Rmc 7152, Pc 5172 – Acnodes PC 5172 User Manual
Page 39
661 Brea Canyon Rd., Suite 3
Walnut, CA 91789
tel: 909.598.7388, fax: 909.598.0218, www.acnodes.com
© Copyright 2009 Acnodes, Inc.
All rights reserved. Product description and product specifications
are subject to change without notice. For latest product information,
please visit Acnodes’ web site at
RMC 7152
14” short depth server
RMC 7152
14” short depth server
39
PC 5172
17-inch sunlight readable touch panel PC
4.6.3 CD Drive Installation
To install a CD drive, please follow the steps below.
Step 1: Remove the back cover (Section 4.4).
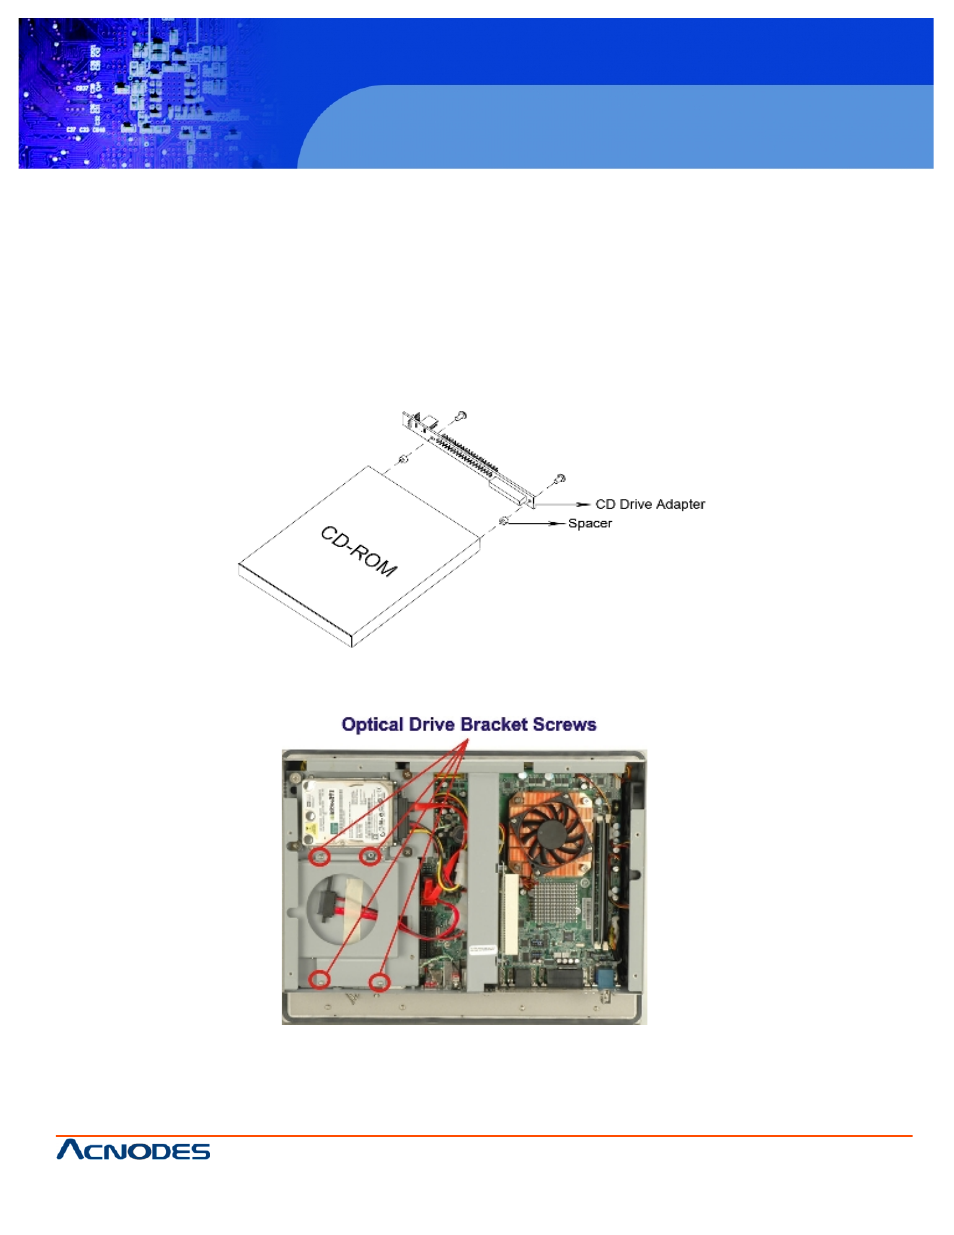
Step 2: Attach the CD drive adapter to the CD-ROM if it is an IDE drive (if it is a SATA drive, proceed to Step 5:). Attach a CD
drive adapter to a CD drive by aligning the two retention screw holes in the CD drive adapter with the retention screw holes on
the rear side of the CD drive.
Step 3: Place two spacers between the CD drive and CD drive adapter.
Step 4: Insert two retention screws and secure the adapter to the CD drive (Figure 4-9).
Figure 4-9: CD Drive Adapter Installation
Step 5: Undo the optical drive bracket screws and remove the optical drive bracket.
Figure 4-10: CD Drive Retention Screws
Step 6: Remove the four screws from the optical drive bracket assembly. Remove the blank drive plate.