Pc 5150, Pc 5172 – Acnodes PC 5172 User Manual
Page 36
© Copyright 2009 Acnodes, Inc.
All rights reserved. Product description and product specifications
are subject to change without notice. For latest product information,
please visit Acnodes’ web site at
PC 5150
15-inch touch panel PC
36
PC 5172
17-inch sunlight readable touch panel PC
661 Brea Canyon Rd., Suite 3
Walnut, CA 91789
tel: 909.598.7388, fax: 909.598.0218,
4.5.8 Touch Screen Selection (JP7)
The touch screen selection jumper selects the type of touch screen panel connected to the system.
Table 4-17: Touch Screen Selection
4.6 Drive Installation
The drive installation process is shown in the sections below. The installation process of the following drives are shown.
4.6.1 Hard Drive Installation................................................................... 47
4.6.2 CompactFlash® Installation ........................................................... 50
4.6.3 CD Drive Installation ..................................................................... 51
4.6.1 Hard Drive Installation
To install a HDD, please follow the steps below:
Step 1: Remove the back cover (Section 4.4).
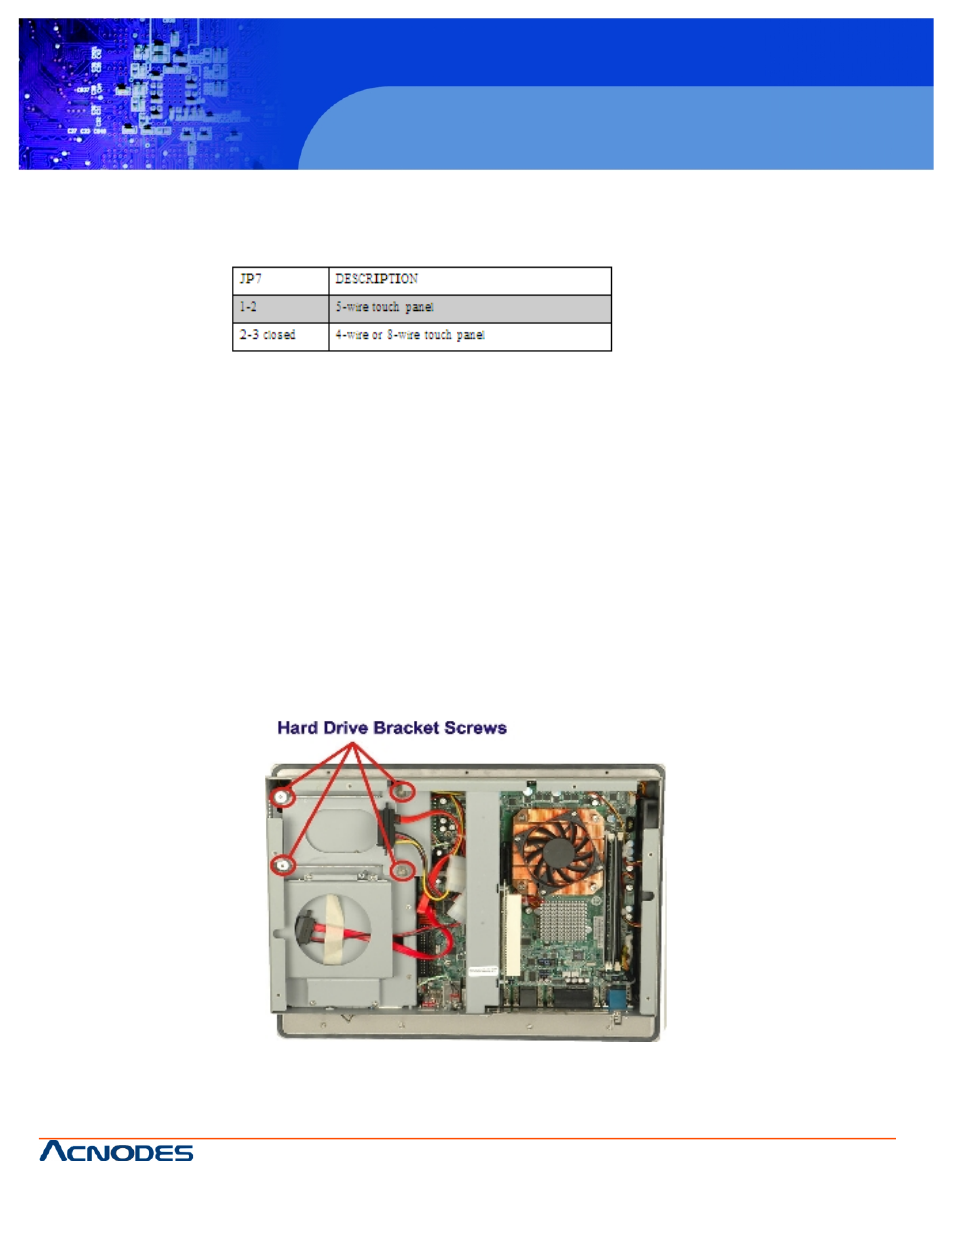
Step 2: The HDD bracket is attached to the elevated platform by four retention screws. Remove the four retention screws
from the elevated platform (Figure 4-2).
Figure 4-2: HDD Retention Screws
Step 3: Attach the SATA connector cable to the bracket.