Pc 5150, Pc 5192, Inch touch panel pc – Acnodes PC 5192 User Manual
Page 100: Inch sunlight readable touch panel pc
© Copyright 2009 Acnodes, Inc.
All rights reserved. Product description and product specifications
are subject to change without notice. For latest product information,
please visit Acnodes’ web site at
PC 5150
15-inch touch panel PC
100
PC 5192
19-inch sunlight readable touch panel PC
661 Brea Canyon Rd., Suite 3
Walnut, CA 91789
tel: 909.598.7388, fax: 909.598.0218,
Figure 7-1: DIMM Socket Clip Locations
Step 3: Push the new DIMM module until it engages and the white plastic end clips click into place. Make sure the end clips
are fully secured after installation.
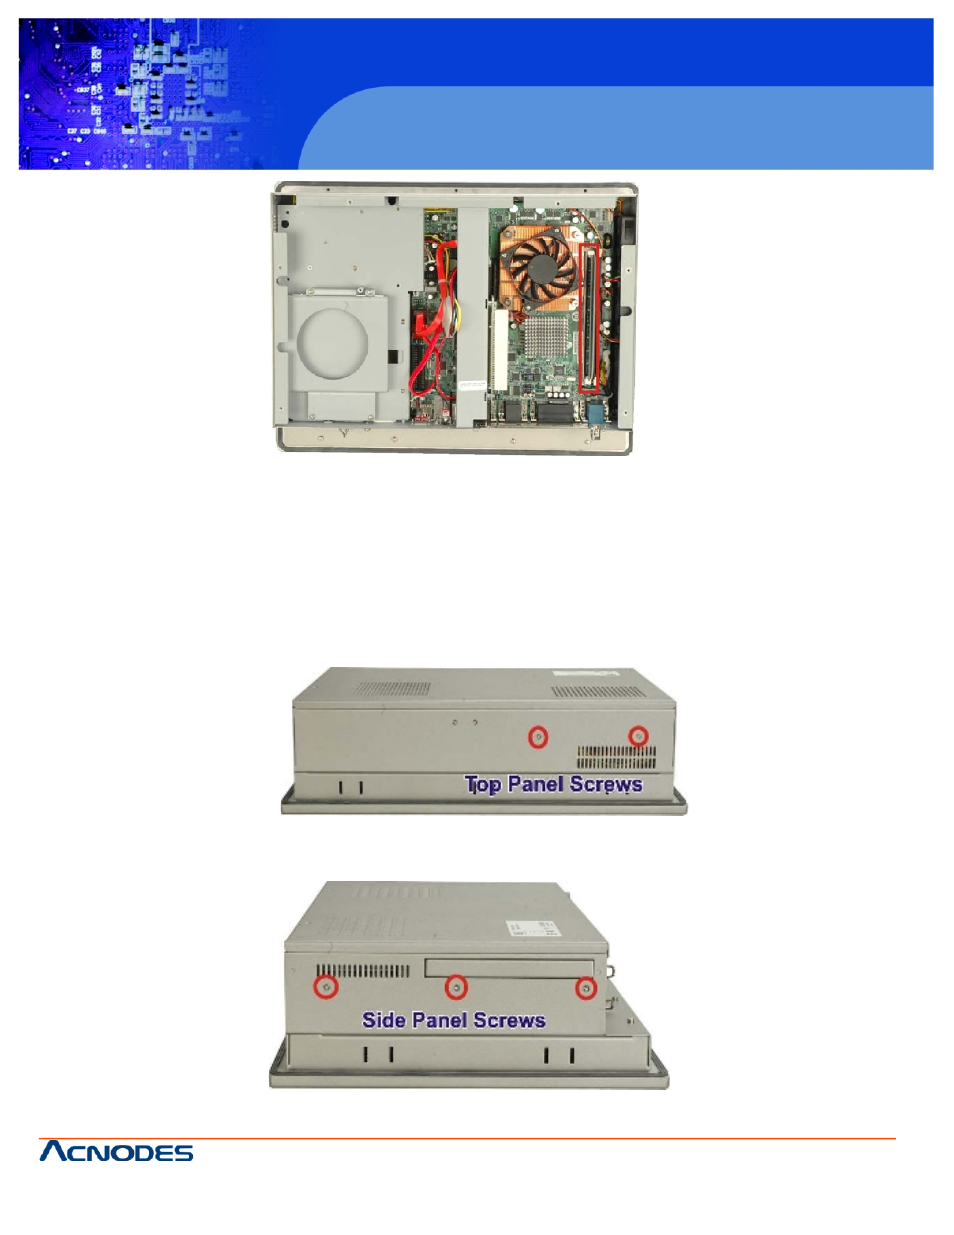
7.5 Elevated Platform Removal
The elevated platform supports the optical drive and the hard drive. It is not necessary to remove the optical drive bracket or
hard drive bracket to remove the elevated platform.
Step 1: Unfasten the elevated platform screws on the top panel (Figure 7-2).
Figure 7-2: Top Panel Elevated Platform Screws
Step 2: Unfasten the elevated platform screws on the side panel (Figure 7-3).
Figure 7-3: Side Panel Elevated Platform Screws