Installing the v7111 in a 19-inch rack, Cabling the v7111, 111 (see – 3Com V7111 User Manual
Page 16: Installing the, V7111 in a 19-inch rack
Installing the V7111 in a 19-inch Rack
The V7111 is installed in a standard 19-inch rack by placing it on a shelf preinstalled in the
rack. The 19-inch rack shelf is not supplied in the standard package kit, but can be ordered
separately. For ordering and pricing, please contact your network distributor.
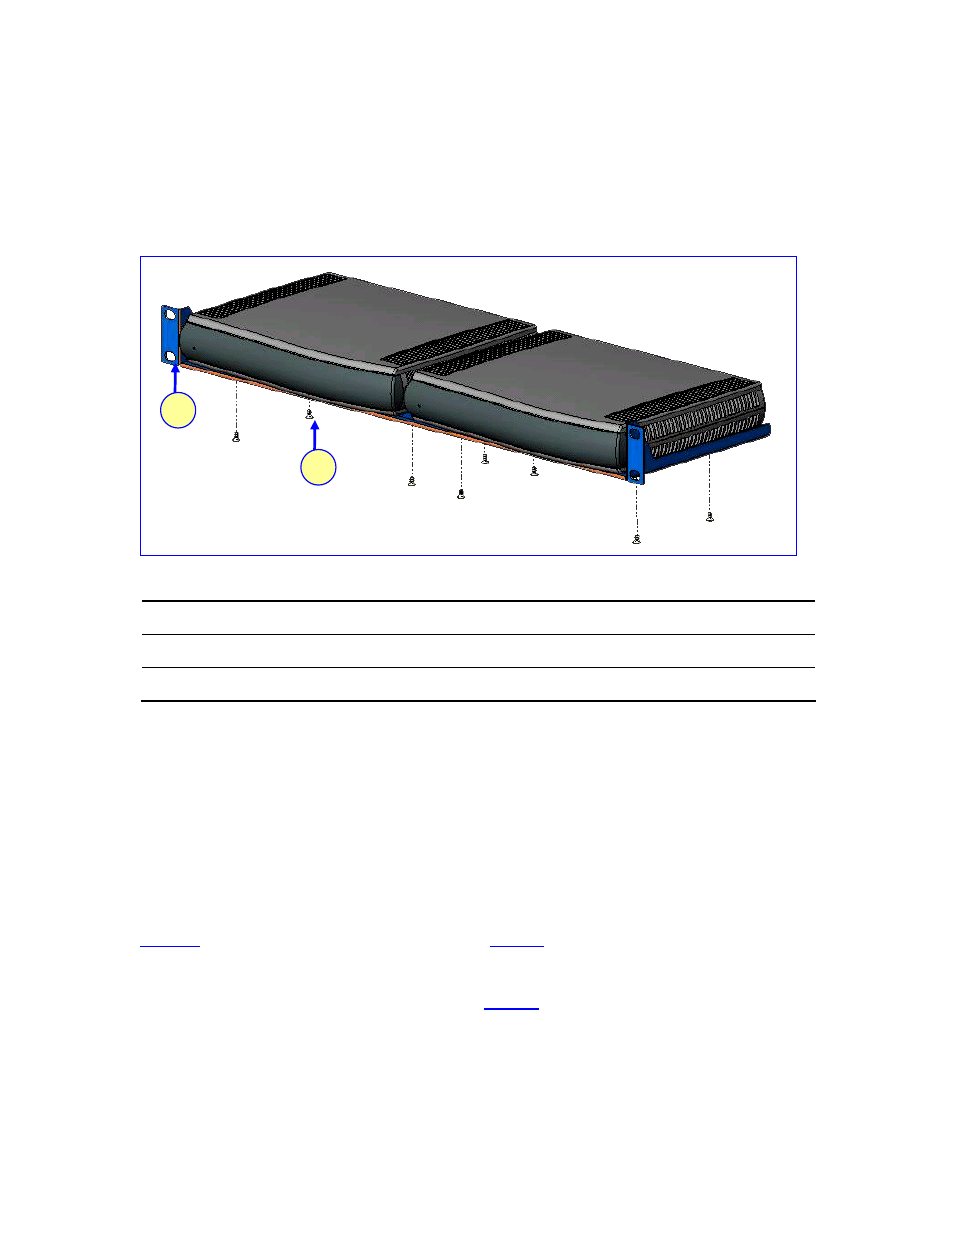
Figure 4
V7111 Rack Mount
1
2
Table 3
V7111 Rack Mount
Item #
Functionality
1
Standard rack holes used to attach the shelf to the rack
2
Eight shelf-to-device screws
To install the V7111 in a 19-inch rack, follow these 3 steps:
1
Use the shelf-to-device screws found in the package to attach one or two V7111 devices
to the shelf.
2
Position the shelf in the rack and line up its side holes with the rack frame holes.
3
Use four standard rack screws (not supplied) to attach the shelf to the rack.
Cabling the V7111
illustrates the rear layout of the V7111.
lists and describes the rear panel
connectors and button on the V7111.
Cable your V7111 according to each section of
16
3Com VCX V7111 Analog Gateway Installation Guide