Mounting the v7111 on a desktop, Mounting the v7111 on a wall, Ed on a desktop (see – 3Com V7111 User Manual
Page 15: On a wall, Figure 3
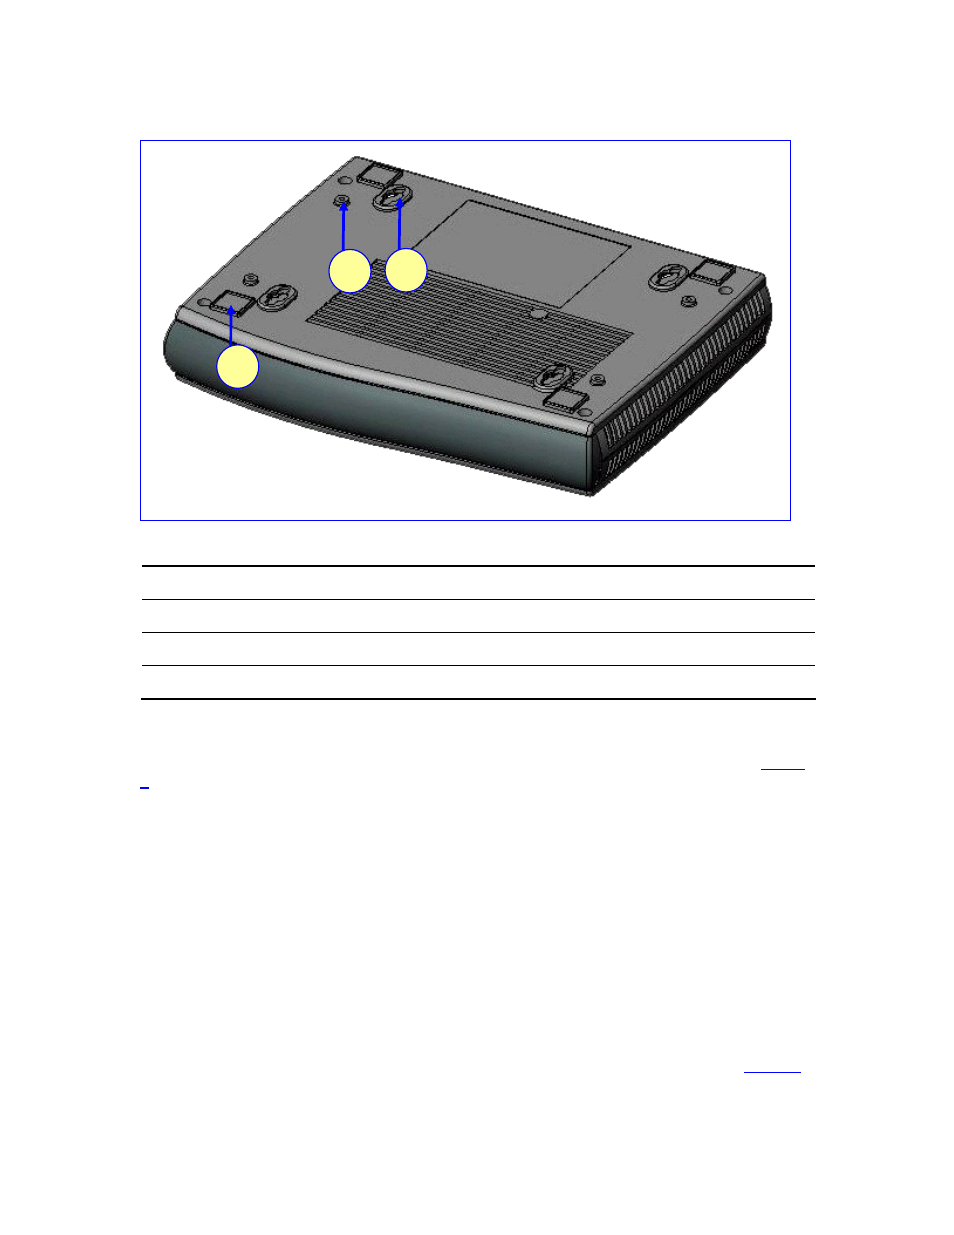
Figure 3
View of the V7111 Base
2
3
1
Table 2
View of the V7111 Base
Item #
Functionality
1
Square slot used to attach anti-slide bumpers (for desktop mounting)
2
Oval notch used to attach the V7111 to a wall
3
Screw opening used to attach the V7111 to a 19-inch shelf rack
Mounting the V7111 on a Desktop
Attach the four (supplied) anti-slide bumpers to the base of the V7111 (see item #1 in
) and place it on the desktop in the position you require.
Mounting the V7111 on a Wall
To mount the V7111 on a wall, follow these 4 steps:
1
Drill four holes according to the following dimensions:
Side-to-side distance 140 mm.
Front-to-back distance 101.4 mm.
2
Insert a wall anchor of the appropriate size into each hole.
3
Fasten a DIN 96 3.5X20 wood screw (not supplied) into each of the wall anchors.
4
Position the four oval notches located on the base of the V7111 (see item #2 in
)
over the four screws and hang the V7111 on them.
3Com VCX V7111 Analog Gateway Installation Guide
15