Zebra Technologies PrintServer User Manual
Page 50
Getting Started
Assigning an IP Address
PrintServer II User and Reference Guide
39
1. From the task bar select
Start>Programs>ZebraNet Utilities>ZebraNet View
.
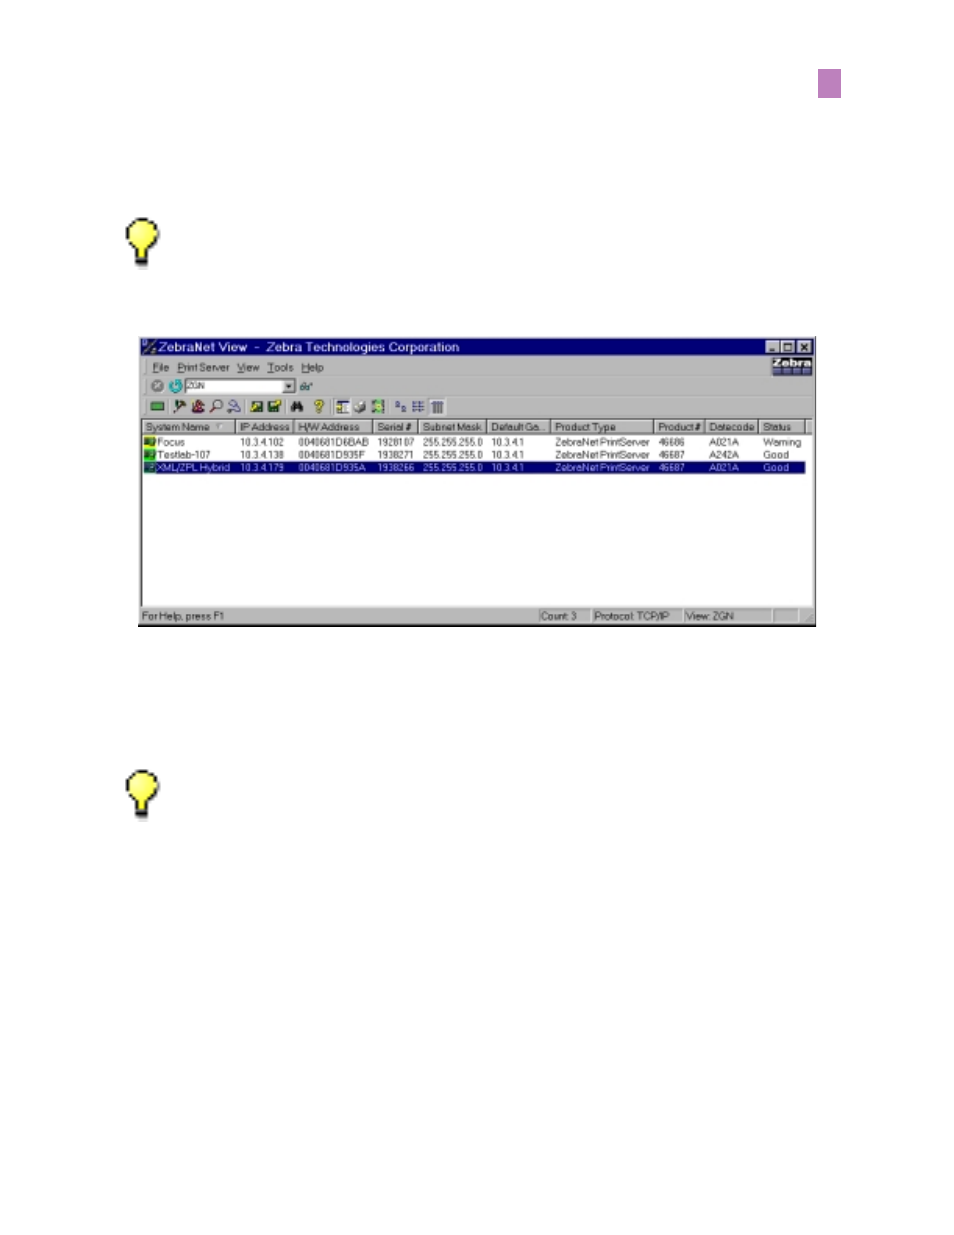
The ZebraNet View dialog appears:
2. Compare the H/W Address on the
PSII
configuration label to the H/W Address
column on the screen to find the
PSII
you are working with.
3. When you located your
PSII
, select it.
4. From the menu bar, select
PrintServer>Configuration
.
5. IF your
PSII
does not have an IP address, complete these steps:
• Find your
PSII
and right-click it.
• In the small dialog that opens, enter an IP Address, click OK.
• The Print Server Configuration dialog opens.
• Set the Subnet Mask (required). Set the Default Gateway (optional).
• Click OK.
Important • On the illustration that follows, take note of the H/W address column
and Serial # column. Compare what you see in ZebraNet View with the
configuration label you printed out.
Important • If the
PSII
does not have an IP address, it shows in the main screen
with an IP of 0.0.0.0. If, after 2 minutes, you do not assign an IP Address, the
PSII
defaults to IP Address 192.168.254.254 or 198.102.102.254 (this depends on your
firmware version).