Rear view rack mounting – Tripp Lite B051-000 User Manual
Page 3
1
3
4
5
2
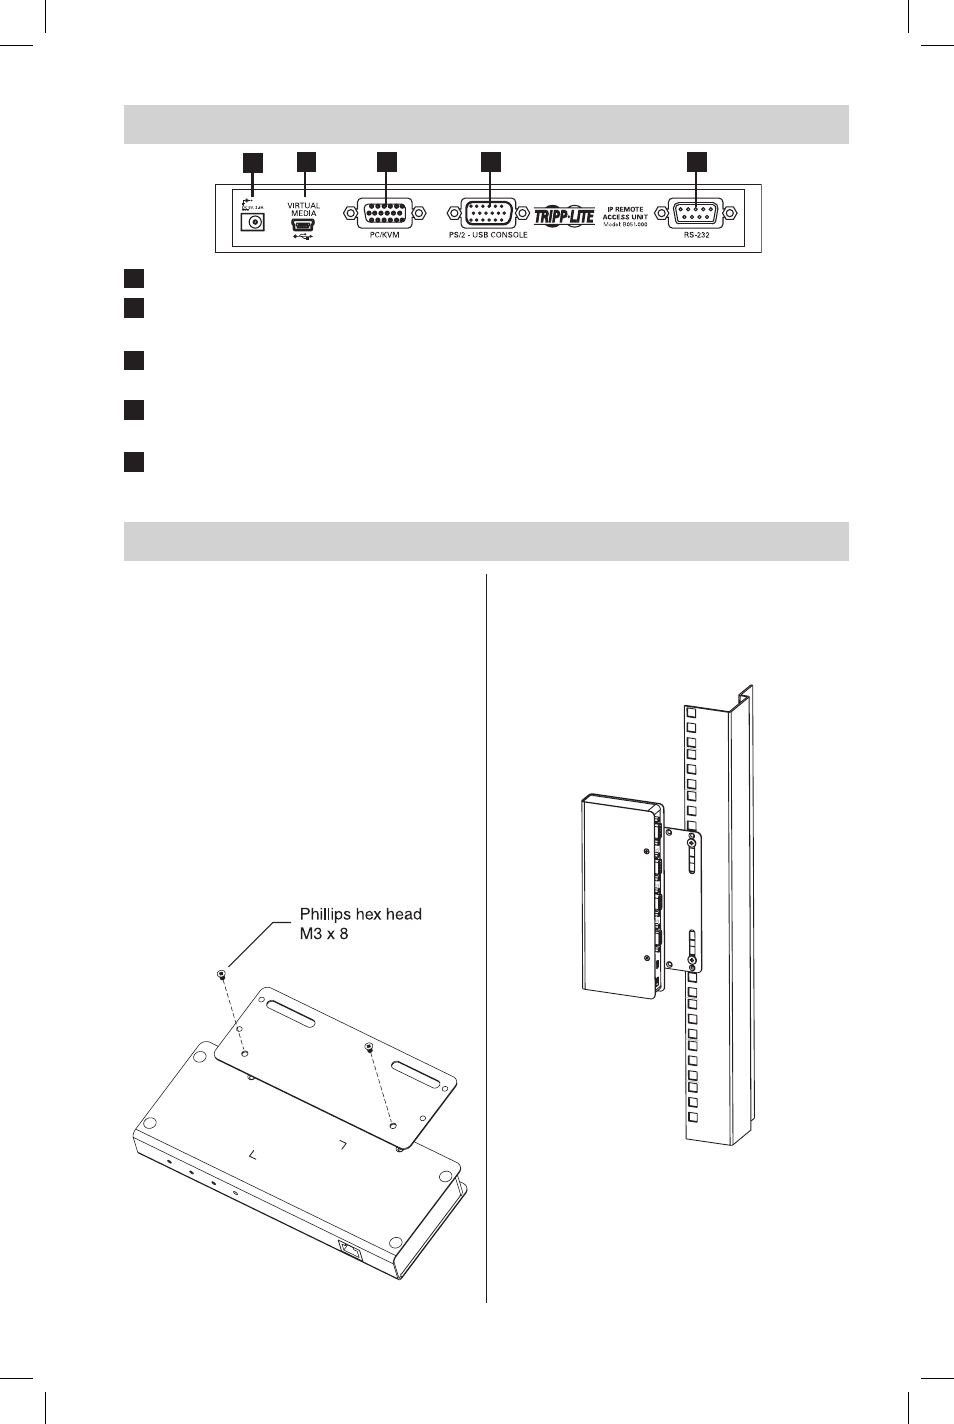
Rear View
Rack Mounting
1
Power Jack
The included power adapter connects to the unit here.
2
Virtual Media Port
The included USB 2.0 device cable connects here when using the
Virtual Media feature.
3
PC/KVM Port
The KVM cable kit that connects the B051-000 to a KVM switch
or server connects to the unit here.
4
Console port
The console connector kit that connects a Local Console to the
B051-000 connects to the unit here.
5
RS-232 port
A RS-232 serial port is provided for out-of-band and low
bandwidth modem and serial terminal connections.
For convenience and flexibility, the B051-
000 comes with a 0U rackmount kit so
the unit can be conveniently mounted on a
system rack.
To rack mount the unit do the following:
1. Remove the two original screws from the
bottom of the unit (near the rear of the
unit).
2. Using the screws and bracket provided
with the rack mount kit, screw the
mounting bracket into the B051-000 – as
shown in the diagram below.
Screw the bracket into any convenient
location on the rack.
Note: Rack screws are not provided. Use screws that
are appropriate for your rack.
200909082 93-2851.indd 3
10/27/2009 3:41:20 PM