Figure 2-2 – Tandberg Data VXA-320 (VXA-3) User Manual
Page 24
10
P
RODUCT
M
ANUAL
433689-01
C
HAPTER
2 I
NSTALLATION
2.
Prepare the drive bay.
Remove the drive bay’s cover plate according to the system manufacturer’s
instructions.
3.
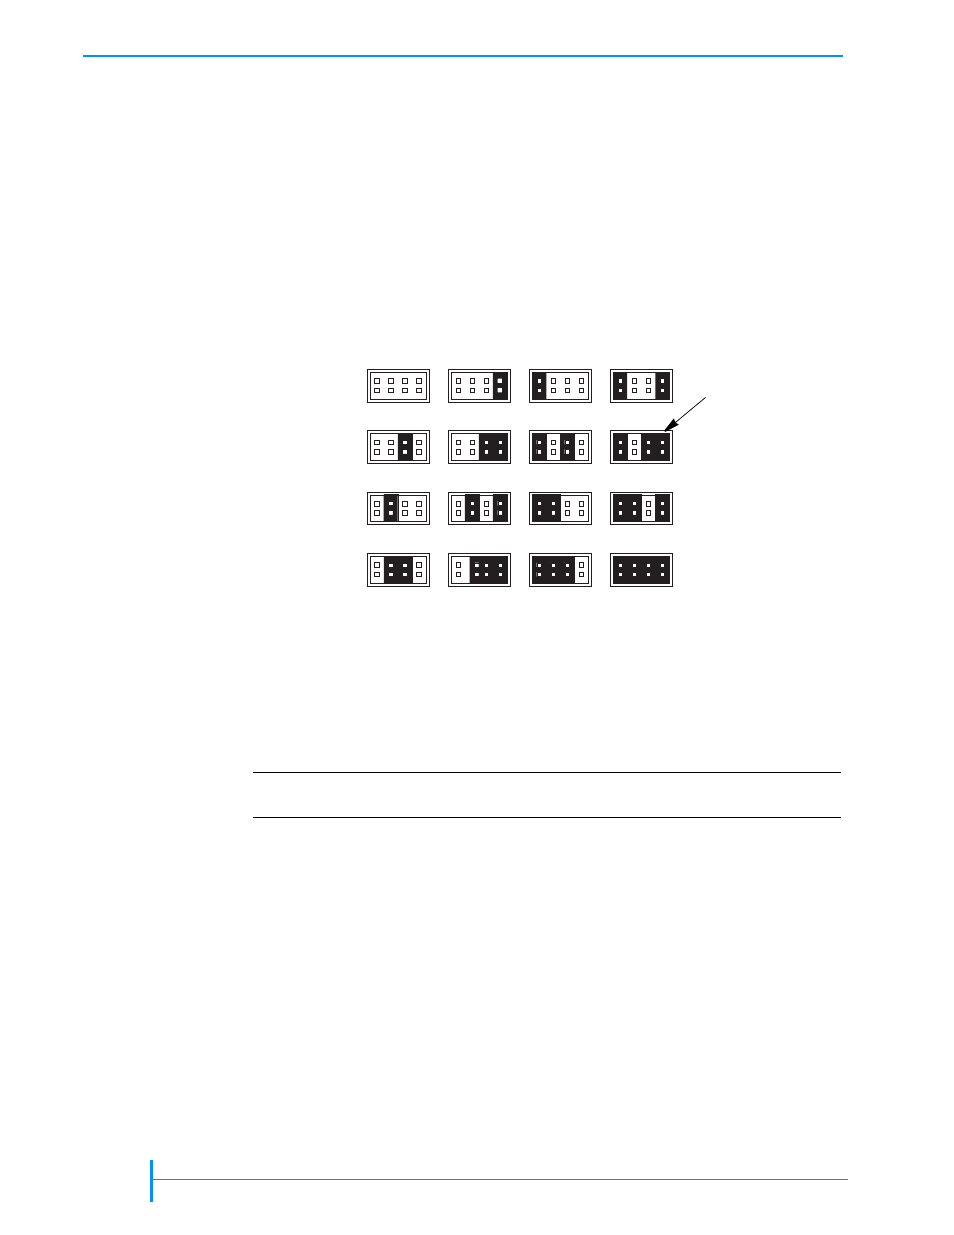
Set the SCSI ID jumpers, if necessary.
a.
The tape drive is shipped with a SCSI ID of 11. If another device on the
SCSI bus is already configured with this SCSI ID, you will need to change
the tape drive’s SCSI ID. Reposition the jumpers on the jumper block, as
shown in
, to select the desired ID. (If necessary, use flat-nose
pliers to remove the jumpers.) If you need an additional jumper, use a
2 mm jumper.
Alternatively, you can remove the jumpers and connect a cable (not
included) from a remote switch to the jumper block, then use the remote
switch to set the SCSI ID. The cable should use a connector equivalent to
Hirose Housing part number DF11-8DS-2C, 2.0MM 8CKT to connect to the
jumper block.
b.
Provide additional grounding, if desired.
Attaching the tape drive to the enclosure protects the tape drive from ESD.
However, if you want additional chassis grounding for the tape drive, use
the grounding hole or grounding tab on the back panel (see
):
Figure 2-2 SCSI ID settings
Address 0
Address 15
Address 1
Address 8
Address 9
Address 2
Address 3
Address 10
Address 11
Address 4
Address 5
Address 12
Address 13
Address 6
Address 7
Address 14
Factory
setting
!
Important
Each device on the SCSI bus must have a unique SCSI ID.