TurboChef Technologies Tornado User Manual
Page 15
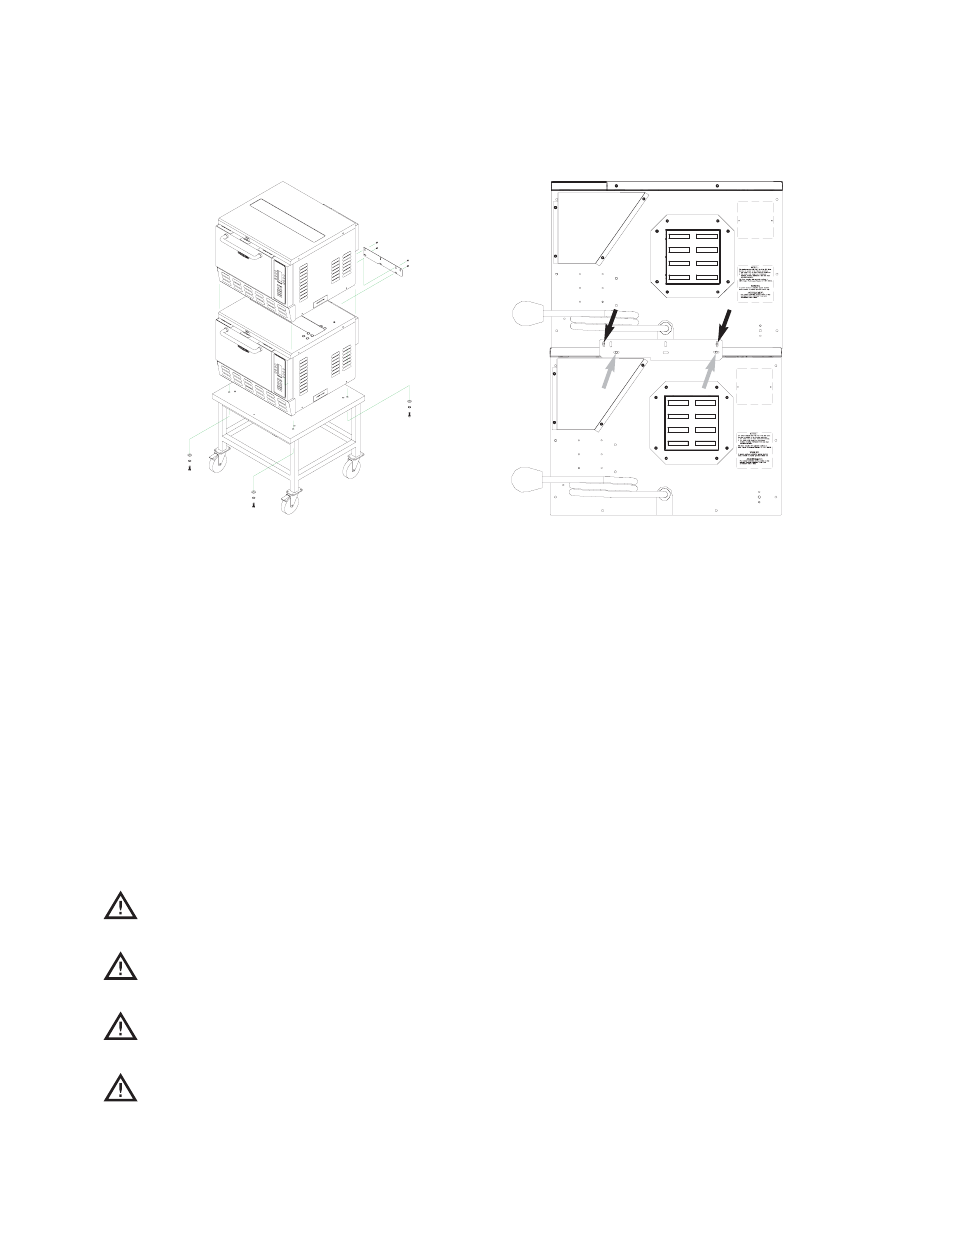
F I G U R E
3: Oven Secured to Cart
F I G U R E
4: Double Stacking Ovens
There must be at least 6” (150 mm) between the
top of the unit and any shelf or surface.
The oven must be installed level front to back and
side to side. For additional stability, the oven legs
may be bolted to the countertop if desired. An
optional Oven Restraint Kit (
P/N TC3-0242
) is also
available and can provide additional stability for
the oven. See page 7 for further information.
Securing Oven to Cart (Figure 3)
1. Lock the wheels of the oven cart.
2. Place the oven on the oven cart.
WARNING: Do not attempt to lift the oven
with fewer than 2 people.
WARNING: When lifting the oven, position
at least one person on each side.
WARNING: Do not lift the oven from the
front and back.
WARNING: Do not transport ovens on cart
when stacked.
4. Remove the oven legs. There will be holes in the
oven where the legs used to be.
5. Align holes in oven with holes on oven cart.
(Different sets of holes are provided on cart to
accommodate either the Tornado or C3.)
6. Install bolts with washers by running them up
through the cart surface and into the holes in
the oven (where the legs were). See Figure 3.
Double Stacking Ovens (Figure 4)
1. Ensure the surface that will hold the stacked
ovens can support the weight (500 lbs/227 kg).
2. Allow each oven time to cool and then unplug.
3. If you are stacking the ovens on a TurboChef
oven cart, make sure that the bottom oven is
bolted to the cart and wheels are locked (see
previous section).
4. Attach the Stacking Bracket (P/N TC3-0323) to
the back of the bottom oven:
a. Remove the screws marked with gray arrows
in Figure 4.
b. Align the holes on the Stacking Bracket with
the holes on the oven and reinstall the screws.
NOTE: Orient the bracket as shown in Figure 4.
5
ASSEMBLY AND INSTALLATION