4 • recording—advanced recording – Tascam CD-RW700 User Manual
Page 20
4 • Recording—Advanced recording
20
TASCAM CD-RW700
1
With a recordable disc loaded, press the
MENU
key (
9
or
7
) until the display shows:
S_LVL>> xxdB
, where
xx
is the cur-
rent value.
2
Turn the
MULTI JOG
control
B
or use the
SKIP
keys
I
to change the value between
-
24
,
-30
,
-36
,
-42
,
-48
,
-54
,
-60
,
-66
, and
-72
dB.
Low numerical values of this setting (towards –24)
mean that it takes a louder signal to trigger the start
of the synchronized recording. A high numerical
value (towards –72) means that a relatively quiet sig-
nal will trigger the start of recording.
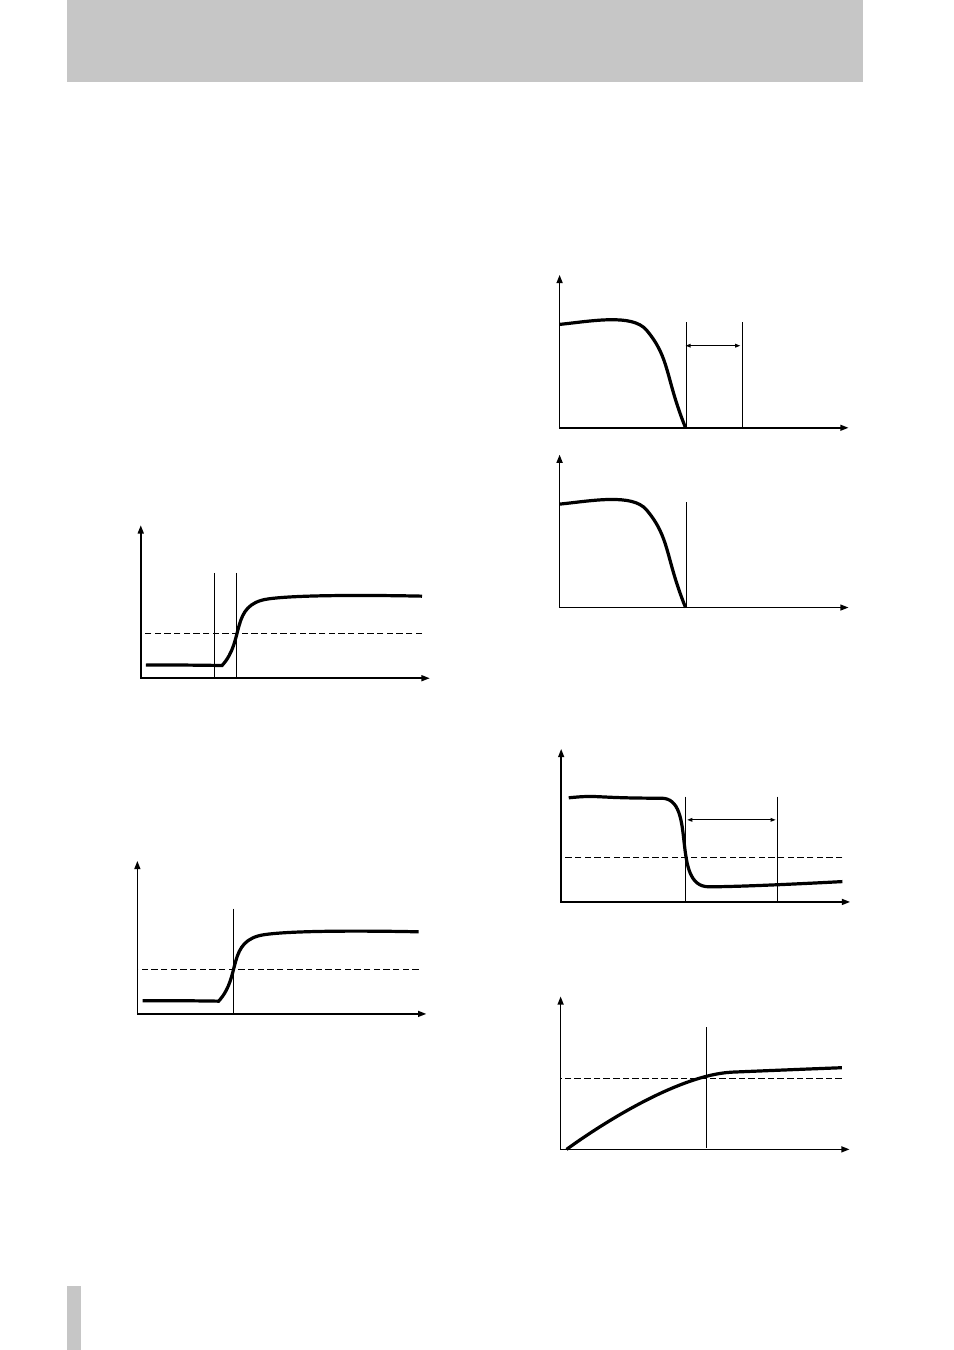
The conditions under which an input signal is used as
the trigger to start recording are:
• when recording digitally, a digital start signal is
detected, and audio is subsequently detected
or
• the sound level rises above the threshold (see
below) after having been below the threshold for
one second or more. Note that the diagram below
represents a special case (the source is stopped or
paused) of the more general condition, as
explained later:
To start synchronized recording when the source is
stopped or in pause mode:
1
The unit must be in record ready mode, and
the
SYNC
indicator in the display must be lit, as
explained above.
2
Start playing the source. The pause indicator
disappears from the display, and the unit starts
recording.
The conditions under which synchronized recording
stops are:
• when recording digitally, an appropriate digital sig-
nal is detected. If the signal is detected from a CD,
the unit enters record ready mode after 2 seconds.
If the signal is detected from an MD, the unit enters
record ready mode immediately:
Note that the trigger level is not used here.
or
• the sound level drops below the threshold level for
five seconds
If you set the threshold value so that only high-level
signals trigger recording, remember that this will not
record the start of a piece with a slow fade-in:
Also remember that when recording from an analog
source, the threshold should be set so that it is higher
than the “noise floor” (the base level of hiss, pops
time
level
S_LVL
Start of recording
Track start signal
received
time
level
S_LVL
noise
level
Start of recording
time
level
REC pause
2
seconds
CD stop
time
level
MD stop
REC pause
time
level
S_LVL
REC pause
5 seconds
time
level
S_LVL
This part of the
track is not
recorded
R e c o r d i n g
starts