Tools required, Mounting, Installation – Outback Power Systems GS8048 User Manual
Page 20
Installation
18
900-0021-01-00 Rev A
Tools Required
The following tools may be required for this installation:
Wire cutters/strippers
Assorted torque wrenches, ratchet wrenches, and sockets
(metric and standard)
Mounting
At least two people are needed to install the Radian inverter/charger due to its weight.
Mount and secure each component before attaching any wiring. The bottom of the inverter must be
enclosed to meet NEC requirements. The GSLC was specifically designed for this purpose.
Avoid large air gaps behind the Radian inverter/charger and its mounting plate. These can result in louder
mechanical noise during heavy inverting or charging. Mount the plate on a flat, solid mounting surface.
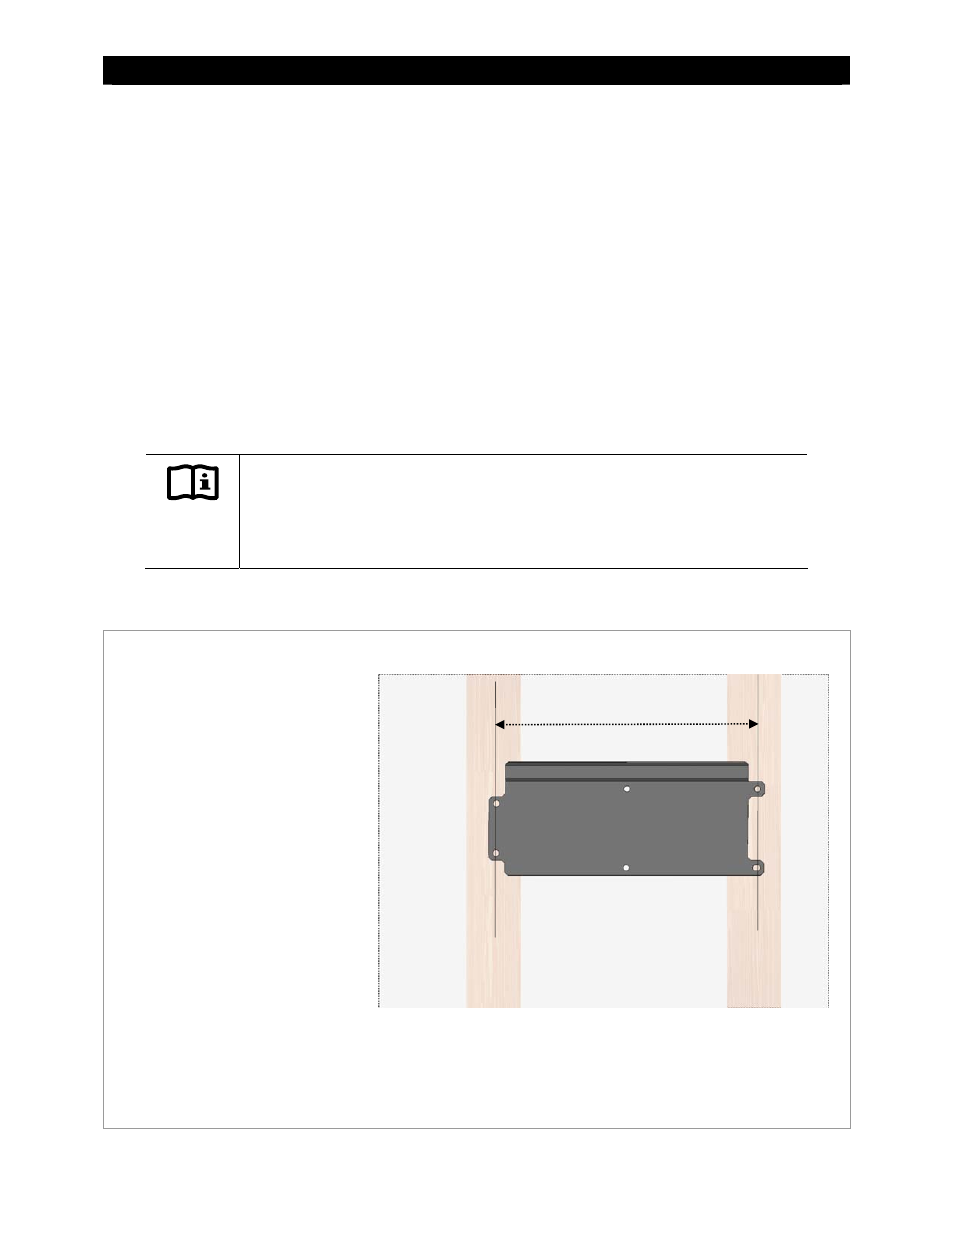
The Radian inverter/charger comes equipped with a mounting plate, as shown in Figure 7.
Figure 7
Mounting the Inverter
IMPORTANT:
Use correct fasteners to secure the mounting plate and the Radian inverter/charger to the
mounting surface. OutBack cannot be responsible for damage to the product if it is attached
with inadequate fasteners.
16” Center Studs
Mounting Plate
The Radian inverter is mounted using
these steps.
1.
The mounting plate is to be screwed
or bolted directly to a solid
mounting surface such as wall studs.
(See Figure 7.) Lag screws are
provided for this purpose.
~
The plate will span wall studs
on 16-inch centers. If the studs
have larger spacing than 16
inches, it is recommended that
plywood or similar material be
installed over the studs. The
mounting plate can be installed
on the plywood surface.
~
If multiple Radian
inverter/chargers are being
installed, all mounting plates
should be installed first. The
inverters can be mounted and
secured one at a time when this
is done.
Continued on the next page…
Assorted insulated screwdrivers
DVM or Voltmeter