Deleting a saved song (delete song), Convenient functions – Roland DIGITAL PIANO HP505 User Manual
Page 43
Convenient Functions
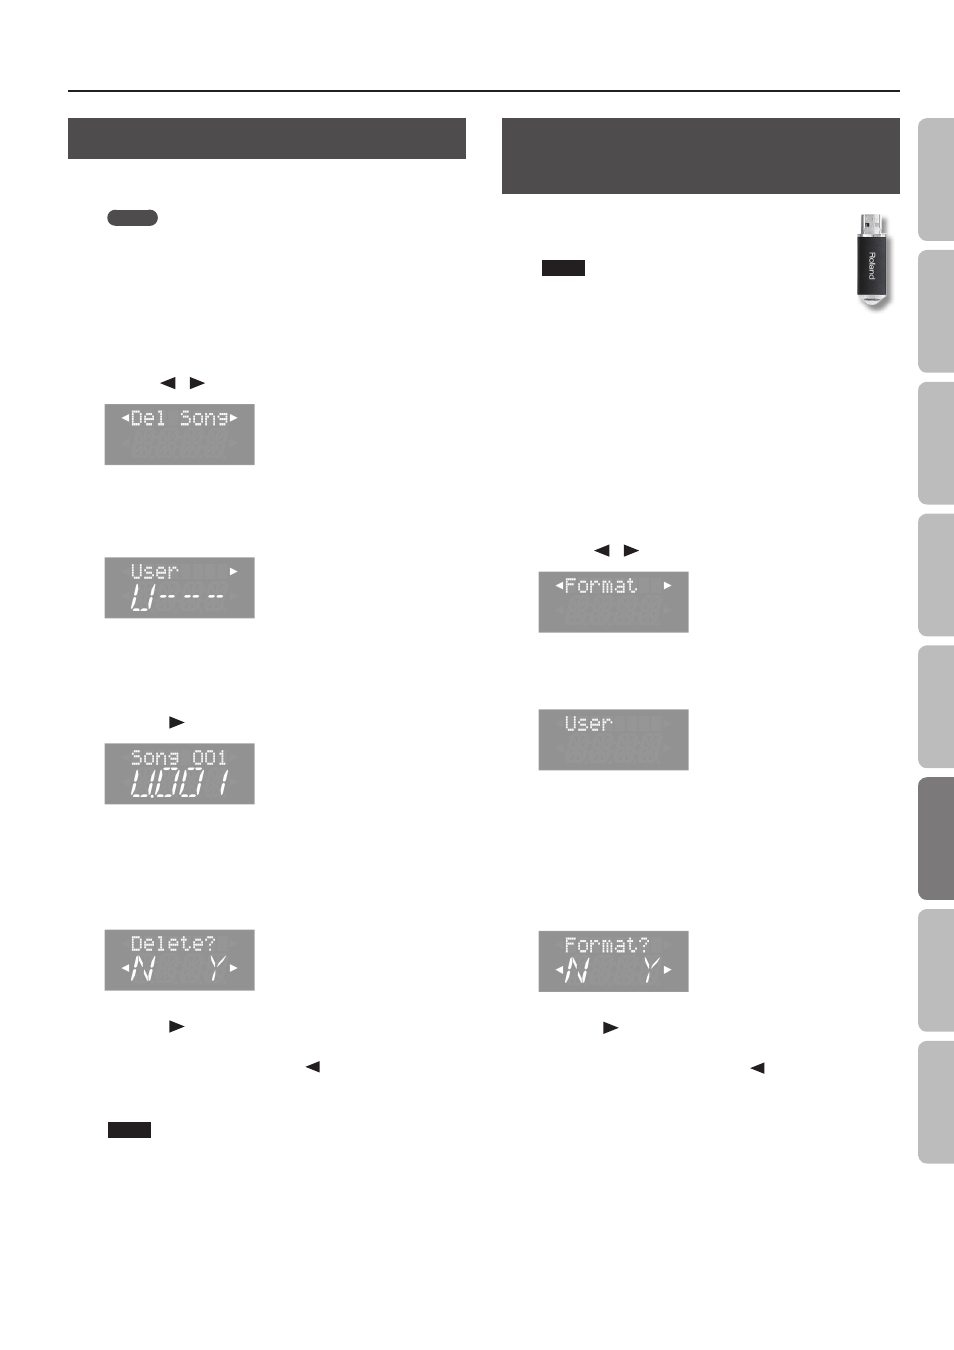
Deleting a Saved Song (Delete Song)
Here’s how to delete a song that you saved on the internal memory
or the USB flash drive (sold separately).
MEMO
If you want to delete all songs that have been saved to the
internal memory, initialize the memory.
* If you want to delete a song on the USB flash drive (sold
separately), connect your USB flash drive to the USB memory
port before you continue.
1.
While holding down the [Key Touch] button, press the
[Transpose] button .
2.
Use the [
] [
] (Slow/Fast) buttons to select “Del Song .”
3.
Press the [Song] button .
A screen will appear, allowing you to select the memory location
that contains the song you want to delete.
If you decide not to delete the song, press the [Metronome] button.
4.
Use the [–] [+] buttons to select the memory location that
contains the song you want to delete .
5.
Press the [
] (Fast) button .
6.
Use the [–] [+] buttons to select the song that you want to
delete .
7.
Press the [Song] button .
A confirmation message will appear.
8.
Press the [
] (Fast) button to select “Y .“
Deletion of the song will begin.
If you decide not to delete, press the [
] (Slow) button.
Once the song is deleted, you’ll be returned to the screen you were
in at step 2.
NOTE
Never turn off the power or disconnect the USB flash drive while
the screen indicates “Working...”
9.
Press the [Key Touch] button or the [Transpose] button to
finish the procedure .
Initializing the Memory
(Format Media)
Here’s how you can completely erase all songs that were
saved in the internal memory or the USB flash drive (sold
separately).
NOTE
• Once an initialization is performed, all songs that
have been saved in the internal memory or the USB
flash drive will be erased. The erased data cannot
be recovered, so we recommend that you check the
contents of memory before you proceed.
• If you’re using new USB flash drive (sold separately) with the unit
for the first time, you’ll need to initialize (format) the USB flash
drive before using it. The unit can’t use USB flash drive that has
not been initialized.
If you want to format USB flash drive, connect the USB flash drive to
the USB memory port (p. 10).
1.
While holding down the [Key Touch] button, press the
[Transpose] button .
2.
Use the [
] [
] (Slow/Fast) buttons to select “Format .”
3.
Press the [Song] button .
A screen will appear, allowing you to proceed with the format.
If you decide not to proceed with the format, press the
[Metronome] button.
4.
Use the [–] [+] buttons to select the memory that you
want to initialize .
5.
Press the [Song] button .
A confirmation message will appear.
6.
Press the [
] (Fast) button to select “Y .“
Formatting of the media will begin.
If you decide not to initialize, press the [
] (Slow) button.
Once the initialization is finished, you’ll be returned to the screen
you were in at step 2.
7.
Press the [Key Touch] button or the [Transpose] button to
finish the procedure .
43
O
per
ation G
uide
Panel Descriptions
Bef
or
e
You P
la
y
Per
forming
Pr
ac
ticing
Con
venien
t F
unc
tions
A
ppendix
Func
tion M
ode