4 connection the m30100t3-rpd-e, Important – Renesas Pod probe for M16C/1N Group M301N2T-PRB User Manual
Page 24
M301N2T-PRB User’s Manual
2. Setup
REJ10J0037-0100 Rev.1.00 Mar.16, 2005
Page 22 of 48
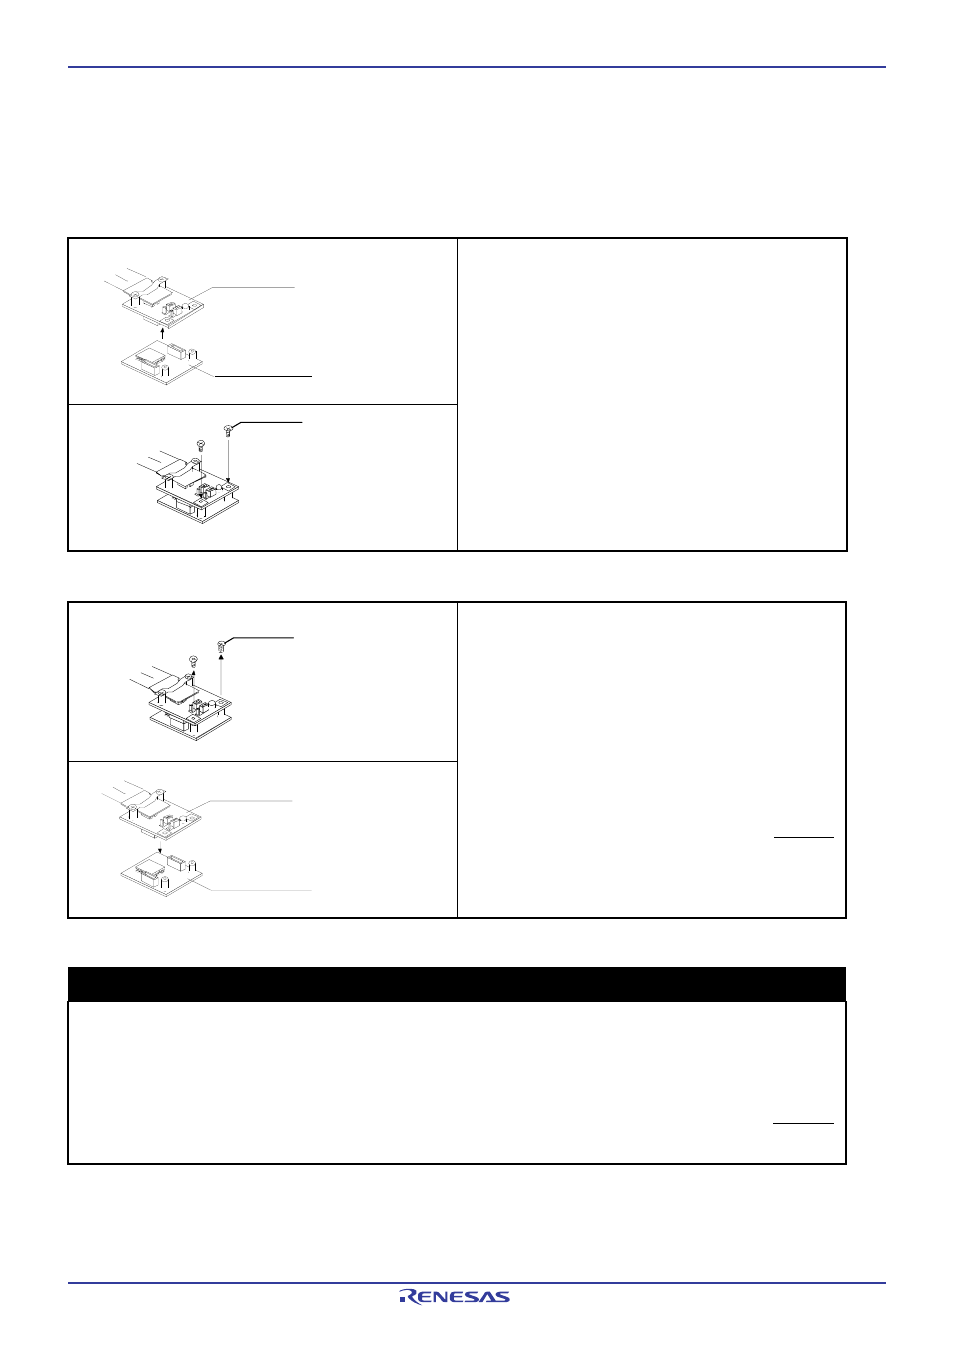
2.4 Connection the M30100T3-RPD-E
The emulation pod for the M16C/1N Group MCUs consists of the two products, the M30100T3-RPD-E emulation pod main
unit and the M301N2T-PRB pod probe. Figures 2.5 and 2.6 show how to connect the M301N2T-PRB and how to remove it,
respectively.
(1) Connect connectors J1 and J2 of the M301N2T-PRB
to connectors J3 and J4 of the FLX64-PRB.
(2) Fix the FLX64-PRB by the two screws.
Figure 2.5 Connection the pod probe M301N2T-PRB
(1) Unscrew the two screws of the M301N2T-PRB.
(2) Remove the M301N2T-PRB from the FLX64-PRB.
In this time, lift off the M301N2T-PRB vertically.
Otherwise, the connector may cause a break.
Figure 2.6 Removing the pod probe M301N2T-PRB
IMPORTANT
Notes on Connecting the Pod Probe:
Be sure to turn off the power before making connections. Otherwise, the internal circuits may be
damaged.
The small connectors of the M301N2T-PRB (J1 to J3) and FLX64-PRB (J3 and J4) are guaranteed for
only 50 insertion/removal iterations
When removing the M301N2T-PRB from the FLX64-PRB, lift off the M301N2T-PRB vertically.
Otherwise, the connector may cause a break.
F LX6 4 - PRB
M301N2T-PRB
F LX6 4 - PRB
M301N2T-PRB
Screw (x2)
Screw (x2)