Selecting a custom size – Ricoh 3260 User Manual
Page 110
Initial Scanner Setup
102
9
❖
❖
❖
❖ Original Orientation Priority
Select the default for original
placement orientation. When orig-
inals are always positioned the
same way, select that orientation
as the default to make operation
easier.
Reference
p.76 “Making the Settings Relat-
ed to the Orientation of the
Original and Scanned Sides”
❖
❖
❖
❖ Change Initial Mode
Select [Standard] to use the stand-
ard settings as the initial mode
which is the mode of the machine
immediately after the operation
switch is turned on or modes are
cleared or reset.
Select [Program No.10] to use the set-
tings stored in Program No.10 as
the initial mode.
❖
❖
❖
❖ Background Density of ADS (Full Color)
With this setting, you can process
scanned images to erase unwanted
paper features (such as lines on
rough paper).
❖
❖
❖
❖ A.C.S. Sensitivity Level
Set the sensitivity level for detect-
ing colors/black and white to scan
the original when [Scan Type] is set
to [Auto Color Select].
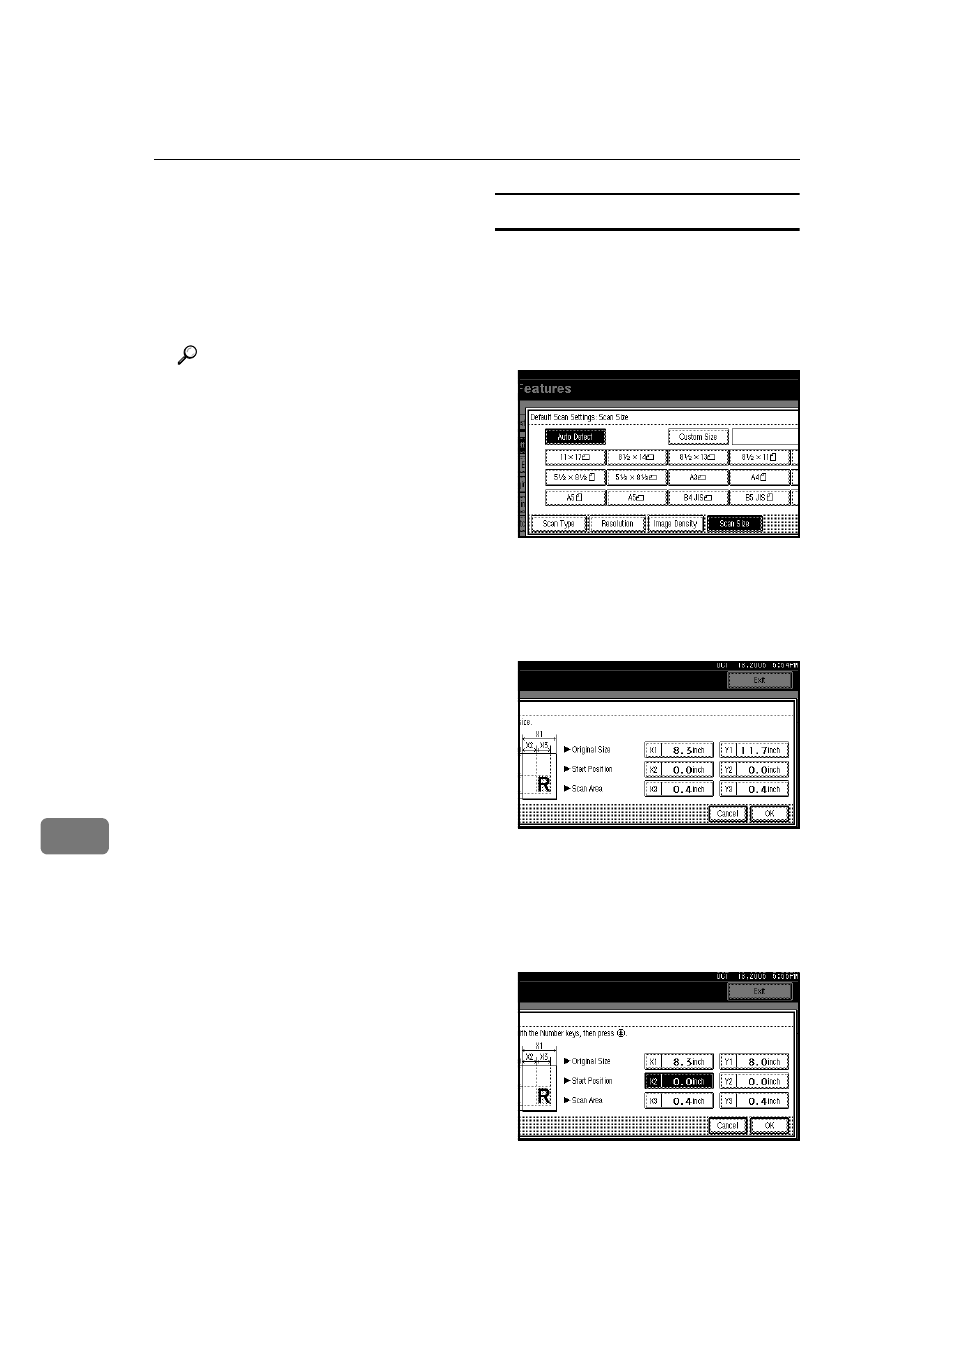
Selecting a custom size
When selecting [Custom Size] as the
scan size, follow the procedure be-
low.
AAAA
Press [Custom Size] on the Scan
Size Setting screen.
BBBB
Enter the original size with the
number keys.
Select and enter values for [X1] and
[Y1]
, and then press the
{{{{#}}}} key.
CCCC
Enter the scan starting point in re-
lation to the standard scan start-
ing point.
Select and enter values for [X2] and
[Y2]
, and then press the
{{{{#}}}} key.