Installation, Finishing trim kit installation – Regency FP90 User Manual
Page 25
FPI FP90 Wood Fireplace
25
INST
ALLA
TION
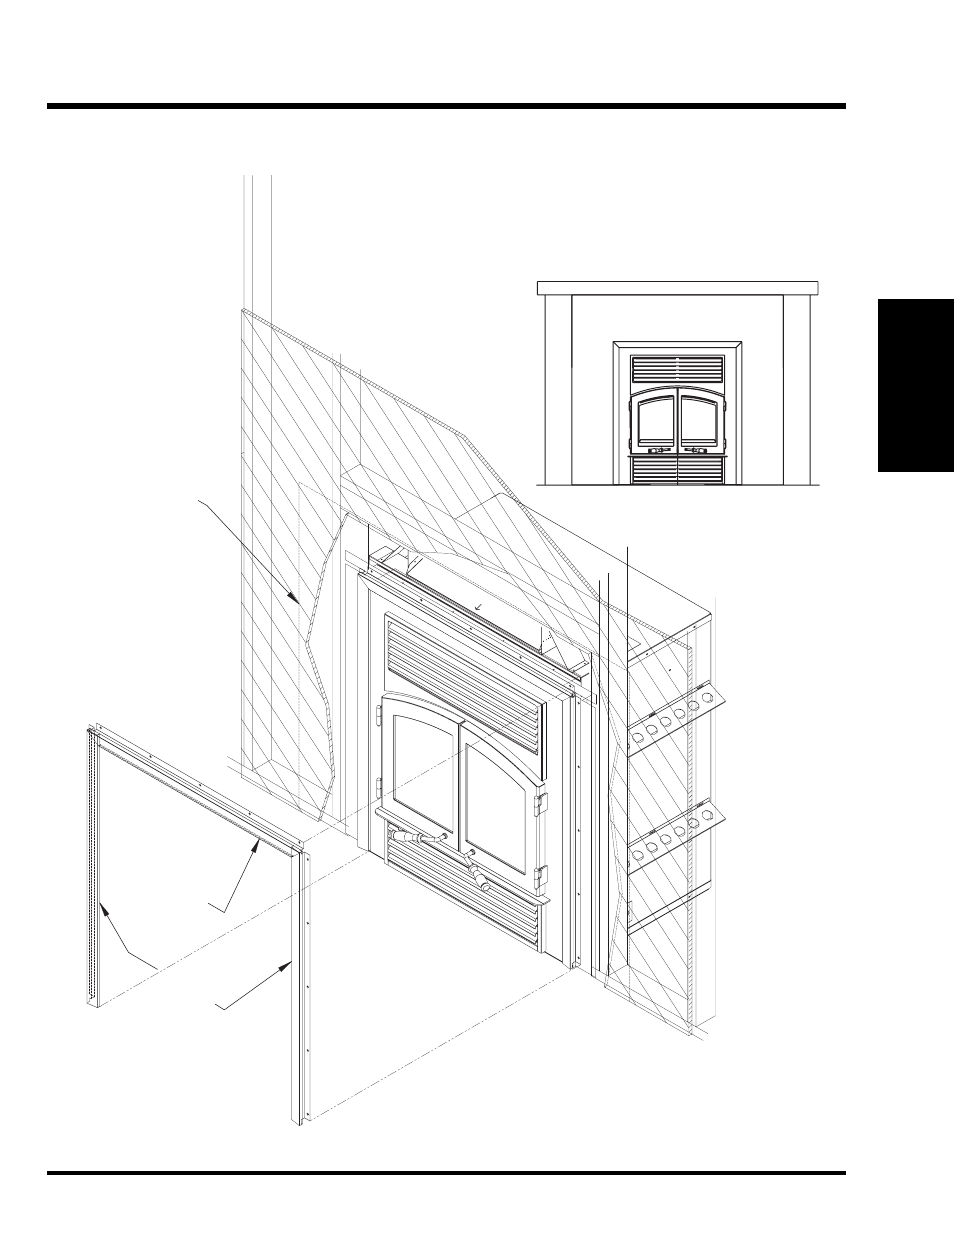
FINISHING TRIM KIT INSTALLATION
2x4 FRAMING
LEFT SIDE TRIM
RIGHT SIDE TRIM
2x4 FRAMING
TOP TRIM
STEP #1
NON-COMBUSTIBLE
AREA
60"W x 51-5/8"H
(1524mm W x
1311mm H)
2x4 HEADER (ON EDGE)
STEP #2
1) Unit must be installed correctly according to the specifi cation in the manual. The nailing
strips must be attached to the top and sides of the unit. They must be positioned so
that they are set-back ½” (13 mm) from the face of the unit. This will allow for the wall
sheathing to be fl ush with the face of the unit and allow the trim to be installed correctly
(refer to Diagram 1).
Diagram
1
Assembly De
tails
Unit With Finished Trim
Side
Trim
Side
Trim
Front Trim
INSTALLATION
See also other documents in the category Regency Kiln:
- HI200 (16 pages)
- 946-523/P (10 pages)
- P48-NG (48 pages)
- Natural Living Gas Fireplaces (9 pages)
- P42-LP4 (48 pages)
- Sunrise Gas Fireplace L676S-NG (3 pages)
- F2400 (24 pages)
- LIBERTY L900-LP (56 pages)
- 944-072 (24 pages)
- P40-LP1 (7 pages)
- Zero Clearance Direct Vent Gas Fireplace P36-NG4 (68 pages)
- P48-NG2 (7 pages)
- P33R-NG2 (40 pages)
- U31-NG2 (2 pages)
- L234-LP (40 pages)
- Panorama P131 (32 pages)
- Liberty L676 (56 pages)
- I1100S (20 pages)
- FREESTANDING WOODSTOVES S3100L (28 pages)
- NATURAL GAS U32-LP4 (40 pages)
- Sunrise U32S-LP5 (36 pages)
- P121RC (48 pages)
- R90 (3 pages)
- Zero Clearance Direct Vent Gas Fireplace P121/P131-NG2 (7 pages)
- Sunrise E33S (2 pages)
- Horizon HZ54 (48 pages)
- Zero Clearance Direct Vent Gas Fireplace P36D-LP1 (8 pages)
- E21-NG1 (32 pages)
- F1100S (28 pages)
- P40-LP (56 pages)
- E21-LP2 (32 pages)
- Panorama P36D (72 pages)
- I2100M (20 pages)
- I1200 (2 pages)
- LIBERTY L676E-LP (48 pages)
- E21-NG2 (32 pages)
- G36D (44 pages)
- U32-NG3 (36 pages)
- U32-NG5 (2 pages)
- E21 (12 pages)
- Bellavista Gas Fireplace B36X (64 pages)
- P131 (44 pages)
- P33-LP3 (48 pages)
- WARMHEARTH Z2510L (24 pages)
- Gas Insert U35-LP1 (2 pages)