Cautions – Rinnai RHFE-431WTA User Manual
Page 61
NOTE: Maintain 1" clearance between exhaust pipe and
combustible materials (0" clearance between exhaust
pipe and non-combustible materials).
– 59 –
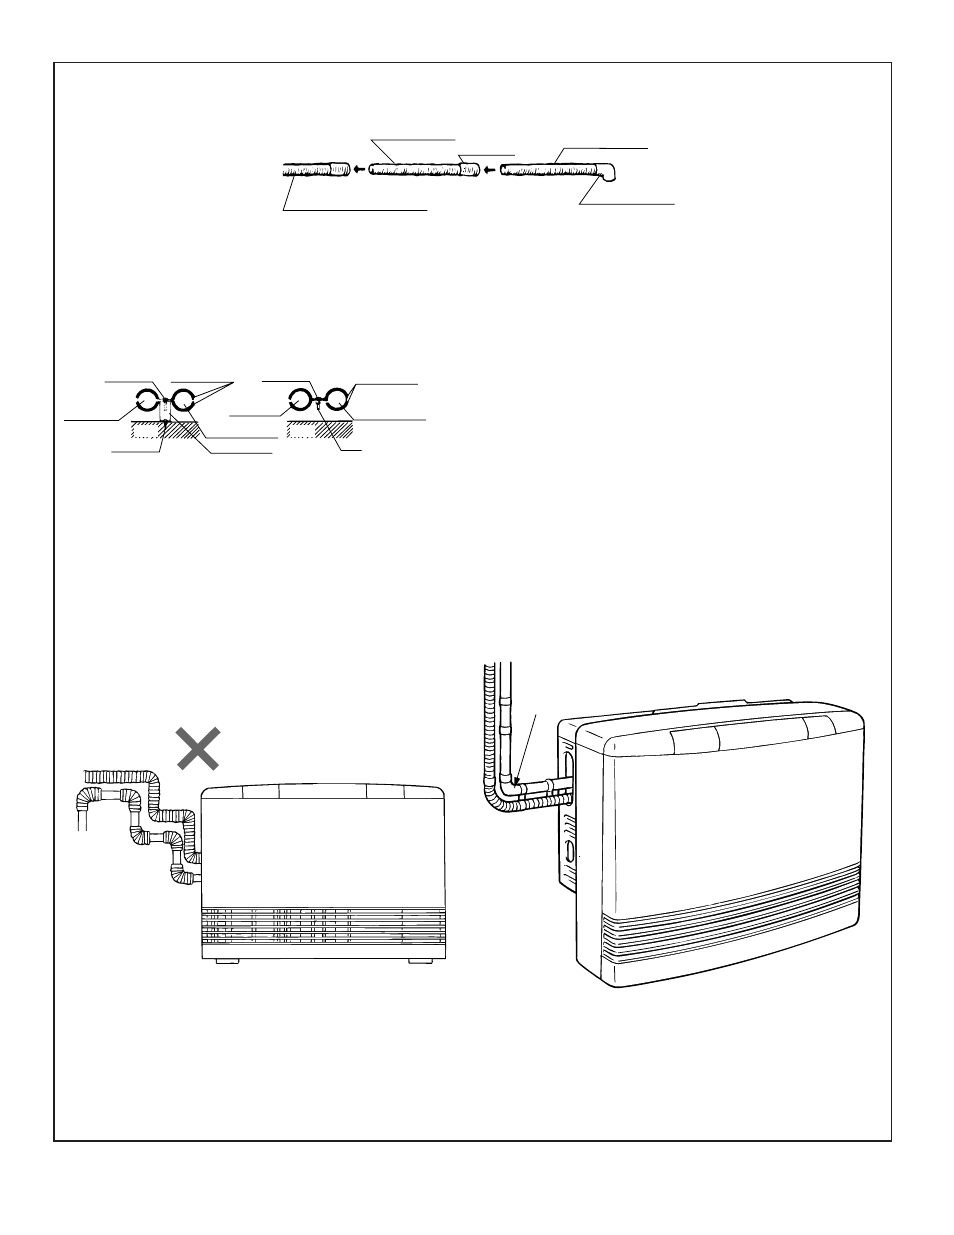
2. How to connect air intake hose
Screw hose joint half of its length onto the air intake hose, then screw another air intake hose into the joint.
The hose can be cut to the required length.
IMPORTANT: The PVC air line is longer than the exhaust line and may need to be cut to size. Be sure,
however, to thoroughly deburr all rough edges.
Set the air intake hose and exhaust pipe into the pipe clamps, screw the clamp onto the wall fixture, and affix to the
wall with screw B.
The air intake hose and exhaust pipe can also be screwed onto the wall using the pipe clamp and
the nut.
3. Affixing the air intake hose and exhaust pipe
Main unit air intake hose
Air intake hose
Hose joint
Screw in counterclockwise
Air intake hose
Air intake elbow
Screw B
Wall
Air intake
hose
Screw A
Pipe clamp
Exhaust pipe
Wall fixture
Wall
Air intake
hose
Screw A
Nut
Pipe clamp
Exhaust pipe
■ CAUTIONS
1. Maximum extendable length
FOR BEST ROOM AIR HUMIDITY, KEEP WATER
IN THE HUMIDIFIER TRAY.
2. To prevent water condensation
Condensed water
may accumulate
here, and cause a blockage
preventing combustion.
13 feet, 2 bends
The bend where the hose and pipes leave the body is
not counted.
The air intake hose should run along the exhaust pipe.
CAUTION
Never allow the exhaust pipe to sag, as condensed
water may accumulate and cause incomplete
combustion.