Basic editing, Assigning a sound to a pad – Roland HandSonic 10 User Manual
Page 11
9
Getting Familiar
In order to understand the possibilities of the various editing functions, there are a few basic points you must
take into consideration. These will help save you time, and avoid frustration whether this is your first
electronic musical instrument or not. Any changes you make are automatically registered as there is no
“write” function. Taking that into consideration, we recommend that you explore the editing process first by
using one of the 5 preset kits shown here. The reason we suggest this is because these kits are pre-set. You
can edit them temporarily, but once you change the kit, they automatically return to their factory settings.
1.
Push the [CONGA] button.
2.
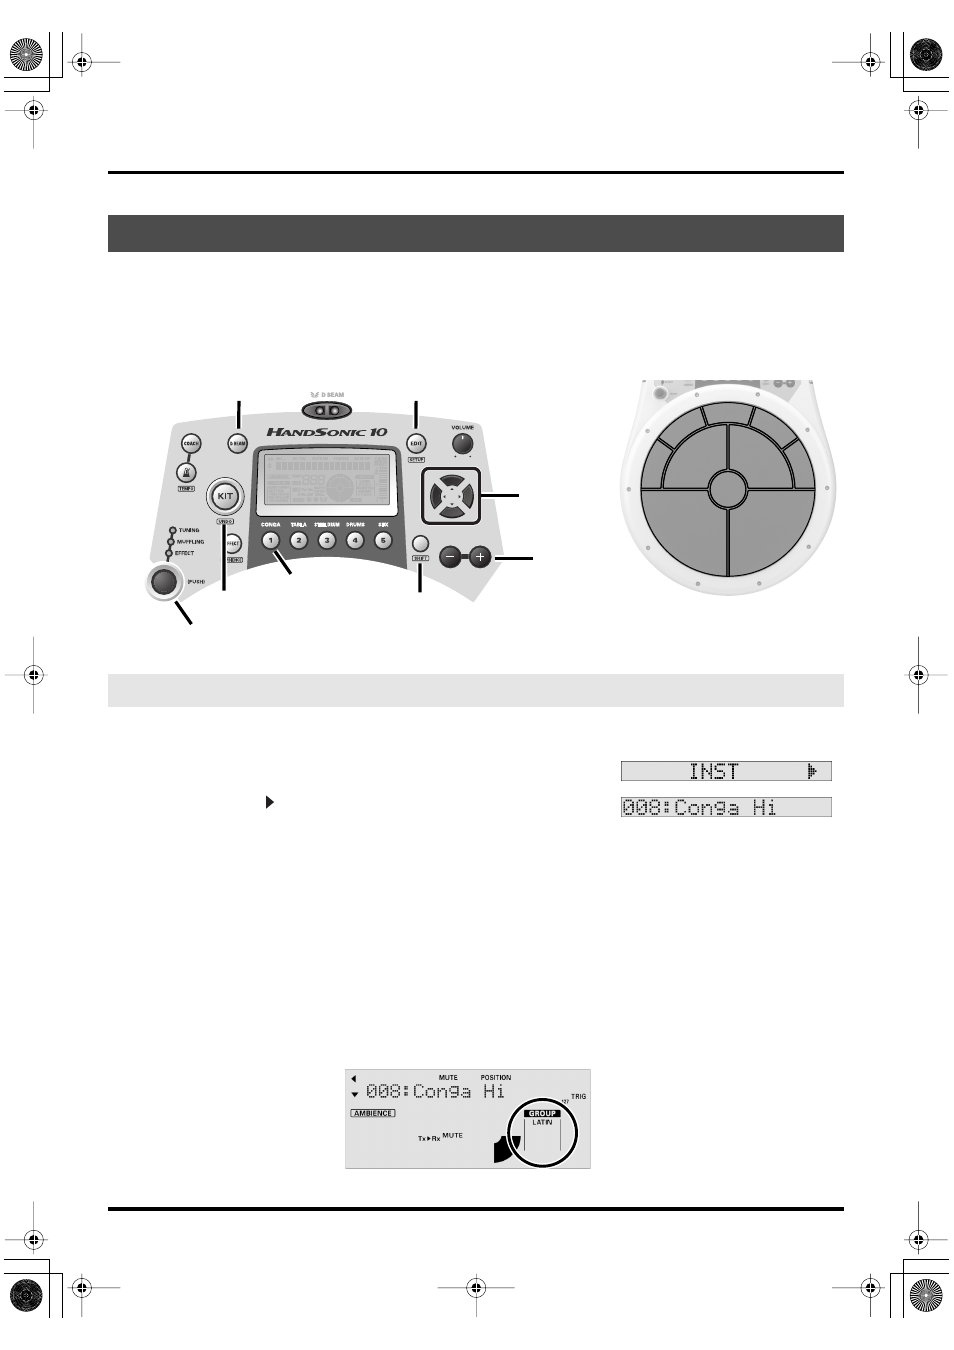
Press [EDIT], and you will see
3.
Press the [ ] cursor and here you will see the sound assigned to
any pad you touch (or D Beam, optional external pad/foot
switch).
The D Beam button must be lit in order for it to function.
* Remember that during the EDIT mode, the [EDIT] button will blink. Also, the pad you are editing will be
highlighted in the display.
4.
Let’s work with just one pad for the moment. Tap pad M5.
To change the sound you have a few choices:
• You can use the [+]/[-] buttons, or the Control knob.
• Or press [SHIFT], and while holding it down, press the [+]/[-] buttons. You can jump between instrument
groups, as shown in the display. Try this once to see what happens, and watch the display to see the
instrument group names change.
Basic Editing
Assigning a Sound to a Pad
CONGA Button
SHIFT Button
EDIT Button
CURSOR
KIT Button
+/- Buttons
Control Knob
D BEAM Button
M1
M2
M3
M4
M5
S1
S2
S3
S4
S5
Pad references used in this manual
HPD-10_e1.book 9 ページ 2006年4月7日 金曜日 午後2時14分