Figure 5-2: surface mounting arrangement – Raymarine 320 User Manual
Page 104
Chapter 5: Installation
5-5
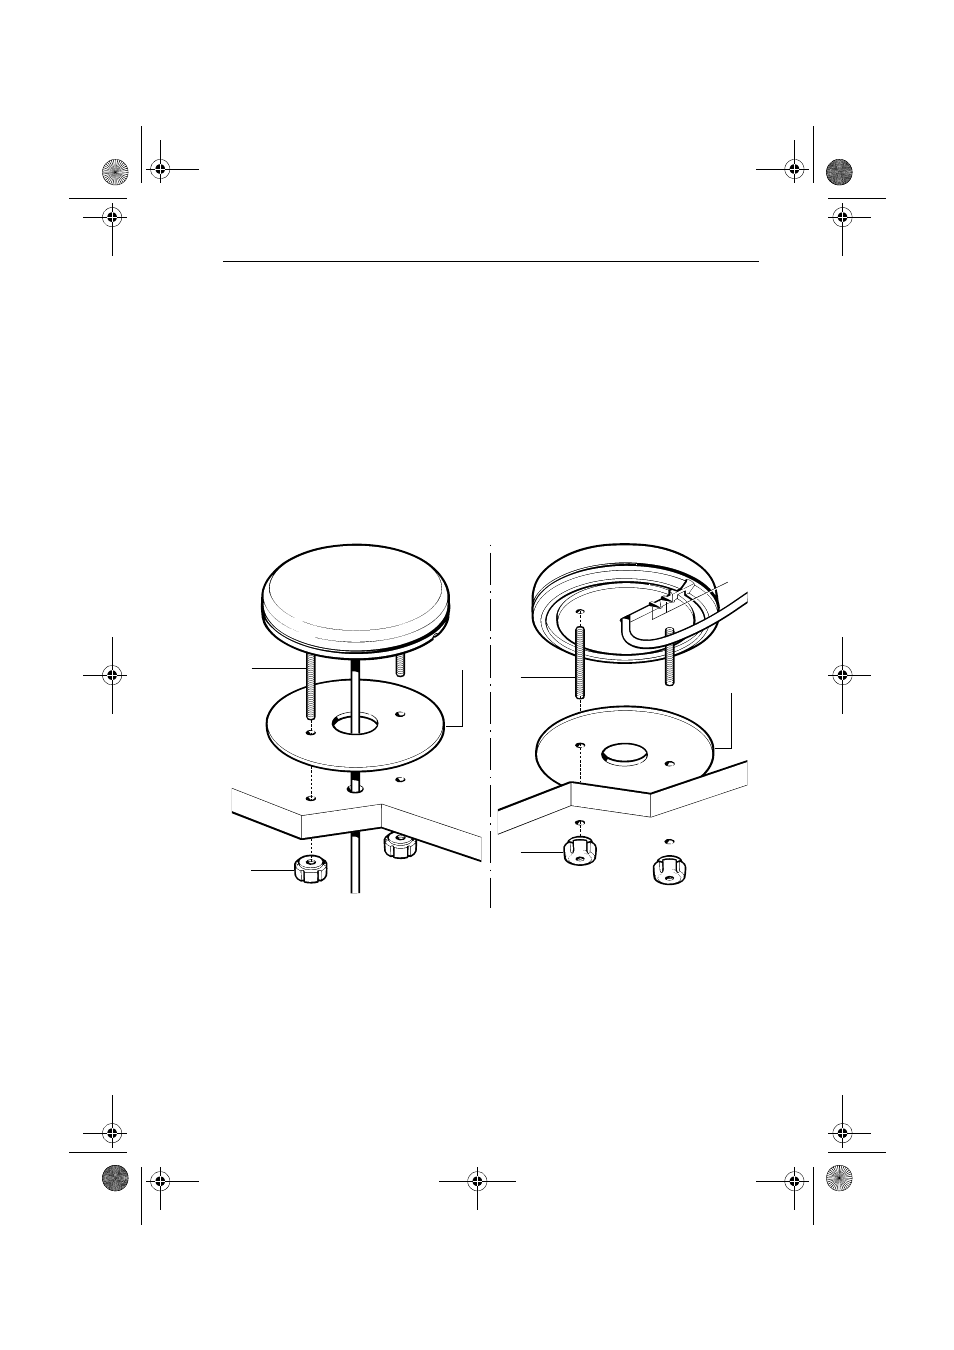
mounting surface, remove the two plastic tabs (1) obstructing the
cable channel.
Note: Failure to remove the plastic tabs from within the cable channel
could result in cable damage.
3. Screw the supplied brass studs (2) into the underside of the GPS
Antenna.
4. Affix the supplied gasket (3) to the mounting surface ensuring that the
holes match and pass the cable through the centre hole or the cable
exit channel.
5. Carefully position the GPS Antenna, passing the studs through the
holes in the mounting surface and secure to the mounting surface
using the thumb nuts provided (4).
Figure 5-2: Surface Mounting Arrangement
D4725_1
1
2
3
4
2
3
4
Top view
Underside view
81167_3.BOOK Page 5 Wednesday, November 21, 2001 2:12 PM
See also other documents in the category Raymarine GPS receiver:
- RAYTHEON E32001 (13 pages)
- RAYCHART 420 (101 pages)
- L365 (83 pages)
- SR50 (48 pages)
- A65 (100 pages)
- RS12 (50 pages)
- DSM300 (82 pages)
- NMEA Multiplexer (16 pages)
- Pathfinder (111 pages)
- Pathfinder Radar (244 pages)
- autopilot control unit (111 pages)
- VolvoPenta IPS Autopilot System DPU (16 pages)
- autopilot + ST4000+ (145 pages)
- stand-alone master instrument (45 pages)
- ST80 (15 pages)
- Raystar 125 (8 pages)
- RS12 (38 pages)
- ST6001 (48 pages)
- Pathfinder Radar Scanners (66 pages)
- Chartplotter (101 pages)
- Heading Sensor (24 pages)
- Ray430 (54 pages)
- Viewable Marine Displays (38 pages)
- Marine GPS System (188 pages)
- C Series (244 pages)
- ST8001 (48 pages)
- hsb2 PLUS Series (246 pages)
- 631 PLUS (170 pages)
- navigation system (17 pages)
- ST8002 (48 pages)
- PowerPilot (18 pages)
- ST7002 (52 pages)
- GPS Kit (24 pages)
- 465 (107 pages)
- Ray54E (116 pages)
- GPS Plotter (131 pages)
- GPS navigation (75 pages)
- ST7001 (48 pages)
- 300 (136 pages)
- Raystar 120 (30 pages)
- autopilot (137 pages)
- DSM30 (34 pages)
- Platinum Chart Card (29 pages)
- ST6002 (56 pages)