3 recording mode, 4 formatting disks – Roland KR-11 User Manual
Page 36
KR-11 Owner’s Manual—Composer Menu
36
— Deletes a single measure after the position
of the cursor, and shifts all subsequent bars to the left.
sions) at the position of the cursor.
Note: Activate the Leading Bass function if you wish to play
complex chords, such as “Fm/C”. See “Performance Pad
buttons: additional or frequently used functions” on
page 46.
6. Press the Composer [PLAY] button to check your
Chord Sequence.
The accompaniment you’ve created is played, starting
from the position of the cursor.
Press the Composer [STOP] button to stop playback.
7. When you’ve finished inputting the accompani-
ment, press
display.
poser Menu screen.
8. Press the Composer [PLAY] button.
The accompaniment you’ve created is played, so try
playing the melody along with the accompaniment as
backup.
Note: Once
cannot be corrected. Always check whether everything has
been entered correctly before you press
Note: An Intro can only be input at the start of a song.
Entering an Intro causes the number of measures corre-
sponding to the Intro’s length to be inserted automatically.
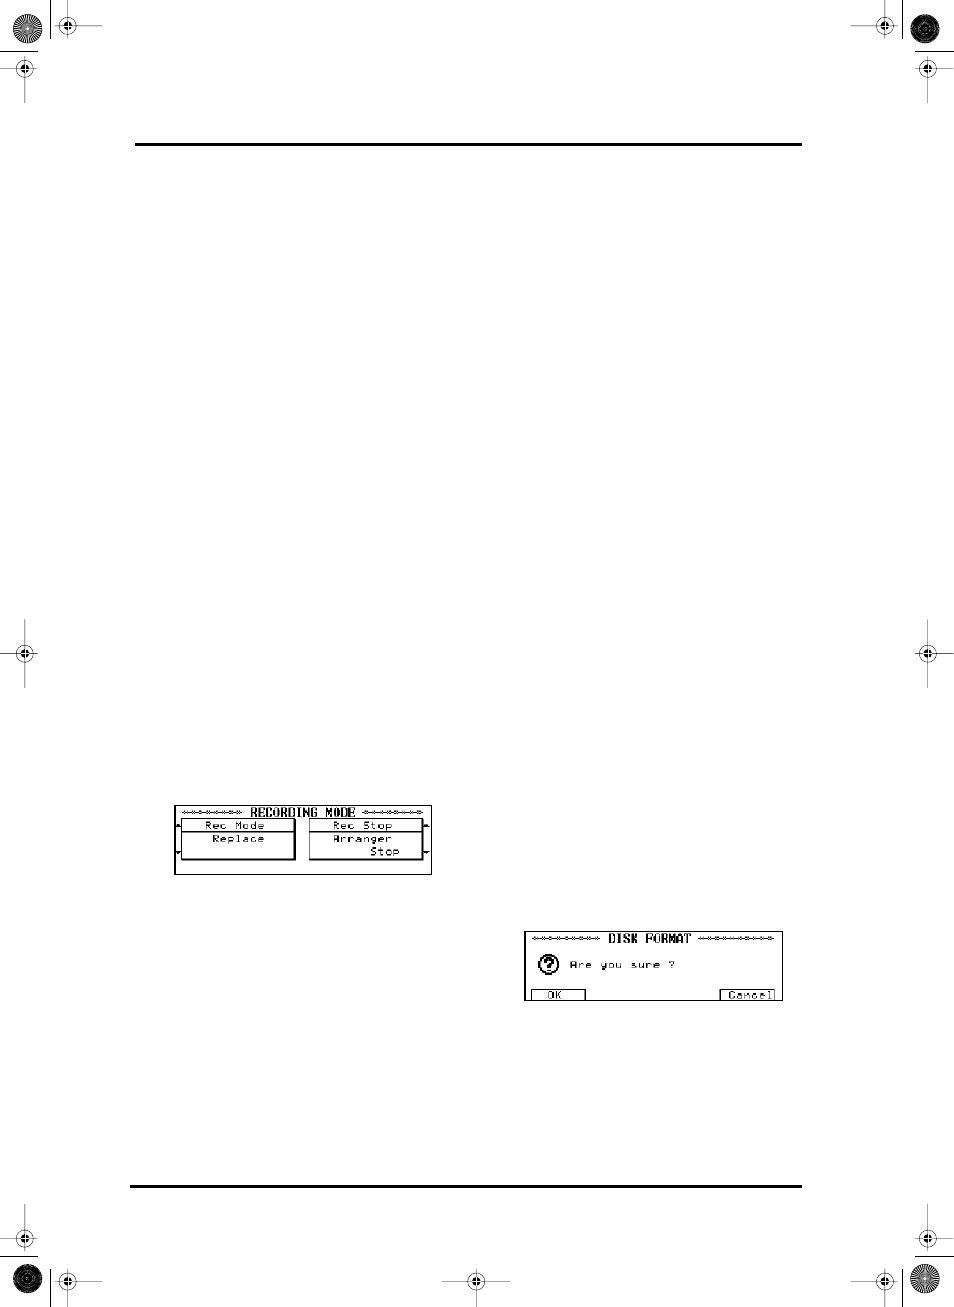
9.3 Recording Mode
You can select the recording method and the way that
recording stops.
1. On the Composer Menu, press
2. Use the buttons on the left side of the display to
select the recording method (Rec Mode), and the but-
tons on the right side of the display to select how
recording ends (Rec Stop).
Recording method (Rec Mode)
Replace— This is the usual recording mode. When
recording to a track that already contains data, you
overwrite the previous version up to the point where
you stop recording. (This is also the case when you
start recording without playing anything: the Com-
poser will then record the equivalent number of rests.)
Mix— Allows you to add new notes to an existing
recording without overwriting the previous version.
This mode is ideal for programming the drums
because it allows you to start with the bass drum and
snare drum and add the HiHat and cymbals the sec-
ond time around.
Note: If you choose Mix to add notes to a melodic part, be
sure to switch on the Link function (see page 51). Other-
wise, the track may suddenly use a different Tone.
Punch In/Out— This mode allows you to use a foot-
switch (or a PAD button) to start and stop recording
while listening to your song. Select this mode to cor-
rect minor mistakes. Press the pedal (or PAD button)
again to cancel recording and returns to the playback
state.
Punch-in recording can only be performed when
“Punch In/Out” has been set as the footswitch (or the
PAD button) function. To perform recording, be sure
to set the pedal function before you start. See “Pedal
functions” on page 47 and “Performance Pad buttons:
additional or frequently used functions” on page 46.
Note: Punch-in recording erases the previously recorded
performance (same as Replace mode).
Stopping a recording (Rec Stop)
Arranger Stop— Recording ends as soon as you stop
the Arranger.
Composer Stop— Pressing the Composer [STOP]
button ends recording. In this case, you can stop the
Arranger and go on recording until you press the
[STOP] button.
9.4 Formatting disks
In order to use new disks or disks which have been
used on other equipment, it will be necessary to “for-
mat” such disks.
Note: When a disk is formatted, all the data stored on it is
completely erased. As a rule, you should always check the
contents of a used disk (either on the KR-11 or on a PC)
before formatting it.
1. Set the Write Protect tab on the disk to the “Write”
position and insert the disk into the disk drive.
2. Press
screen.
3. If you really want to format the disk, press
will begin on the screen.
To cancel the operation, press
screen, or the [EXIT] button.
Note: Never remove a disk that is being formatted. Doing so
may damage both the disk and the floppy drive.
KR-11_Book Page 36 Thursday, November 21, 2002 9:35 PM