Panel mounting, Figure 8. mounting the usb-513x on a panel, Windows device recognition – National Instruments NI 5102 User Manual
Page 11
© National Instruments Corporation
11
NI High-Speed Digitizers Getting Started Guide
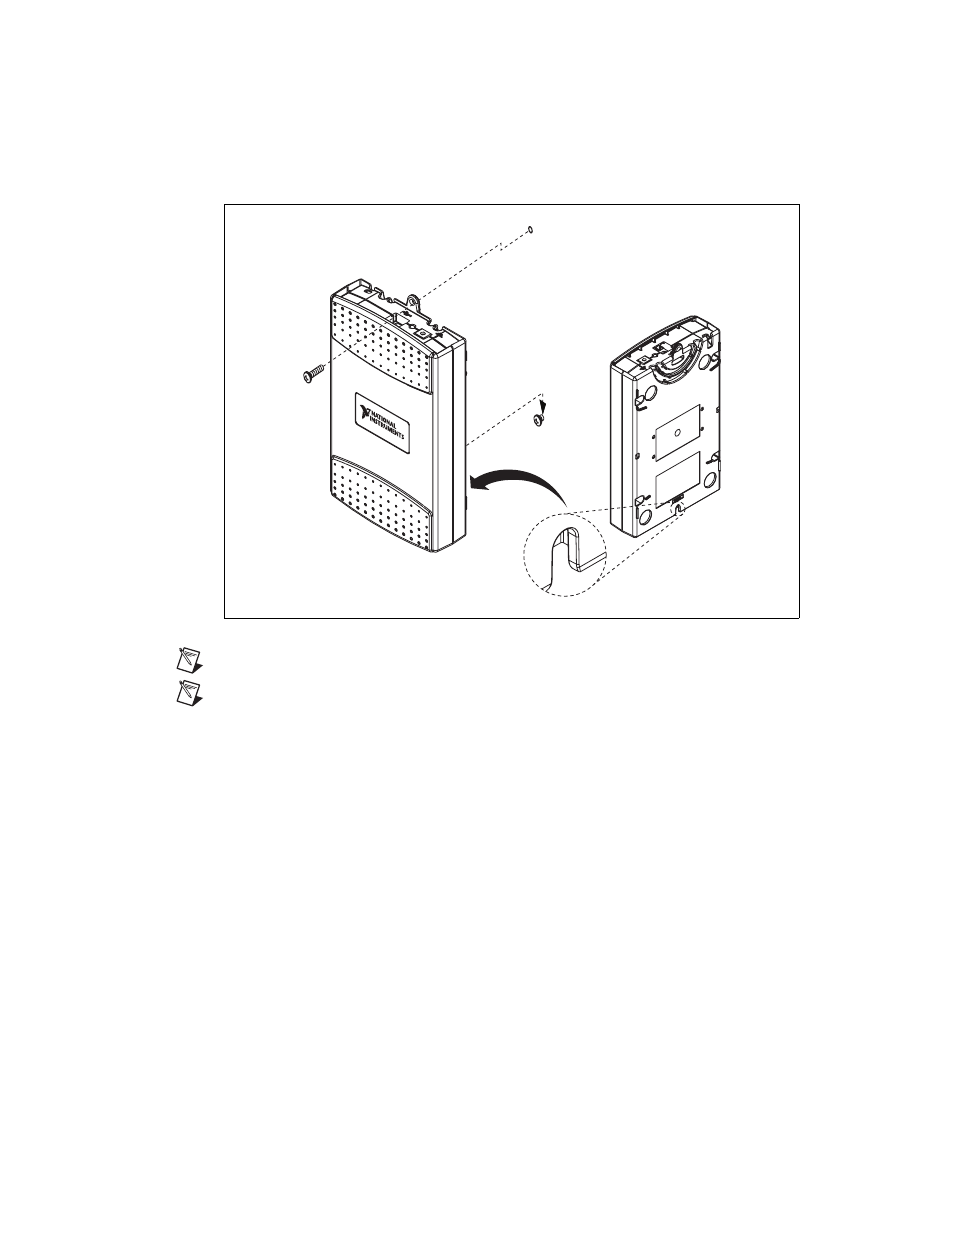
Panel Mounting
To mount the USB-513x to a board or panel, complete the following steps while referring to Figure 8.
Figure 8.
Mounting the USB-513x on a Panel
Note
Do not apply the rubber feet to the USB-513x when panel mounting the device.
Note
Apply strain relief, as described in the
section, before panel mounting
the USB-513x.
1.
Download and print the panel mounting template PDF attached in the KnowledgeBase document,
USB-4065/5132/5133/6509 Panel Mounting Template. Go to
ni.com/info
and enter the info
code
rd3233
to locate the KnowledgeBase document.
2.
Using the template, mark the bottom point and top point on the panel. The points will be 162 mm
(6.375 in.) apart.
3.
Remove the USB cable from the connector on the USB-513x.
4.
Screw a #8 or M4 screw into the bottom point on the panel.
5.
Set the USB-513x on the screw by fitting it into the bottom screw notch on the underside of the
USB-513x.
6.
Screw a #8 or M4 screw through the USB-513x top screw hole into the panel.
Windows Device Recognition
Windows recognizes any newly installed device the first time the computer reboots after hardware is
installed. On some Windows systems, the Found New Hardware wizard opens with a dialog box for
every NI device installed. Install the software automatically (Recommended) is selected by default.
Click Next or Yes to install the software for each device.