Install drive carrier into enclosure, Remove a disk drive – Promise Technology SuperSwap 4600 User Manual
Page 20
SuperSwap 4600 User Manual
14
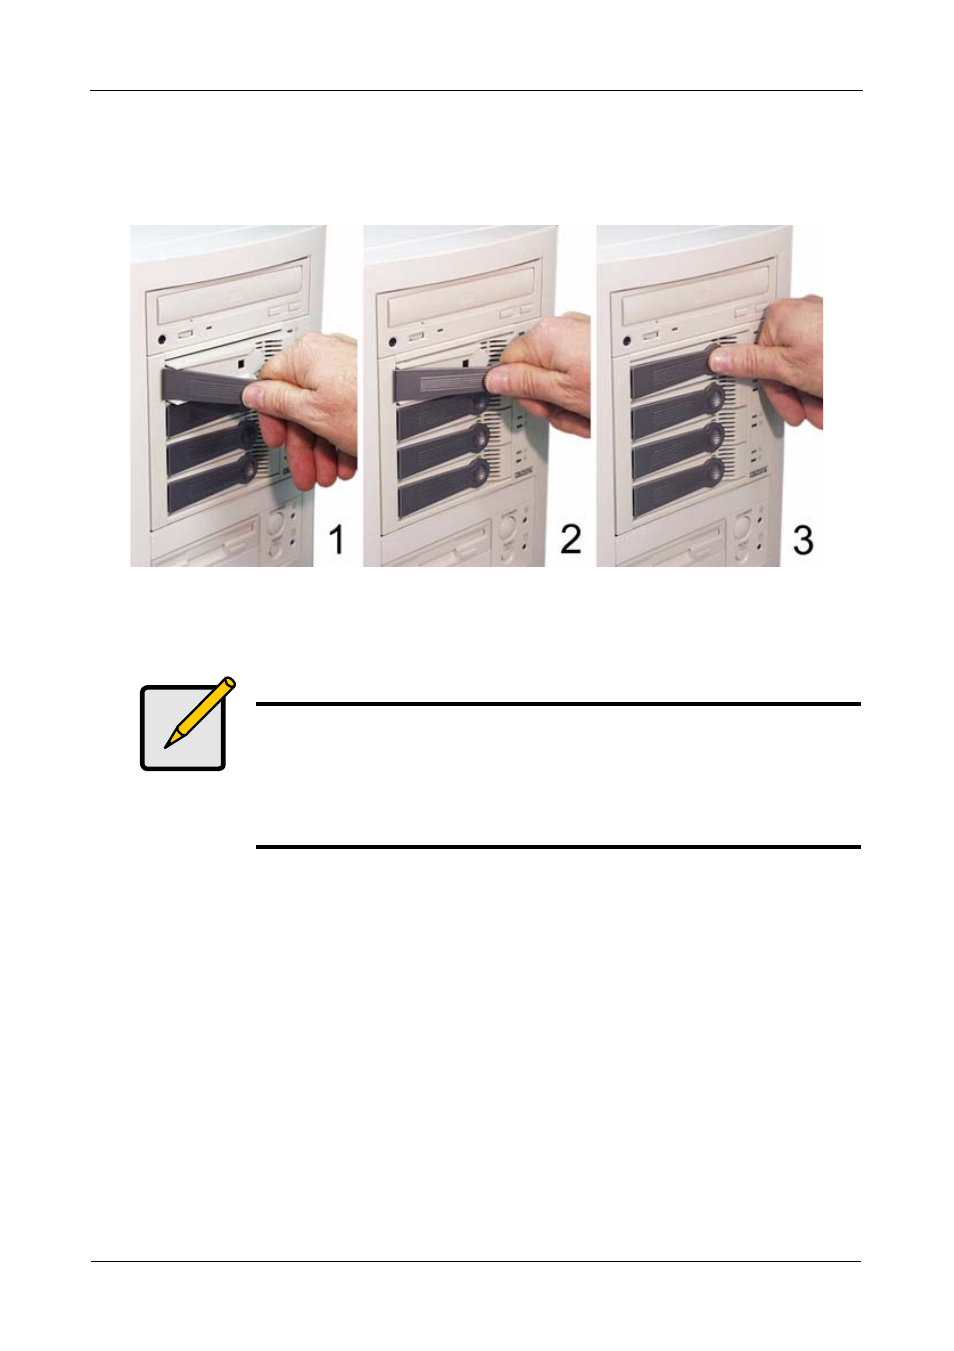
Install Drive Carrier into Enclosure
1.
Carefully slide the drive carrier into the housing assembly with the handle
turned out all the way.
2.
As the carrier snaps into place, the handle will swing inward.
3.
Press the handle flat against the drive carrier to fully seat it.
Remove a Disk Drive
1.
Pull the drive carrier handle out and swing it to the left.
2.
Pull the drive carrier out of the SuperSwap enclosure.
3.
Remove the four screws attaching the disk drive to the drive carrier.
4.
Lift the disk drive from the drive carrier.
5.
Reinstall the disk drive as described under Install a Disk Drive, above.
Note
The previous generation of SuperSwap enclosures used the key
lock to activate power as well as secure the drive carrier.
SuperSwap 4600 uses only the handle to secure the drive carrier.
Power is available at all times, in order to comply with SATA
requirements.