Top features – PLUS Vision UP-800 User Manual
Page 8
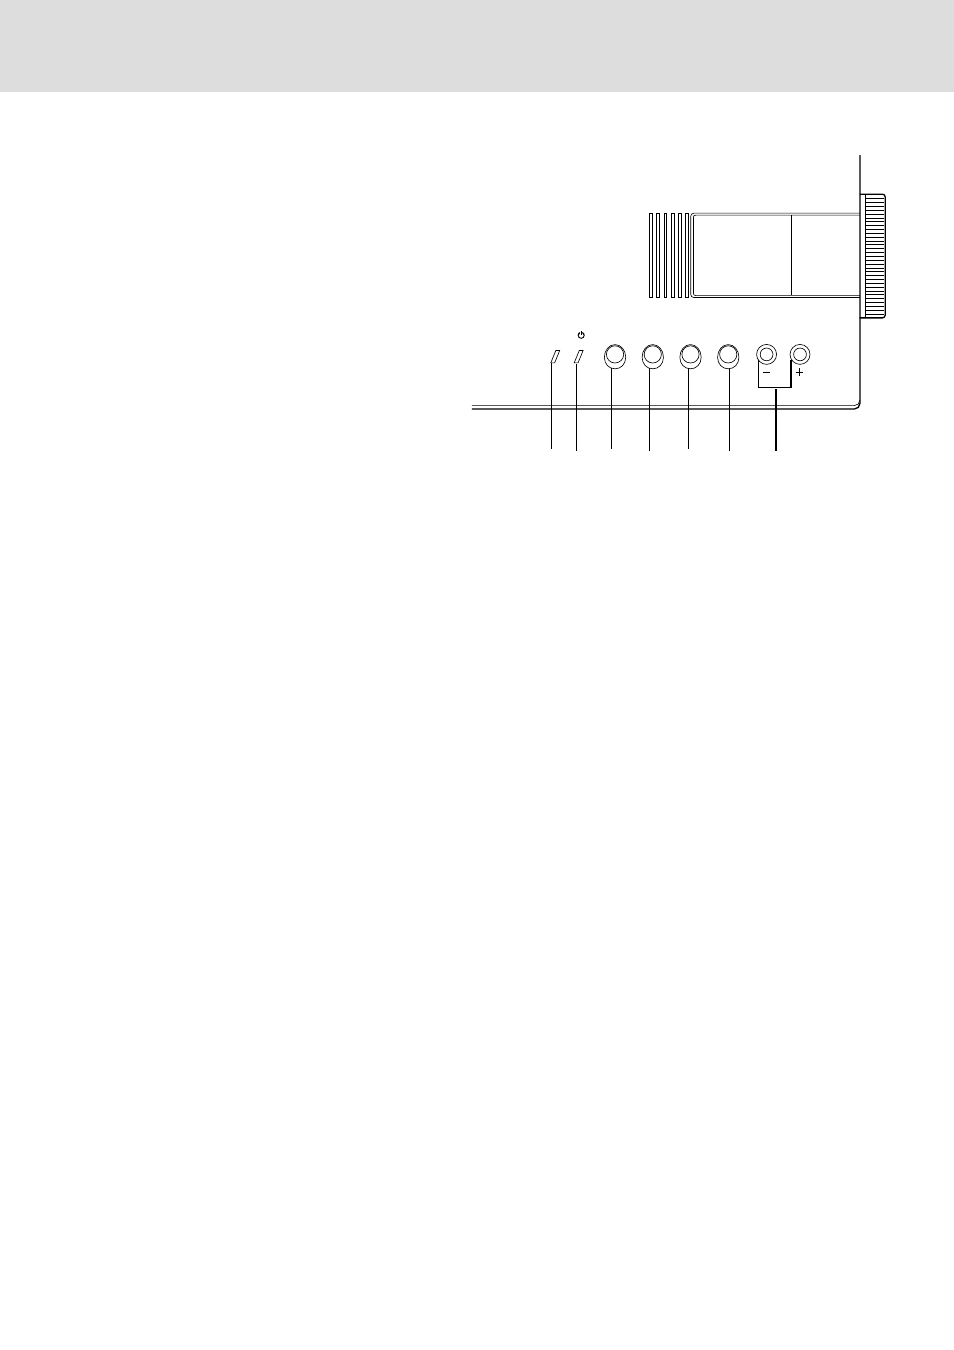
Top Features
1 Standby Button
Use this button to turn the power on and off w hen Main
Power Switch is on and the Data projector is on standby.
(When this button is pressed and held for at least two
seconds, the “Display Mute” mode will be canceled.)
2 Menu Button
Displays the on- screen menu.
3 Select Button
After you press the “Menu” button, use this button to
select the menu icon of the item you wish to adjust.
4 Enter Button
Executes your menu selection.
5 (+) (–) Adjust Button
Use these buttons while you' re in the Image Adjust mode
to change the level of a selected menu item. These buttons
are also used to set an item in the Power or Settings
menus.
6 STANDBY Indicator
When STANDBY is s witched On, the green LED blinks
for about one minute, then lights up.
If the power is on and you switch it off by pressing POWER
OFF on the remote controller or the STANDBY button on
the projector main unit operation section, the green LED
blinks for one minute, then lights up and the projector goes
on standby.
* The projector will not accept operation instructions for
the one minute during which the LED is blinking during
switching on or off as described above.
7 Status Indicator
When this is lit red contin ually, it's warning you that the
projection lamp has exceed 1100 hours of service. After
this light appears, it is advisable to replace the projection
lamp as soon as possible.(See page E-27.)
When the operating time of the lamp exceeds 1000 hours,
the STATUS indicator is lit red continually. In addition
the message "LAMP USAGE XX HOURS" appears con-
tinually when the on-screen menu is not displayed.
If this light blinks red rapidly, it indicates that either the
lamp house or filter cover is not attached properly; if the
light blinks slowly it means the projector's internal tem-
perature is too hot to operate safely. See the Status Light
Messages on page E-29 for more details.
5
4
3
2
1
7 6
STANDBY
STATUS
MENU
SELECT
ENTER
ADJUST
E – 8