Paxar Monarch 9855 User Manual
Page 14
10
L o a d i n g R i b b o n
1 .
Open the cover.
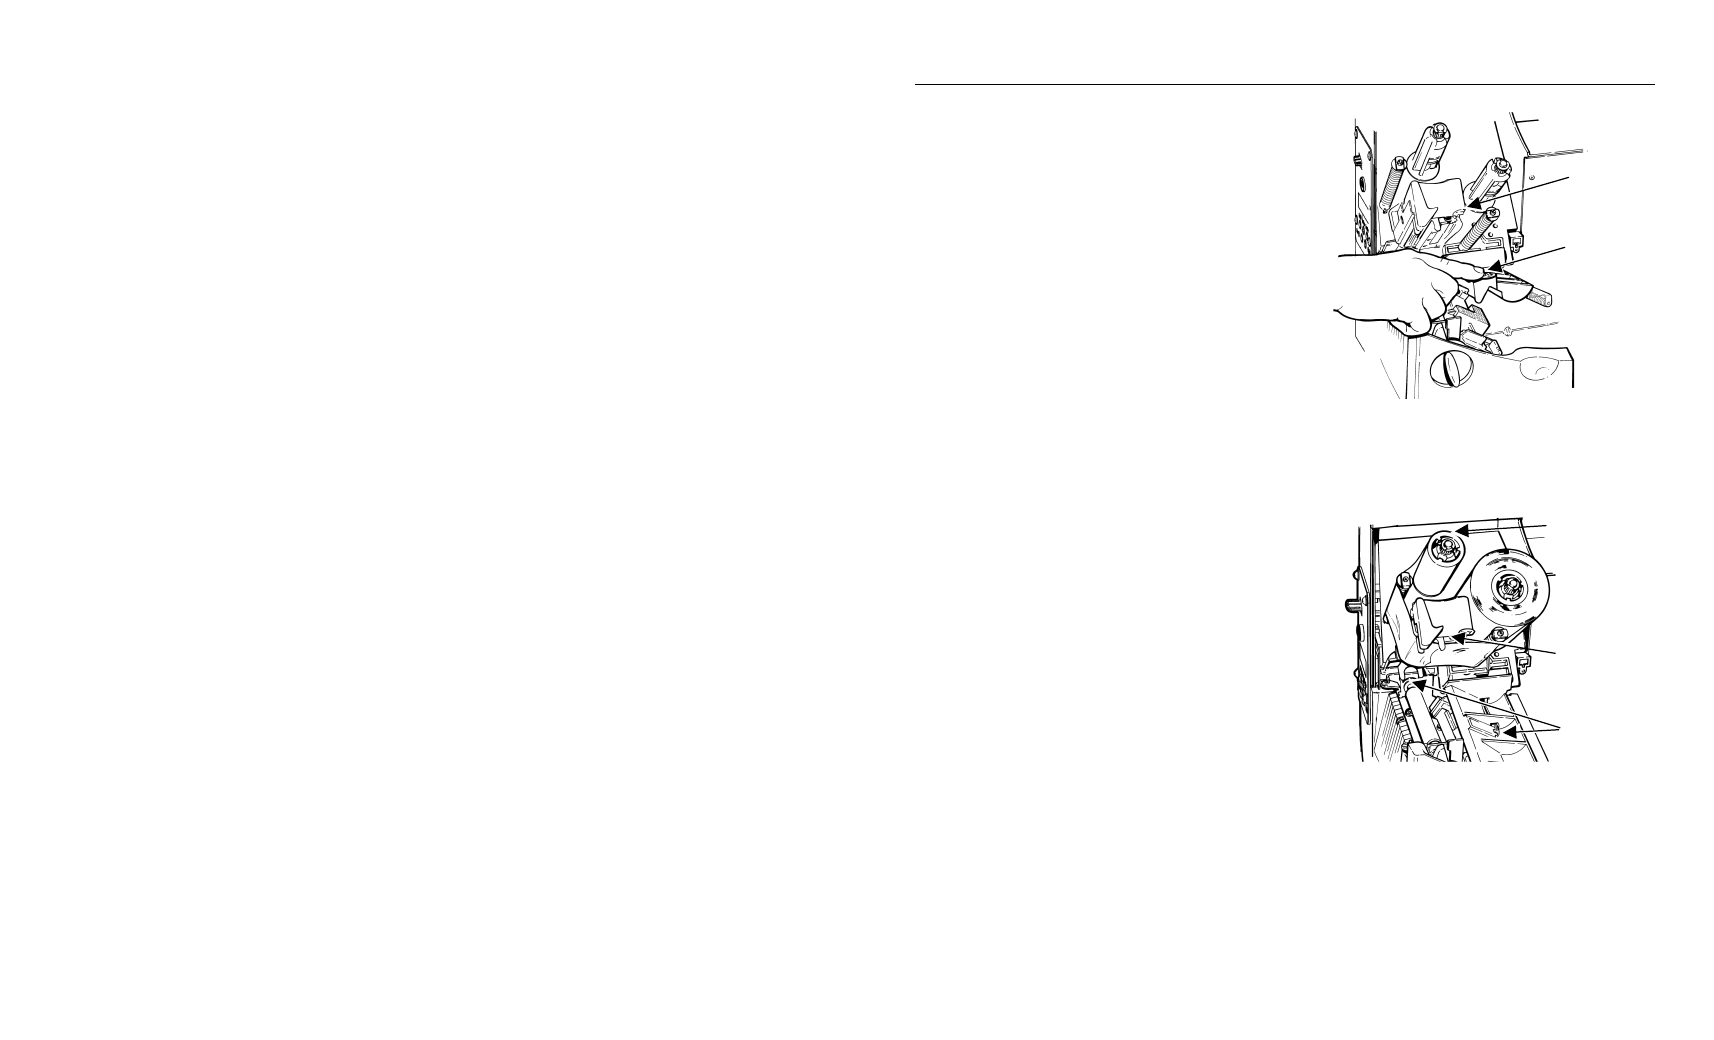
2 .
Unlock the printhead by turning the
retaining latch.
3 .
Lift printhead assembly using the
printhead tab until the assembly locks
into place.
4 .
Push the deflector tab down.
5 .
Slide the extra ribbon core on the
take-up reel as far as it will go with the
"This End Out" writing facing out. Use
your empty ribbon core as the take-up
core. The take-up core only fits on the
take-up reel one way.
6 .
Remove the new ribbon from the package. Do not wrinkle or crush the new
ribbon.
7 .
Slide the ribbon onto the back reel as far as it will go. The ribbon roll only fits
on the reel one way. Carefully unwind a few inches of ribbon from the bottom
of the roll.
Note:
Make sure the “Monarch This End
Out” writing is facing out. The
ribbon roll only fits on the reel one
way.
8 .
Carefully feed the ribbon under both
ribbon rollers and printhead.
9 .
Align the ribbon and make sure it is
straight and centered throughout the
path.
1 0 .
Tape the ribbon to the take-up core. Do
not tape the ribbon to the take-up reel.
1 1 .
Rotate the take-up core until the leader is past the printhead.
1 2 .
Remove any slack in the ribbon by turning the take-up reel clockwise.
1 3 .
Hold the printhead assembly by the printhead tab while pressing down on the
printhead release.
1 4 .
Close the printhead by pressing down on the thumb well until you hear it click
into place. Close the cover. Press Feed/Cut several times to feed at least
three labels/tags to properly position the supply and the ribbon.
Printhead
Tab
Deflector
Tab
Take-up Core
Take-up Reel
Ribbon
Rollers