Detail 39 figure 39, Figure 40 – ParaBody 425103 User Manual
Page 34
34
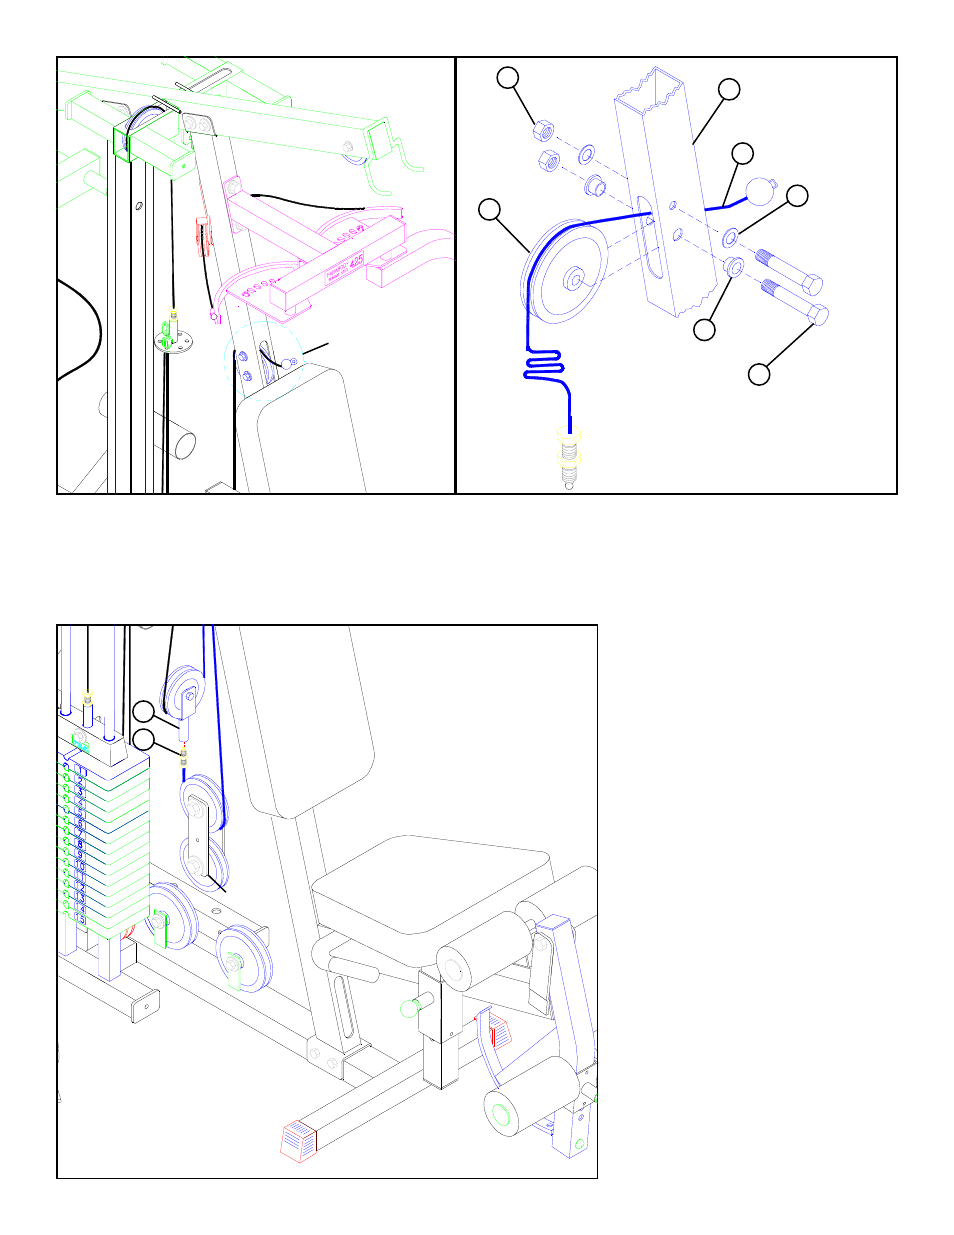
DETAIL 39
FIGURE 39
SEE DETAIL 39
STEP 39
• Securely assemble the ball end of the AB CABLE (103) and one 3-1/2” PULLEY (42) to the FRONT UPRIGHT (25) using two 3/
8 X 2-3/4” BOLTS (85), two 3/8” FLANGE SPACERS (49), two 3/8” WASHERS (91), and two 3/8” LOCKNUTS (92). (NOTE: The
AB CABLE (103) should be routed underneath the retaining bolt as shown in DETAIL 39.)
25
3/8 X 2-3/4” 85
91
92
42
49
103
• Run the AB CABLE (103) through the
floating pulley assembly, then screw the
threaded end of AB CABLE (103)
approximately 3/4” into the end of the
PULLEY BRACKET (29) and tighten jam
nut securely as shown in FIGURE 40.
STEP 40
IMPORTANT! Make sure the cables are
running in the grooves of all pulleys.
FIGURE 40
AB CABLE
29
103
FLOATING
PULLEY
See also other documents in the category ParaBody Sports and recreation:
- Free Weight Systems (5 pages)
- 886101 (3 pages)
- 425/660 (2 pages)
- 822 (9 pages)
- 848101 (14 pages)
- 881 (26 pages)
- Free Weight Smith System (5 pages)
- Leg Press 100101 (14 pages)
- 360101 (11 pages)
- 777 (5 pages)
- 832102 (14 pages)
- Leg Press 100 (11 pages)
- 205101 (1 page)
- 425 (2 pages)
- 440 (33 pages)
- 426103 (45 pages)
- Hip Sled System (24 pages)
- 824 (8 pages)
- GS2 (24 pages)
- 826 (8 pages)
- 856 (6 pages)
- 400101 (27 pages)
- 829 (14 pages)
- 435104 (13 pages)
- GS6 (8 pages)
- 842 (6 pages)
- 778 (13 pages)
- 375101 (22 pages)
- Leg Press 5 (15 pages)
- 838 (10 pages)
- 441101 440 (10 pages)
- LP5 (15 pages)
- Home Guide (9 pages)
- 888 (15 pages)
- cm3 (8 pages)
- 870 (4 pages)
- 893103 (20 pages)
- 890 (10 pages)
- 250101 (18 pages)
- 843 (12 pages)
- GS4 (1 page)
- 849 (7 pages)
- 855 AB (9 pages)
- 883 (31 pages)