Scheduled recording, When you have fi nished programming, Tips – Panasonic DMR-EZ37V User Manual
Page 9
9
RQT8849
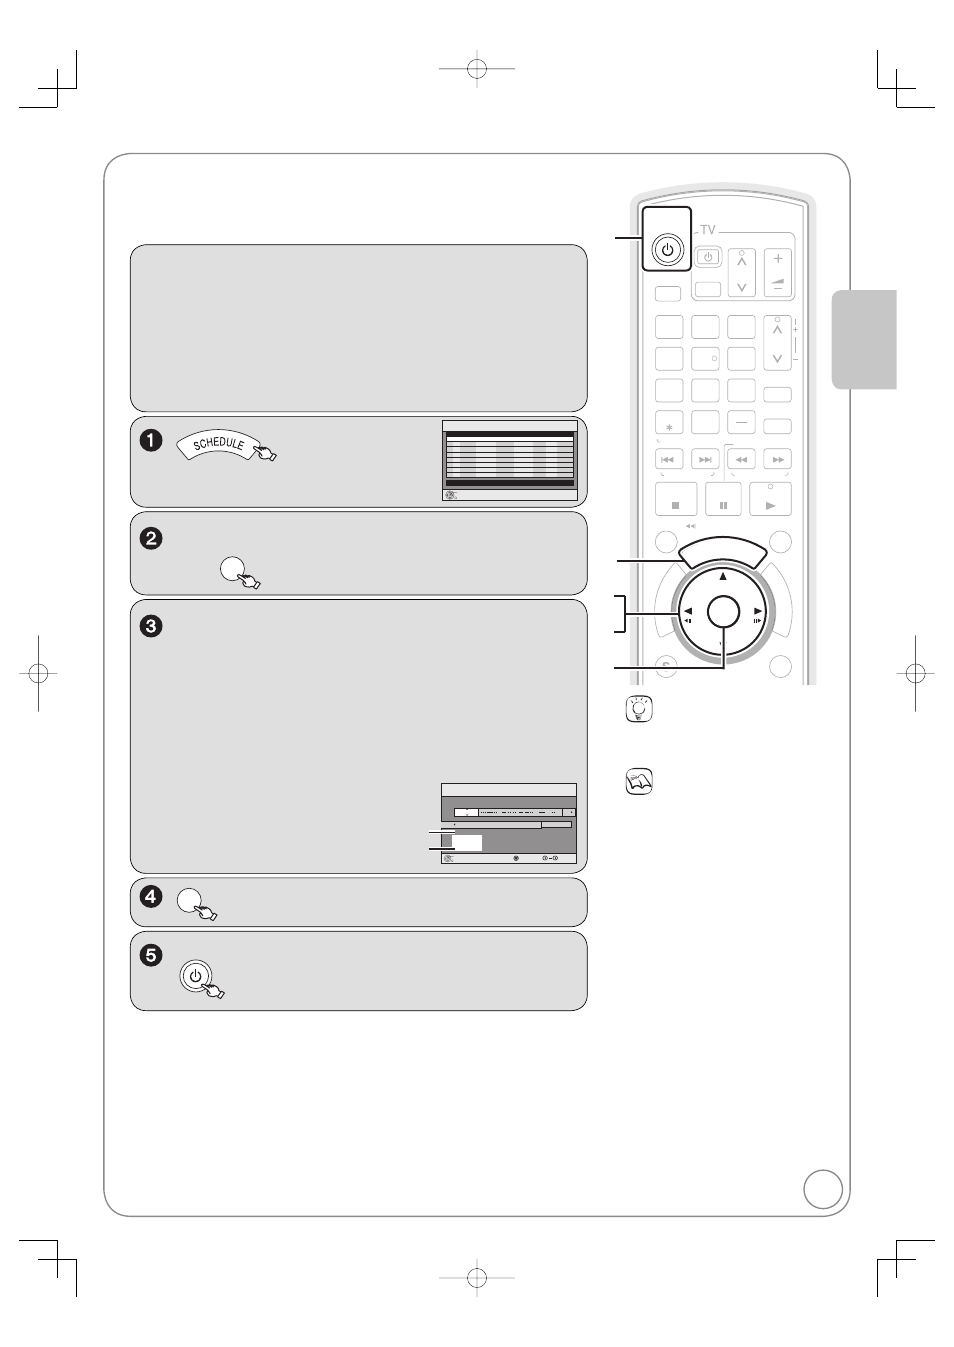
, to move through the items and , to
set the items.
Channel/Input –
TV Station/External Input
Date/Frequency – You can set a daily or weekly program.
On (start time) / Off (end time)
–
Hold button to change in 30-minute increments.
Drive
– VHS or DVD
Mode
– Recording mode, see page 14
Name (only for discs)
–
Press [ENTER], see
page 30.
Channel, Caption
Preview of selected
channel
Mode
Off
On
4-1 KPO-SD
Channel/
Input
Date/
Frequency
Name
Set Channel/Input.
:
:
Drive
SCHEDULED
RECORDING
DVD
VHS
5/ 4 Fri 6:11 PM
Remaining Recording Time
0:33 XP
2:00 SP
4-1
ENTER
Cancel
Number
Scheduled Recording
ENTER
− Repeat steps 2−4 to program other recordings.
Preparation:
Turn on the television and select the appropriate video input to suit the
connections to this unit.
[RAM] If the disc is protected, release protection ( 36).
[VHS] Ensure accidental erasure tab is intact.
Insert a disc or VHS cassette with enough remaining blank space.
Confirm that the clock on the unit’s display is set to the correct time.
If connected via a cable box or satellite receiver, set channel there
before scheduled recording starts.
, to select “New Scheduled Recording”,
then
ENTER
POWER
DVD/VHS
when you have fi nished programming.
− “
” lights on the unit’s display.
POWER
POWER
SLOW/SEARCH
SCHEDULE
ENTER
FU
NC
TIO
NS
TV/VIDEO
PAUSE
STOP
3
2
1
6
5
4
9
8
7
0
RETURN
SUB MENU
CM SKIP
DI
RE
CT
NA
VA
IG
ATAA
OR
DISPLAY
AUDIO
DRIVE
SELECT
CHAPTER
CREATE
INPUT SELECT
CANCEL
DELETE
CH
CH
PLAY
VOL
DVD/VHS
VCR/TV
TRACKING/V-LOCK
SKIP/INDEX
REW
FF
TIME SLIP/ JET REW
RESET
Channel
No
Date
On
Check
Off
Drive
Mode
Schedule List
DVD
VHS
5/ 4 Fri 6:11 PM
Remaining Recording Time
0:33 XP
2:00 SP
ENTER
New Scheduled Recording
Press ENTER to set new schedule.
Refer to “Advanced Scheduled Recording” ( 18) for detail information on
scheduled recording.
[RAM] [-R] [-R]DL] [-RW‹V›] [+R] [+R]DL] [+RW] [VHS]
Digital broadcasts cannot be recorded to video tape.
Notes
Be sure to perform step 5 before the
scheduled recording time. Scheduled
recording will work only if “
” is
displayed.
“
” fl ashes when the unit cannot go to
scheduled recording standby.
(e.g., a recordable disc is not in the
disc tray)
It does not fl ash if Quick Start is off.
When scheduled recordings are set to
start one immediately after another,
the unit cannot record the beginning
of the later program.
If two scheduled recording times
overlap, the fi rst recording always
has priority. The second recording will
start only after the fi rst recording has
fi nished.
Scheduled recording cannot be
executed on both DVD and VHS
drives at the same time.
When starting time for a scheduled
recording is the same, the recording
that you programmed later has priority.
If you set DST (Daylight Saving Time)
to On when manually setting the
clock, scheduled recording may be
affected when summer time switches
to winter time and vice versa.
Basic Operations
Tips
Icons such as “
[RAM] ” indicate usable
discs. Refer to pages 62 and 63.