Disassembly of parts, Removal of the front panel, Removal of front grille – Panasonic CU-TE12DKE User Manual
Page 66: Disassembly of indoor unit
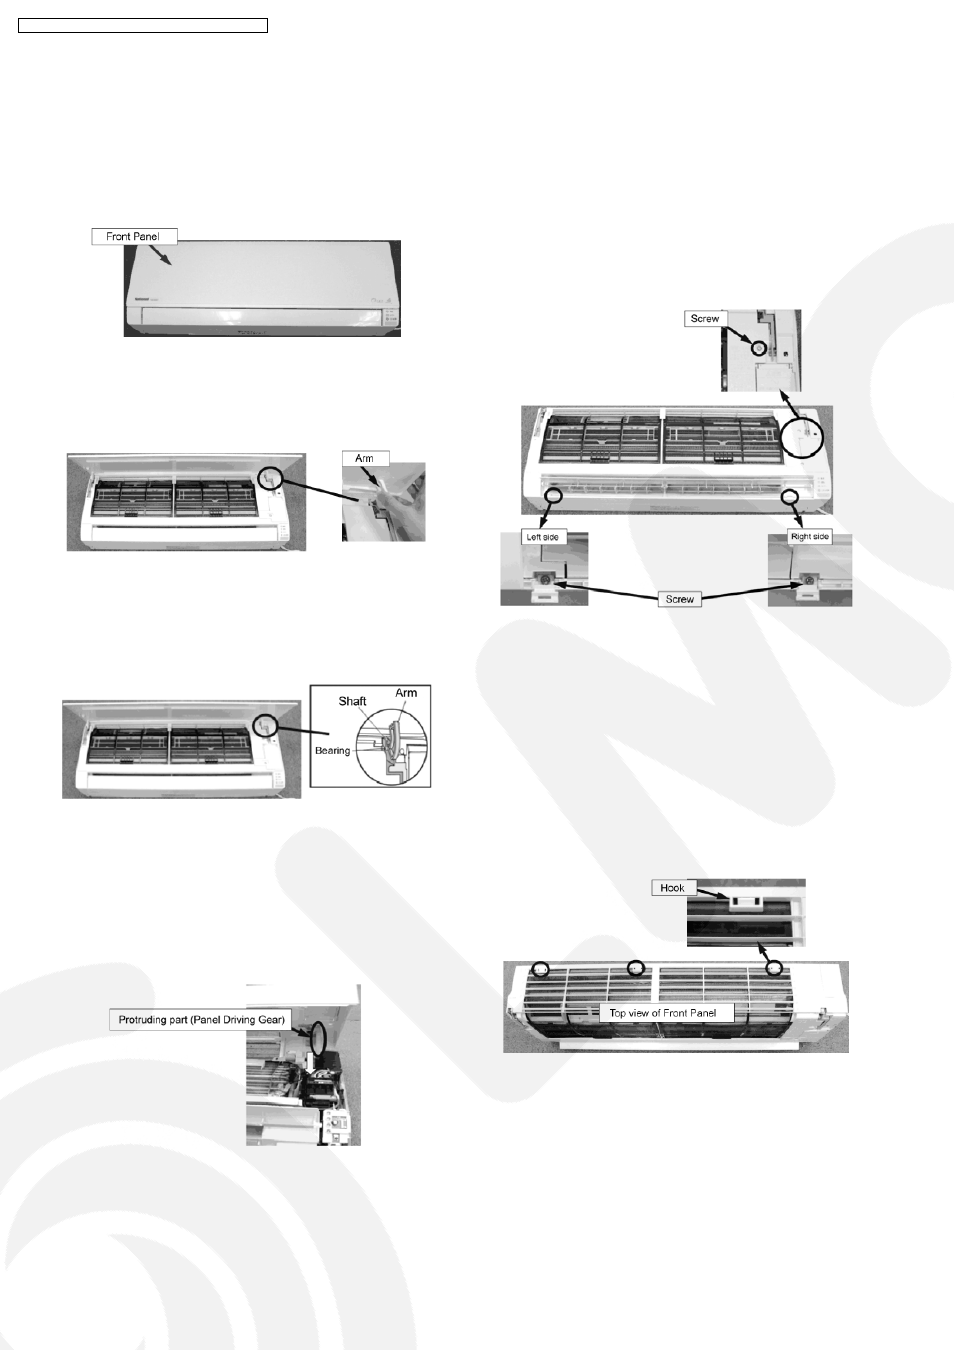
13.4.1.1. Removal of the Front Panel
1. Push the Front Panel up toward upper side from the
horizontal line a little by hand.
Fig. 1
2. Pull it out by pressing each arm located on left and right
sides toward outside.
Fig. 2
Note for Reassembly:
Put each axis into Bearing Ass’y up to the bottom one
side by one while keeping the Front Panel horizontal.
Fig. 3
Note for Reassembly:
Insert protruding parts on the reverse side of the panel
(both left and right sides), for right side, between the
PCB Control Box the Open/Close Motor, and for left
side, into the left side of the Heat Exchanger
respectively.
Fig. 4
13.4.1.2. Removal of Front Grille
1. Remove the Front Panel according to the item 13.5.1.1.
2. Keep the Vertical Louver horizontal.
3. Pull the Screw Caps (two in left and right sides) toward the
front side and unscrew the screws inside (one each left and
right), and finally unscrew the screw on the right side of the
Front Grille (one).
Fig. 5
Note for Disassembly:
Removing the Front Panel in advance before removal of
Air Filters (two) can make reassembly of the Grille easy.
4. Remove the Front Grille to upside by holding the lower part
up a little.
Note for Disassembly:
There are three hooks on the top. Holding the Grille up
while holding these hooks down makes its removal
easy. Be careful of the hooks that might be hard.
Fig. 6
Note for Reassembly:
Put the Grille back securely until you hear click sound
of all the hooks (three) on the top. Or, it may cause
breakdown such as “Front Panel does not open” due to
out of gear of the Front Panel Open/Close Motor.
13.4. DISASSEMBLY OF PARTS
13.4.1. Disassembly of Indoor Unit
66
CS-TE9DKE CU-TE9DKE / CS-TE12DKE CU-TE12DKE