Setting the window – Pella Bay and Bow window with seat board 80AT0102 User Manual
Page 3
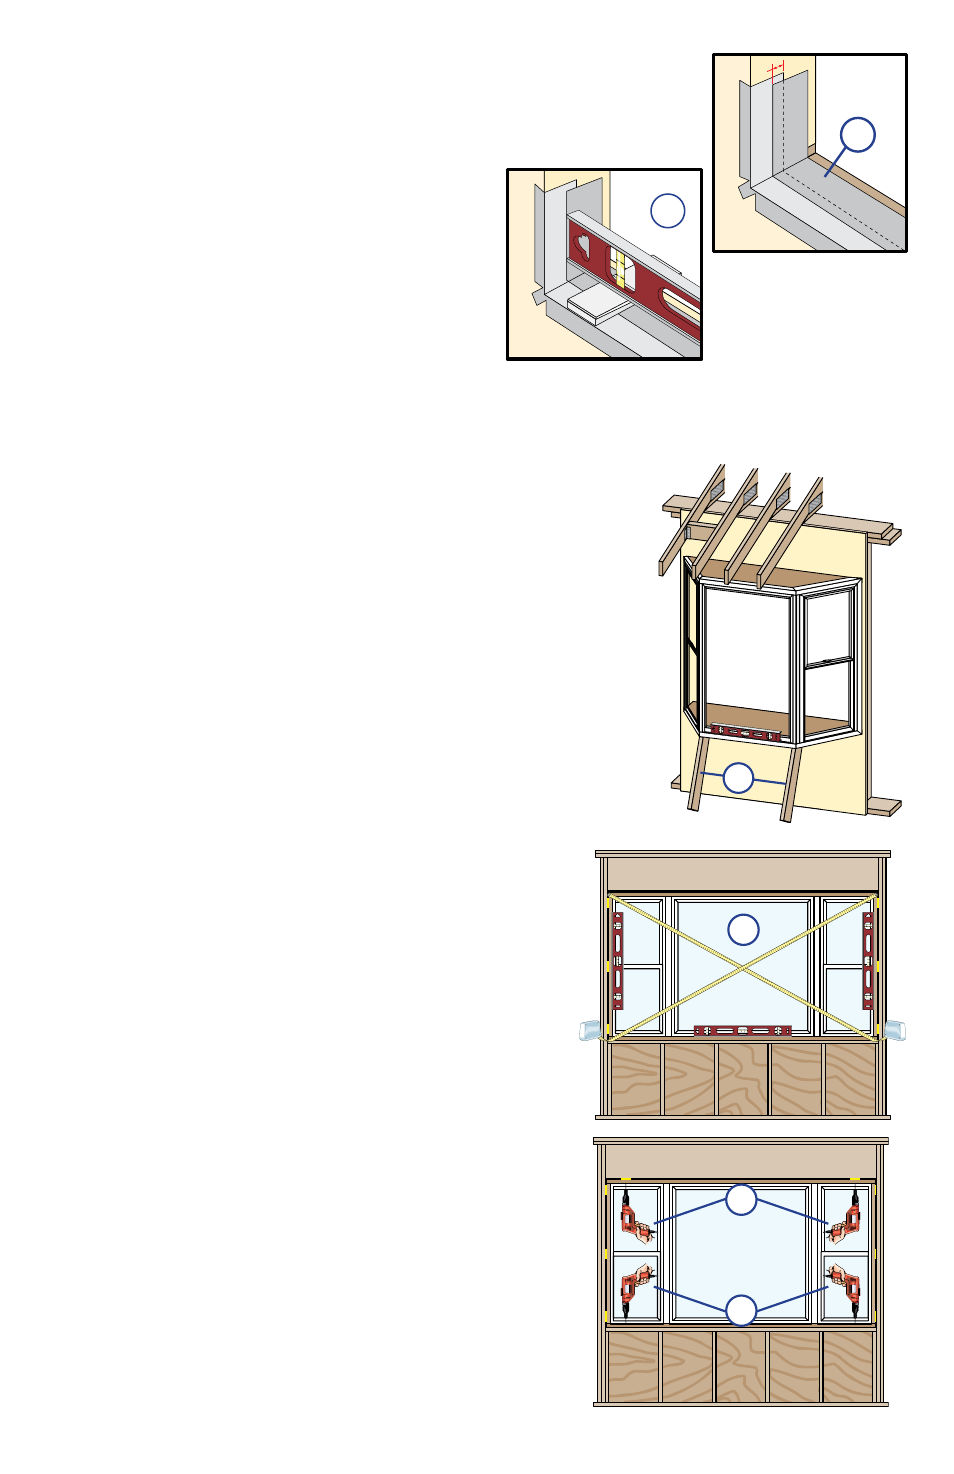
TWO OR MORE PEOPLE WILL BE REQUIRED FOR THE FOLLOWING STEPS.
1"
1F
2B
Interior
2C
Interior
2F
2D
1G
2
SeTTING THe WINDOW
F.
Apply sill flashing tape #2. Cut a piece of flashing tape 12" longer
than the opening width. Apply at the bottom, overlapping tape #1 by
at least 1". DO NOT allow the tape to extend past the interior face
of the framing (1F).
Note: The flashing tape may not fully cover the framing members.
G.
Install and level sill spacers. Place 1" wide
by 3/8" thick spacers on the bottom of the
opening 1/2" from each side. Add shims
to ensure the spacers are level. Once level,
attach spacers and shims to the opening to
prevent movement.
Note: In some installations, the cable clamps will not be
accessible for cable attachment and adjustment after the
window is installed. For this type of installation proceed to
Cross Bracing Mount - Non Accessible Cable Attachment. The
cable and clamp will have to be measured and installed before
the window is installed.
A.
Insert the window from the exterior of the building. Place
the seat of the window at the bottom of the opening and slide
the top into position. Center the window between the sides of
the opening to allow clearance for shimming.
B.
Place temporary bracing under the seat of the
window and raise the unit until level as shown (2B).
C.
Plumb and square window. Place shims 1" from the
bottom and top of the window between the window and
the sides of the opening. Adjust the shims as required
to plumb and square the window in the opening. Place
shims at the midpoint of the window sides.
D.
Nail one 10d finishing nail or drive a #8 x 2-1/2"
long screw on each end, through the seat board into
the rough opening.
E.
Continue placing shims/spacers between the seat
board and the rough opening at not more than 16"
on center. Ensure the seat board is flat.
F.
Nail one 10d finishing nail or drive a #8 x 2-1/2"
long screw on each end, through the head board into
the rough opening.
G.
Place shims between the head board and the rough
opening at not more than 16" on center. Ensure the
head board is straight and level.