Pella Impervia 802Q0101 User Manual
Pella For Home
Part Number: 802Q0101
© 2009 Pella Corporation
INSTALLATION INSTRUCTIONS
SLIDING, SINGLE-HUNG and FIXED WINDOW
WITH FINS
Installation Instructions for Typical Wood Frame Construction.
These instructions were developed and tested for use with typical wood frame wall construction in
a wall system designed to manage water. These instructions are not to be used with any other
construction method. Installation instructions for use with other construction methods or multiple
units may be obtained from Pella Corporation or a local Pella retailer. Building designs, construction
methods, building materials, and site conditions unique to your project may require an installation
method different from these instructions and additional care. Determining the appropriate installation
method is the responsibility of you, your architect, or construction professional.
Always read the Pella Impervia Limited Warranty before purchasing or installing
Pella Impervia products. By installing this product, you are acknowledging that this Limited
Warranty is part of the terms of the sale. Failure to comply with all Pella Impervia installation and
maintenance instructions may void your Pella Impervia product warranty. See Limited Warranty for
complete details on
http://warranty.pellaimpervia.com.
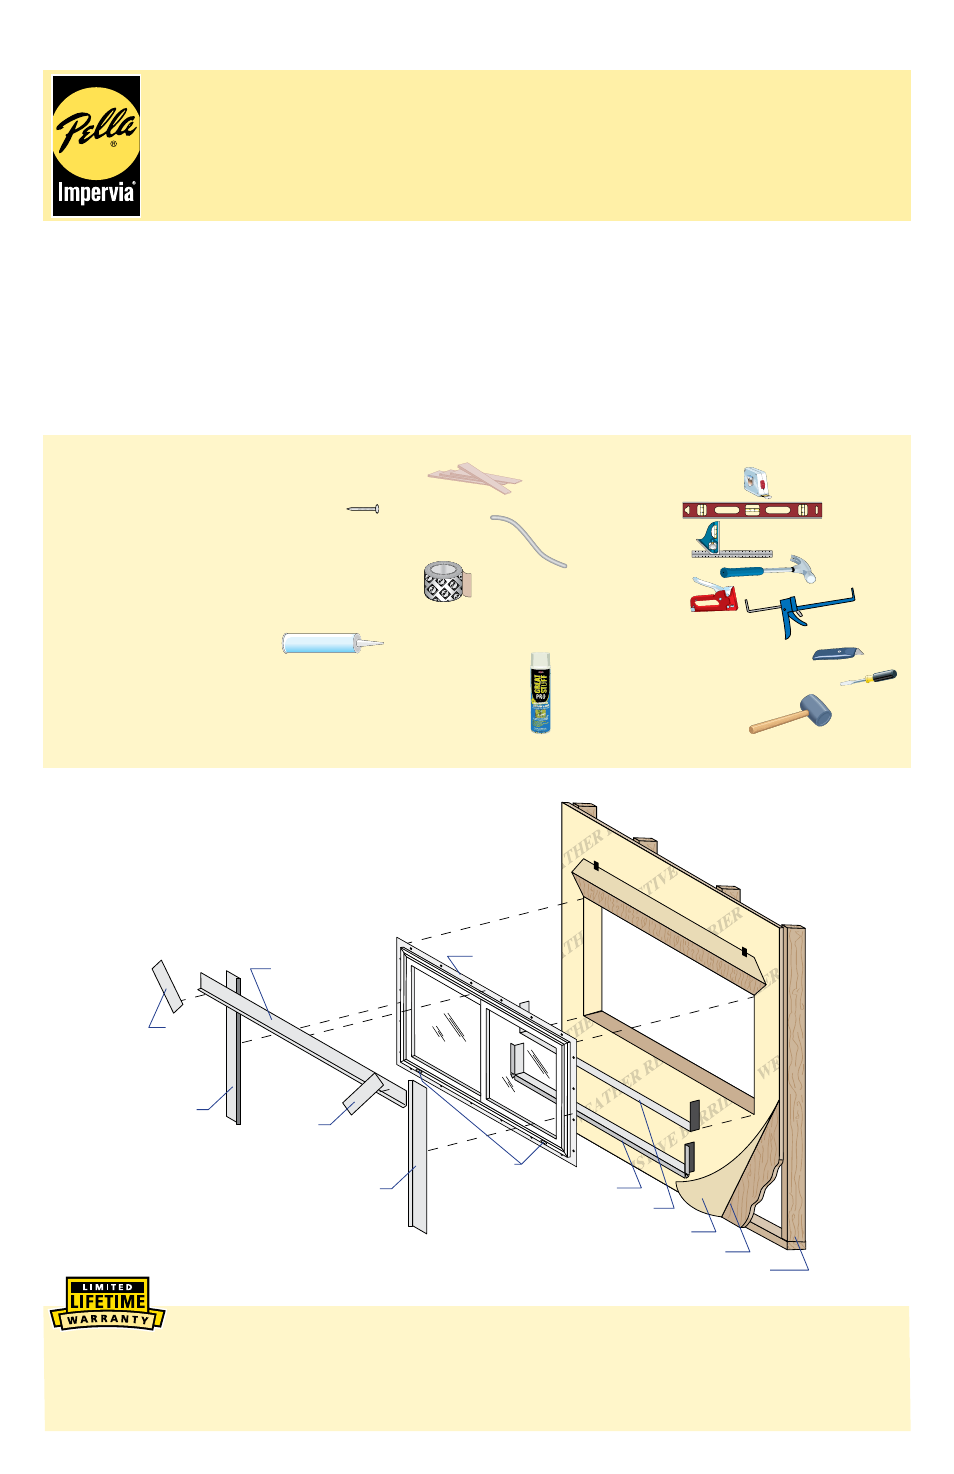
Top
Flashing
Tape
Nailing Fin
Sill Flashing Tape #2
Sill Flashing Tape #1
Side
Flashing
Tape
Weep Valves
Weather Resistive Barrier
Sheathing
Framing
Side
Flashing
Tape
Corner
Flashing
Tape
Corner
Flashing
Tape
YOU WILL NEED TO SUPPLY:
• Cedar or Impervious shims/spacers (12 to 20)
• 2" galvanized roofing nails (1/4 lb.)
• Closed cell foam backer rod/sealant backer (12 to 30 ft.)
• Pella
®
SmartFlash
™
foil backed butyl window
and door flashing tape or equivalent
• OSI Quad or Geocel Pro-Flex Tri-polymer Sealant
(1 tube per window)
• Great Stuff
™
Window and Door Insulating Foam Sealant
by the Dow Chemical Company or equivalent low pressure
polyurethane window and door foam - DO NOT use high
pressure or latex foams
TOOLS REQUIRED:
• Tape measure
• Level
• Square
• Hammer
• Stapler
• Sealant gun
• Scissors or utility knife
• Small flat blade screwdriver
• Rubber mallet
Installation will require two or more persons for safety reasons.
SEALANT
SEALANT
REMEMBER TO USE APPROPRIATE
PERSONAL PROTECTIVE EQUIPMENT.