Timer recording, Recording 05, Setting timer recording preparation – Pioneer DVR-RT501-S User Manual
Page 59
59
En
Recording
05
Timer recording
The timer recording system allows
you to select the date, time and
channel and record the desired
programs. Up to 12 timer pro-
grams within a month can be
stored in this unit.
Setting timer recording
Preparation:
• Turn ON the TV and select its AV channel (this may be labelled
EXT / AUX etc.).
• Load a recordable DVD or video tape.
• Press DVD/VCR to select the appropriate mode.
• Confirm that the clock is indicating the correct time.
Example: Set the recording mode to LP and record on DVD; the TV
program is on channel 1 starting at 20:00 and stopping at 23:00 on a
date of 20th.
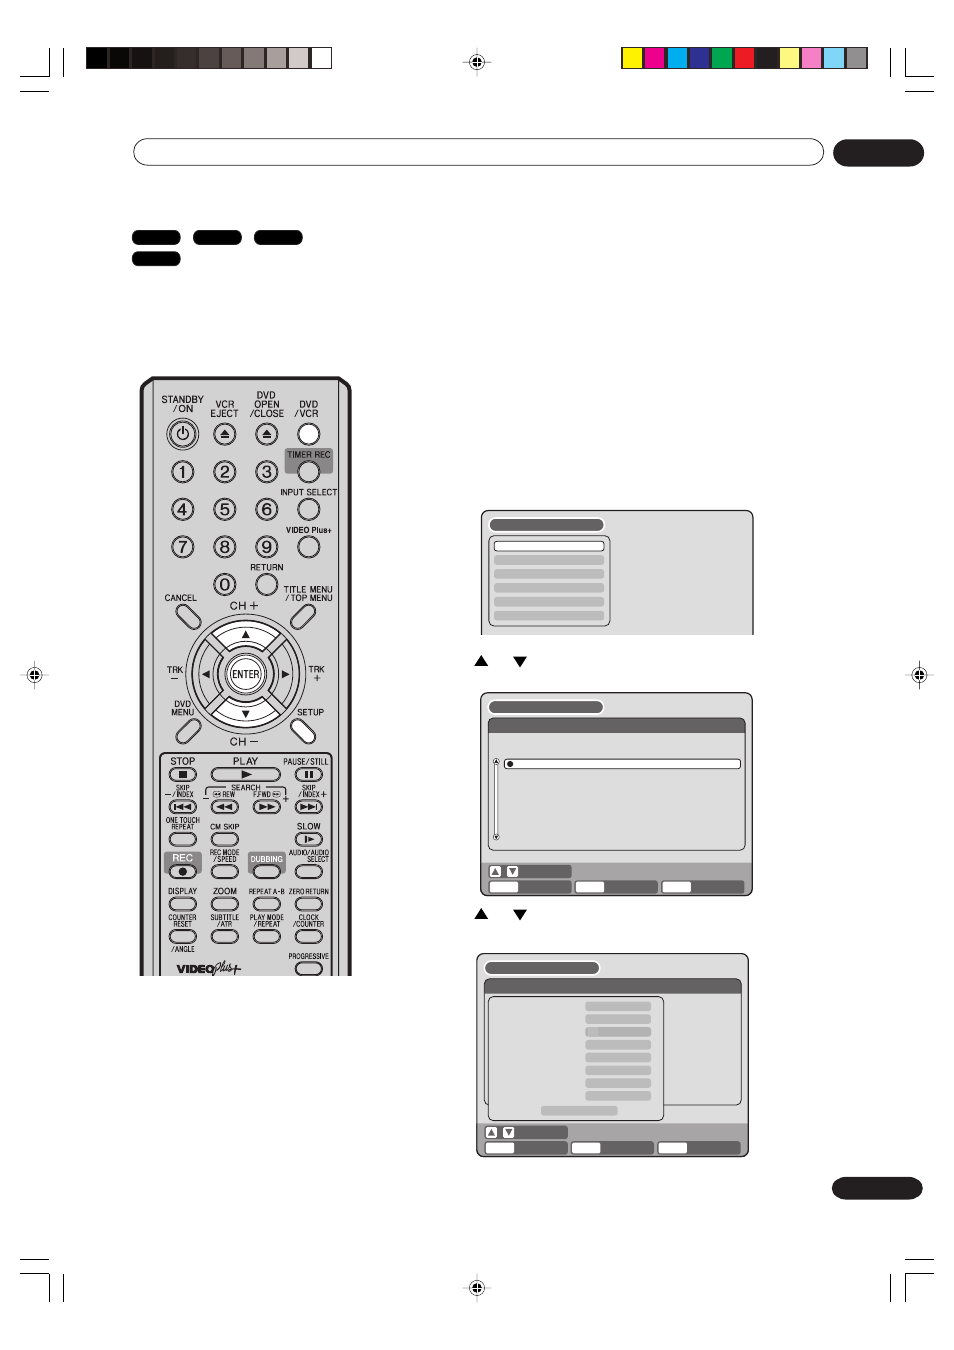
1
Press SETUP.
The SETUP MENU screen appears.
NOTE:
In the event of a power failure the
data of the automatic recording will
be maintained in the built-in memory
for about 30 minutes. Also, the clock
will continue to run for this period of
time. Thereafter the data will be
deleted. When the power resumes,
the time display will change to “0:00”
that the timer setting will have to be
set.
2
Press
or
to select “TIMER REC SET” and press ENTER.
The TIMER REC SET screen will appear.
3
Press
or
to select “NEW” and press ENTER.
The program screen will appear.
ENTER
RETURN
BACK
END
SELECT
SETUP
ENTER
TIMER REC SET
REC
REC
TO
MODE
VPS/
PDC
CH
END
START
DATE
NEW
SETUP MENU
TIMER REC SET
SYSTEM SETUP
AV SETUP
REC SETUP
CHANNEL SETUP
OTHER
SETUP MENU
RETURN
BACK
END
SELECT
SETUP
ENTER
ENTER
TIMER REC SET
REC
REC
TO
MODE
VPS/
PDC
TYPE
DATE (DD/MM)
START
END
CH
REC TO
REC MODE
VPS/PDC
ONCE
1
DVD
SP
OFF
OK
19/11(WED)
03:17
04:17
SETUP MENU
DVD-Video
VR mode
DVD-R
VCR
2H30301B_En_54_62
8/4/05, 19:24
59