Installation – Pioneer AVIC-D3 User Manual
Page 24
23
Installation
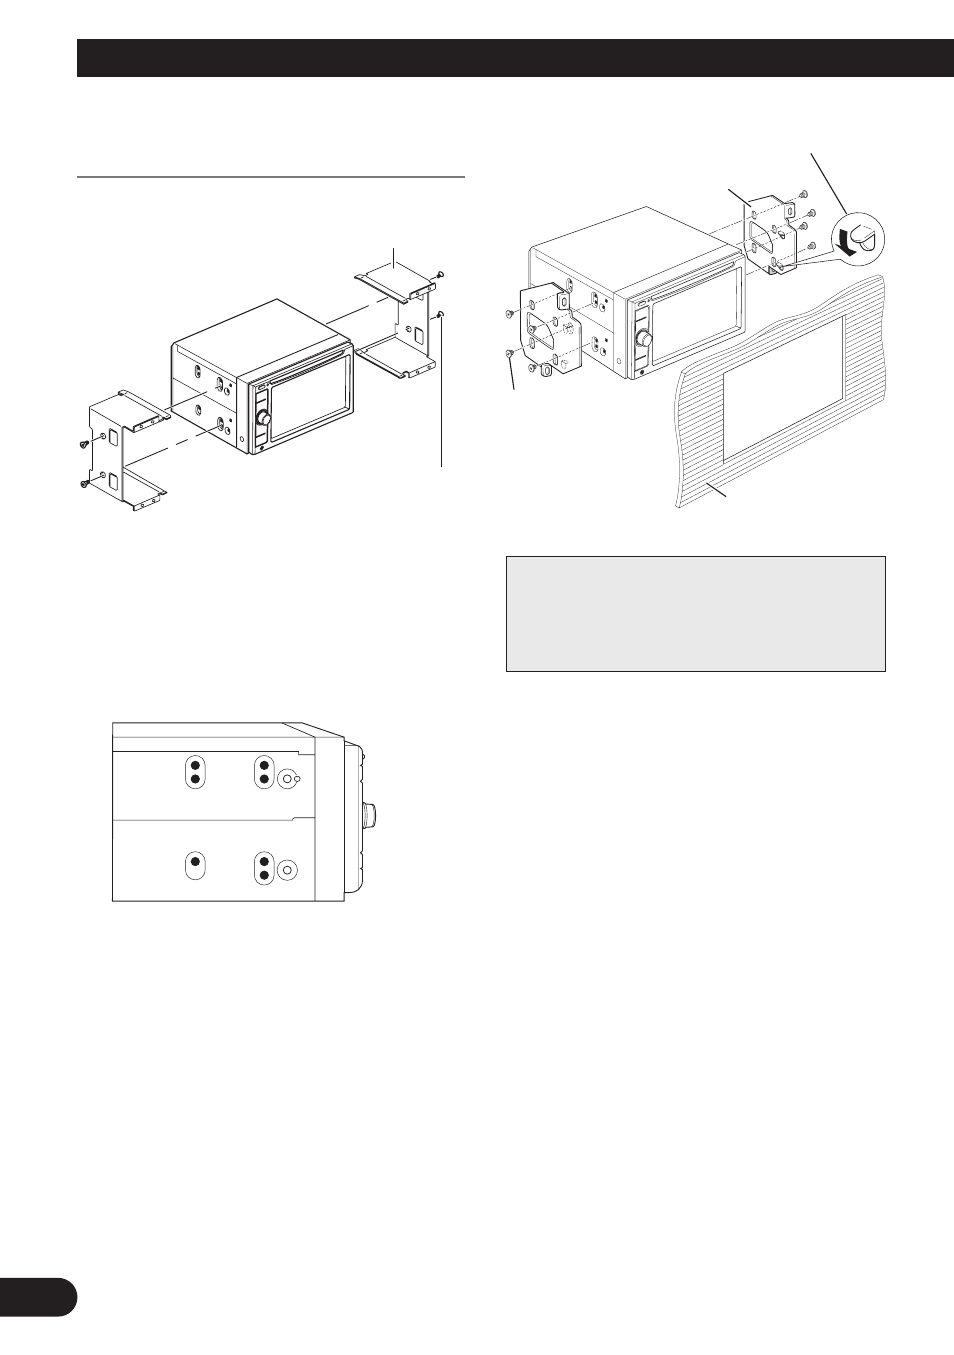
Installation using the screw holes on
the side of the navigation unit
1. Remove the side brackets.
2. Fastening the navigation unit to
the factory radio-mounting
bracket.
Position the navigation unit so that its
screw holes are aligned with the screw
holes of the bracket, and tighten the
screws at 3 or 4 locations on each side.
Note:
In some types of automobiles, discrepancy
may occur between the navigation unit and
the dashboard. If this happens, use the sup-
plied frame to fill the gap.
Side bracket
Screw for fixing the side bracket
(5
× 6 mm)
Factory radio mounting bracket
Binding screw or
flush surface screw
Be sure to use the
screws supplied
with this navigation
system.
Dashboard or console
If the pawl gets in the
way, bend it down
See also other documents in the category Pioneer Car speakers:
- AVIC-D3 (2 pages)
- TS-W1001DVC (18 pages)
- TS-W254F (9 pages)
- TS-WX20LPA (9 pages)
- TS-T3PRS (6 pages)
- TS-WX205 (8 pages)
- TS-H1702 (4 pages)
- TS-W12PRS (10 pages)
- TS-G1311 I (5 pages)
- TS-SW251 (2 pages)
- Super Tuner III D DEH-P6550 (132 pages)
- Super Tuner III D DEH-1150MP (96 pages)
- DEH-33HD (52 pages)
- AVH-P6450CD (14 pages)
- CD-IB100II (84 pages)
- DEH-16 (56 pages)
- AVIC-Z3 (2 pages)
- AVIC-Z3 (211 pages)
- FH-P8000BT (7 pages)
- AVIC-88DVD (15 pages)
- DEH-2200UB (117 pages)
- DEH-2200UB (8 pages)
- DEH-2200UB (20 pages)
- YRD5301BS (75 pages)
- Super Tuner III D DEH-P80RS (165 pages)
- DEH-P350 (124 pages)
- S-HTD340 (84 pages)
- Super Tuner III D DEH-1050E (56 pages)
- DEH P4500MP (56 pages)
- DEH P4500MP (136 pages)
- DEH-1500RXU/EW (71 pages)
- Super Tuner III D DEH-P3950MP (92 pages)
- DEH-7300BT (8 pages)
- DEH-7300BT (64 pages)
- DEH-7300BT (28 pages)
- AVIC F900BT (2 pages)
- AVIC F900BT (18 pages)
- AVIC F900BT (2 pages)
- AVIC F900BT (172 pages)
- AVIC F900BT (168 pages)
- AVIC F900BT (177 pages)
- AVIC F900BT (4 pages)
- GEX-P10XMT (4 pages)
- Super Tuner III D DEH-P4550 (116 pages)