Planet Technology VIP-280 User Manual
Page 41
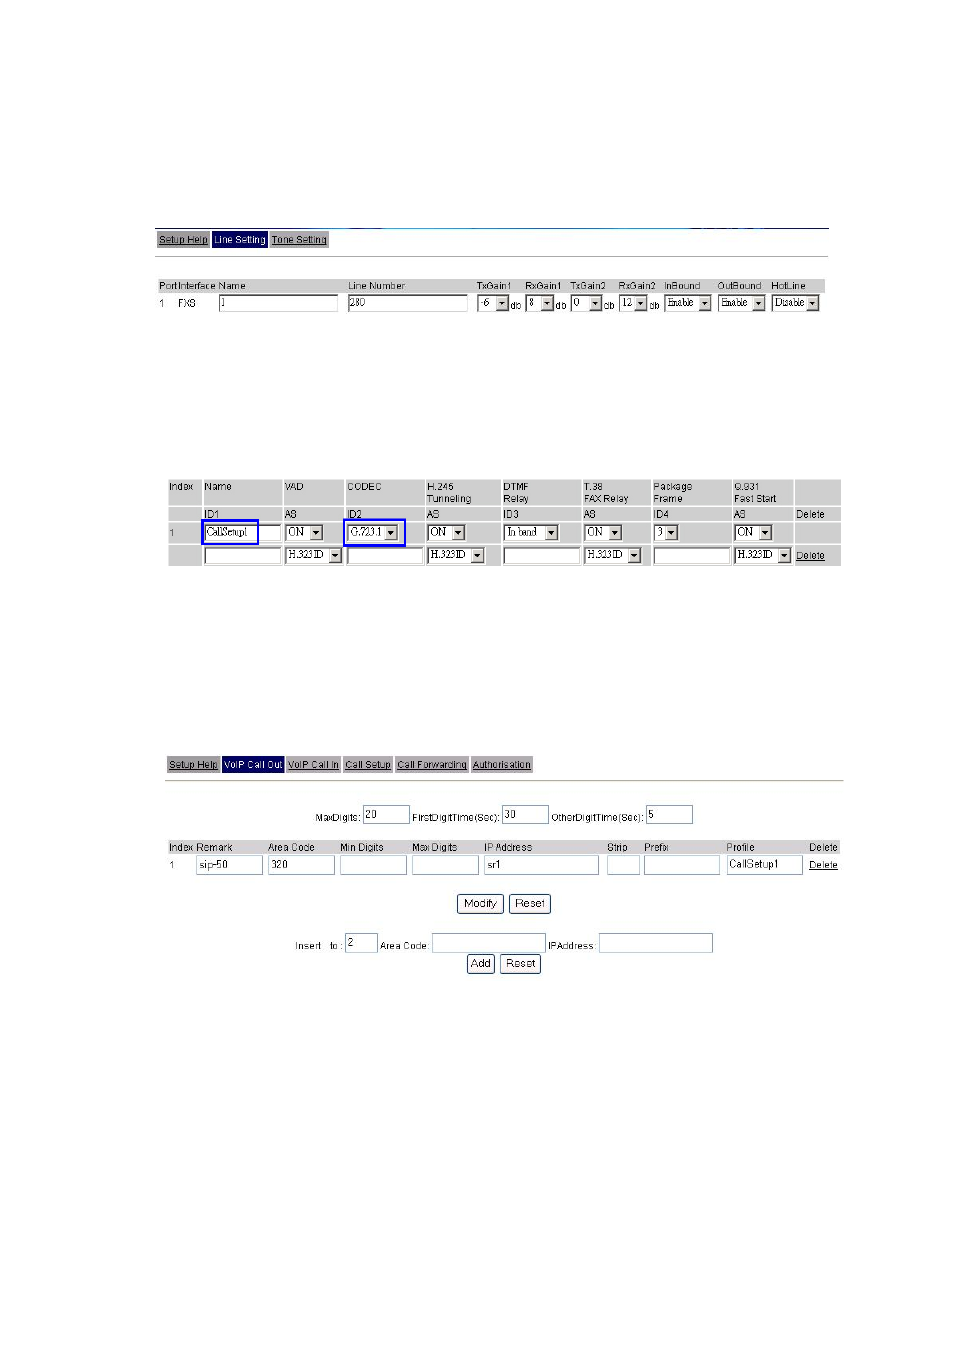
STEP 2:
Select Line Setting in the Line config menu. In this Line Setting page, please insert the
telephone number assigned to this line, and then the sample configuration screen is shown
below (in this sample, we’re using number 280 for incoming calls).
STEP 3:
If wants to assign the individual voice codec (G.723.1/G.729/G.711) to establish the voice
communications, please browse the Call Setup in the Call Routing menu, and refer to the
following configuration illustrate:
STEP 4:
Select VoIP Call Out in the Call Routing menu; insert the values of the index number, Area
Code, IP Address and Profile on the VoIP call out routing table for outgoing calls. The
sample configuration screen is shown below. The IP address “sr1” is the alias name of
register server 1. Area Code “320” is the number for VIP-320.
IP Address: sr1 is the alias name of register server 1.
Profile: CallSetup1 is the profile that created in STEP 3.
Area Code: 320 is the number to call the VIP-320. Of course, if there are more phones registered to
SIP-50, say, there are number 321, 322, 323… You can just use “3” as the area code,
whenever you dial 3xx, such as 322, 323, and then it will check SIP-50 for the available
phones.
Remark: sip-50 is the explaination of this index.
Note: please remember to press the
Save Modification
button after you modify the parameters.
41