Linksys BEFW11S4 User Manual
Page 19
DNS The Domain Name System (DNS) is how the Internet translates
domain or website names into Internet addresses or URLs. Your ISP will
provide you with at least one DNS Server IP Address. If you wish to use
another, type that IP Address in one of these fields. You can type up to
three DNS Server IP Addresses here. The Router will use these for quicker
access to functioning DNS servers.
WINS The Windows Internet Naming Service (WINS) manages each PC’s
interaction with the Internet. If you use a WINS server, enter that server’s
IP Address here. Otherwise, left this blank.
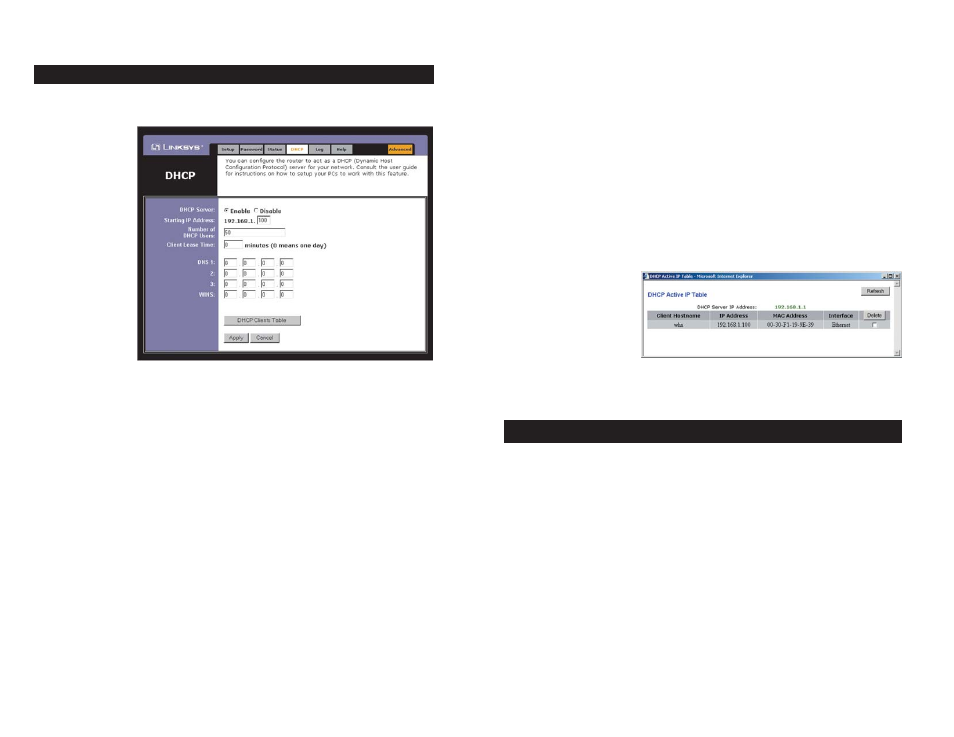
DHCP Clients Table When this button is clicked, a table similar to that
shown in Figure 5-9 appears, displaying a list of PCs assigned IP addresses
by the Router. Click the Refresh button to display the most current infor-
mation. If you wish
to delete a client’s
IP address, select
that client by click-
ing the box to the
right and click the
Delete button.
To clear any values you’ve entered on any page, click the Cancel button. To
apply any settings you’ve altered on any page, click the Apply button.
The Log tab, shown in Figure 5-10, provides you with a log of all incoming and
outgoing URLs or IP addresses for your Internet connection.
To access activity logs, select the Enable option next to “Access Log”. This
function can be disabled by clicking the Disable radio button.
With logging Enabled, you can choose to view temporary logs or have a per-
manent record, using the Logviewer software. Temporary logs can be accessed
from the Log tab by clicking either the Incoming Access Log or Outgoing
Access Log buttons. The Incoming Access Log gives you a log of all the
incoming Internet traffic while the Outgoing Access Log lists all the URLs and
IP addresses of Internet sites that users on your network have accessed.
Figure 5-9
Log
29
A DHCP (Dynamic Host Configuration Protocol) Server automatically assigns
IP addresses to each computer on its network. Unless you already have one, you
should set the
Router up as a
DHCP server.
This is done on
the DHCP tab,
shown in Figure
5-8.
DHCP Server Click the Enable option to enable the Router’s DHCP serv-
er function If you already have a DHCP server on your network, set the
Router’s DHCP option to Disable.
Starting IP Address Enter a numerical value for the DHCP server to start
with when issuing IP addresses.
Number of DHCP users Enter the maximum number of PCs that will
require IP addresses assigned by the Router. No more than 253 computers
can be used. In order to determine the DHCP IP Address range, add the
starting IP address (e.g., 100) to the number of DHCP users. By default, as
shown in Figure 5-9, if you add 50 users, the range or IP Addresses will be
192.168.1.100 to 192.168.1.149.
Client Lease Time The Client Lease Time is the amount of time a network
user will be allowed connection to the Router with their current dynamic IP
address. Enter the amount of time, in minutes, that the user will be “leased”
this dynamic IP address.
DHCP
30
Figure 5-8