Life Fitness G3 User Manual
Page 18
17
S
TEP
9:
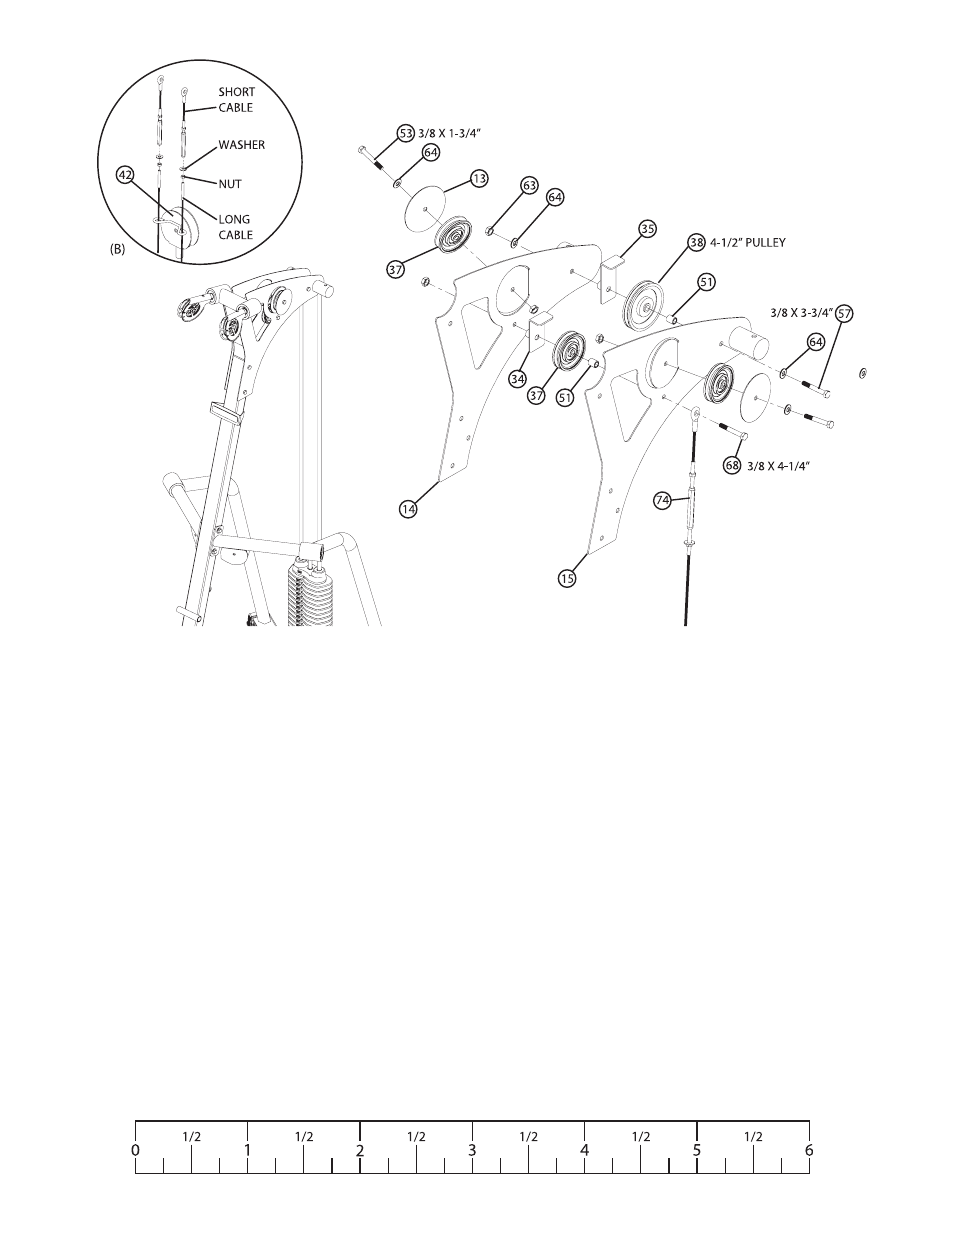
• Detach the Short Cable from both REAR GUIDE CABLES (74) as shown in Figure 9 (B).
• Slide the Long Cables of the REAR GUIDE CABLES (74) through the eyelets of the GUIDE
BRACKET (42) as shown in Figure 9 (B). Reattach the Short Cable of the REAR GUIDE CABLES
(74) to the Long Cable, leaving the GUIDE BRACKET (42) loose.
• Assemble two BOOM PULLEY PLATES (13) and two 3-1/2" PULLEYS (37) to the RIGHT and
LEFT BOOM PLATES (14 & 15) using two 3/8 x 1-3/4" BOLTS (53) and two 3/8" SILVER LOCK
NUTS (63). See Figure 9.
• Loosely assemble one 4-1/2" PULLEY (38), one 4-1/2" CABLE GUARD (35) and one 1" SPACER
(51) to the RIGHT and LEFT BOOM PLATES (14 &1 5), using one 3/8 x 3-3/4" BOLT (57), one
SILVER 3/8" LOCK NUT (63), and two 3/8” WASHERS (64).
• Loosely assemble one 3-1/2" PULLEY (37), one 3-1/2" CABLE GUARD (34), one 1" SPACER
(51) and both REAR GUIDE CABLES (74) to the RIGHT and LEFT BOOM PLATES (14 & 15),
using one 3/8 x 4-1/4" SILVER BOLT (68), one 3/8” SILVER LOCK NUT (63), and two 3/8” WASH-
ERS (64).
NOTE: The GUIDE BRACKET (42) will remain loose until attached to the pulley assembly in a
later step. Securely tighten all the nuts and bolts on the gym, starting with the nuts and bolts on
the frame, before proceeding any further.
F
IGURE
9