Installation and operation cart collector – Snapper 1691356 User Manual
Page 8
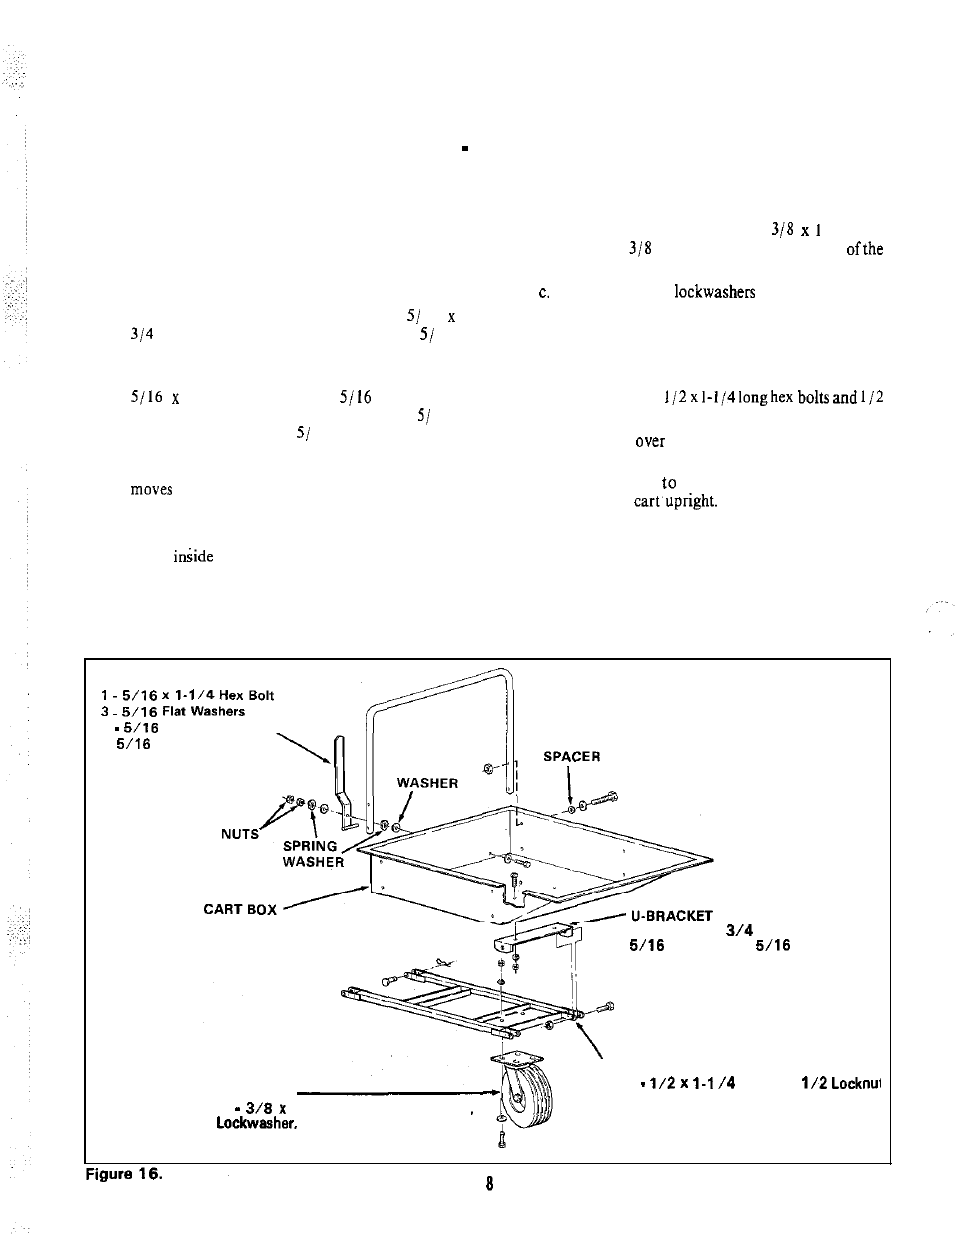
INSTALLATION AND OPERATION CART COLLECTOR
ASSEMBLY
1 . Remove all parts from inside the cart’s box. Open the
bag of parts and sort the fasteners into groups for
easier assembly
of the cart (figure 16).
2. Turn cart box’on one side.
a. Bolt U-bracket to bottom of box with two
16
long round head bolts. Secure with two
16
lockwashers and nuts.
b. Bolt latch handle to front side of box. Place one
I long hex bolt with
flat washer
through the inside of the box. Next place a
16
flat washer, latch handle,
16 flat washer, spring
washer (side with grooves on outside), and
locknut. Tighten the locknut until the latch handle
slowly.
3. Bolt swivel wheel to the H-frame.
a. Place the head of the swivel (end with four slotted
holes)
the H-frame (side with the ends bent
upward).
b. Align the holes and place four
long hex
bolts with
flat washers throughthe head
swivel and frame.
Secure with four
and nuts.
4. Turn cart’s box upside down and install H-frame to
U-bracket.
a. Align the two ends of the H-frame (end with the
swivel wheel attached) to the U-bracket and
secure with two
locknuts.
b.
DO NOT
tighten the locknuts. The box
pivots at this point for dumping.
5. Turn latch handle
lock the H-frame to the cart’s
box and turn
LATCH HANDLE
2
Spring Washers .
2
N u t s
2 Each 5/16x
Round Head Bolt,
Lockwasher,
Nut
H-FRAME
SWIVEL WHEEL
4 Each
1 Hex Bolt, 3/B Flat Washer,
3 / B
3 / B N u t
2 Each
Hex Bolt,