Snapper 1691356 User Manual
Page 10
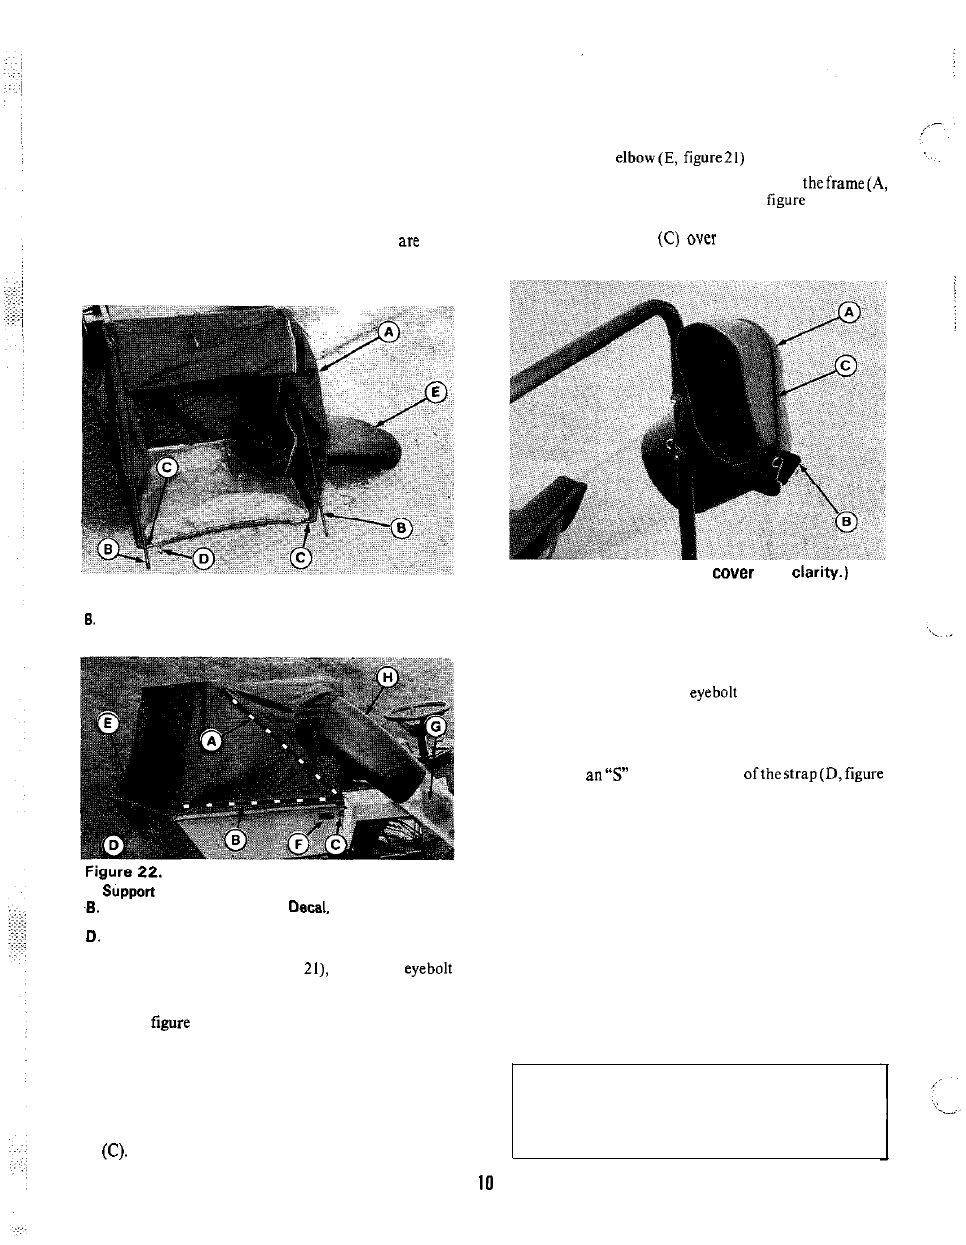
3. The support rod and frame rod must be inserted into
the cover (A, figure 21) as follows.
a. The frame rod (C, figure 21) must be inserted
through the bottom sleeve of the cover so that the
two bent endsextend out openings, which
next
to the cord loops (D). The frame rod position is
indicated by dotted line (B, figure 22).
Figure 21.
A. Cover
Support Rod
C. Frame Rod
D. Cord Loops
E. Elbow
A.
Rod Location
E. Clip
Frame Rod Location
F.
Warning
C. Cord Loop
G. Tube
strap
H. Elbow
b. The support rod (B, figure
which has
ends, must be threaded through the sleeve inside
the cover. The position is indicated by dotted line
(A,
22).
NOTE
A
WARNING
When you pick up cover to place over the frame, be
sure support rod (B, figure 21) is inside frame rod
It is important for the operator’s safety, that the
warning decal he installed.
4. Insert the
into thecoveropening.
5. Pick up the cover and place down onto
figure 20) inserting the elbow (A,
23) into the
bracket (B) (shown without cover for clarity). Pull
the rubber strap
the elbow and hook into
bracket as shown.
Figure 23. (Shown without
for
A. Elbow
B. Bracket
c. strap
6 . On each side, place the
end of the support rod
(B, figure 21) onto the frame rod, then insert frame
rod (A, figure 24) through the frame (B). Insert clip
(C) through frame rod to secure.
7. Insert
hook toeachend
22). Hook one end through washer (E, figure 22) and
pinch closed with a pliers.
8. Pull the cover down so it appears as in figure 22. To
secure the front, pull the cord loops (C) onto the
spacers. To secure the rear, hook the strap(D) onto
back of cart as shown.
9. Install warning decal (F, figure 22) so it is visible
from right-hand side. Make sure surface is clean.
Remove backing paper and tack edge of decal in
position. Then apply with heal of hand, smoothing
out bubbles. The edge of a ruler can also be used