Installation blower assembly, 36” mower – Snapper 1691356 User Manual
Page 3
INSTALLATION BLOWER ASSEMBLY, 36” MOWER
Remove the mower deflector by
two
carriage bolts,
and nuts. Save this
hardware for use when blower is removed for side
discharge.
2. Install strap (A,
I) as follows:
a. Drill a
hole for large spacer (B). Use the
supplied template on the last page. Align template
with deflector mounting holes
b. Install strap (A, figure 1) to
deck
with hardware
shown in figure 2.
c.
Check
the installation. The strap should
be
secured to deck with locknut
figure
small spacer (E) should be above the strap. The
large spacer (B) should be between strap and
mower deck.
3. The belt stop (A, figure 3) and hardware must be
relocated to hole (C) shown. Install self-tapping
screw
which was removed. in
of belt
Figure 3.
A.
Stop
Self-Tapping Screw
C. New Belt Stop Location
Figure 1.
E. Small Spacer
A. Strap
F. Pulley
6. Large spacer
G. Wing Nut
C. Holes, Deflector Mounting
H. Cup
D. Nut, Center Lock,
Locknut,
Center Lock
Mower Deck
Figure 2.
3
NOTE
To ease installation, engage PTO lever, so that
brake is away from pulley.
4. Remove the existing right-hand arbor pulley and
install the new double-groove pulley (F, figure I)
with existing capscrew, lockwasher and washer.
Torque to 55 to 70 ft.
Do not reinstall deck-drive
belt at this time.
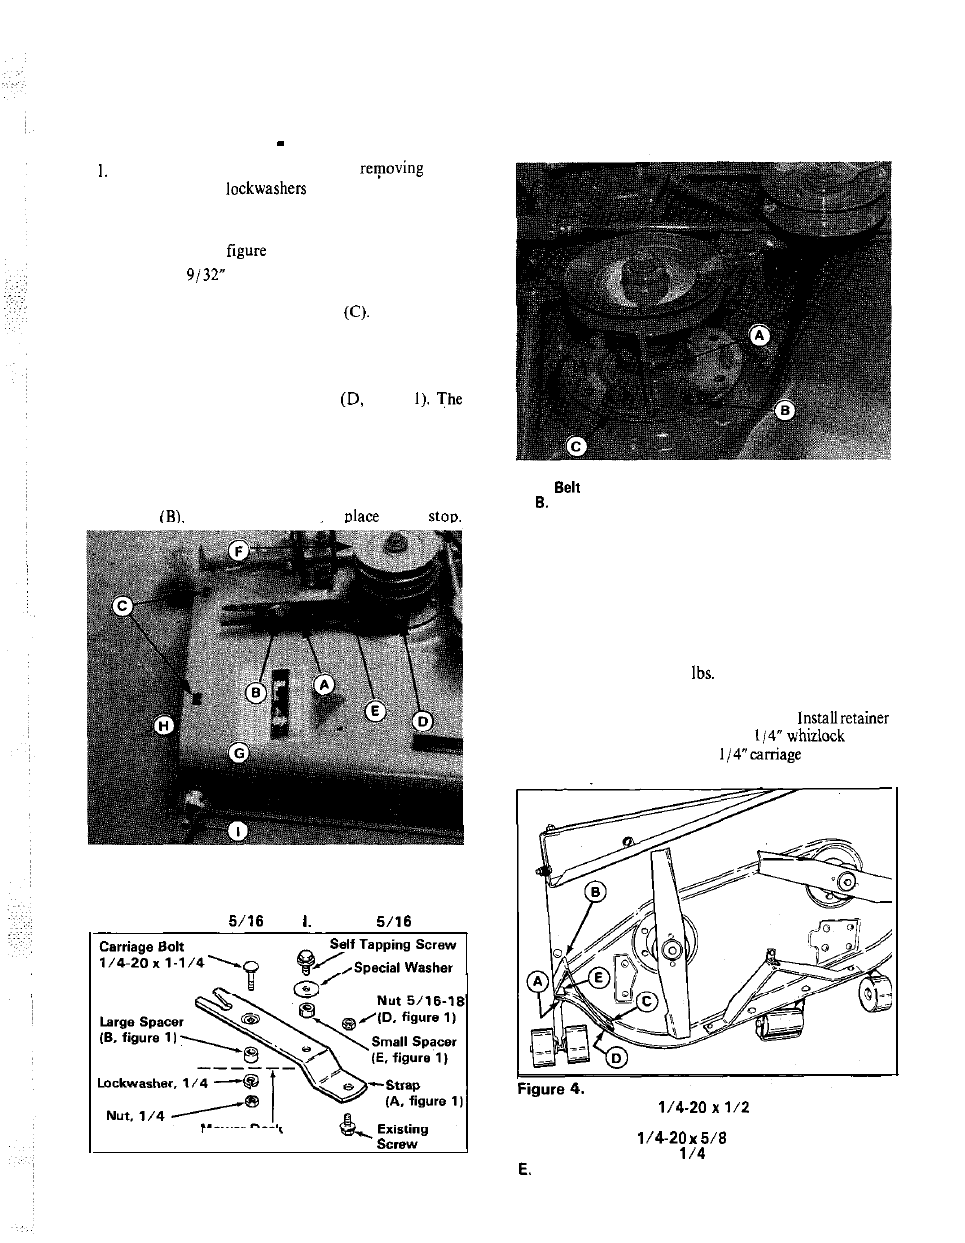
5 . Install the baffle (B, figure 4) as shown.
nut (E) in baffle, then screw the
screw
(A) into retainer nut. Insert
bolt (C) from
inside deck and install lockwasher and nut (D).
A. Screw. Whizlock.
6. Baffle.
C. Bolt, Carriage,
D. Lockwasher and Nut,
Retainer Nut