Snapper 1691356 User Manual
Page 12
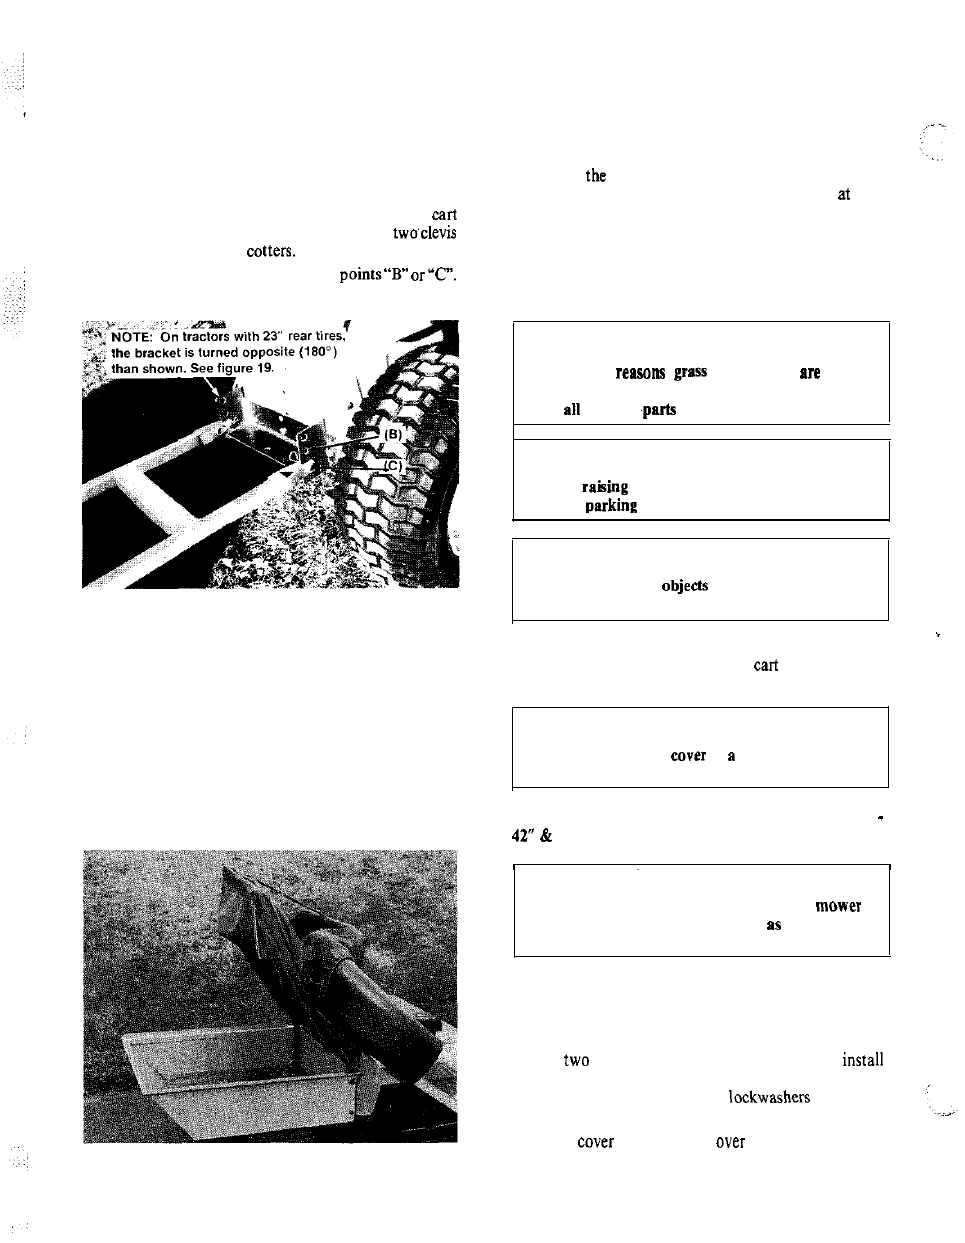
1. Attaching:
a. Attach the cart to the tractor by aligning the two
ends of the H-frame to the holes in the bracket
(figure 26). Use the holes that will make the
level, Secure the cart to the bracket with
pins and hairpin
b. Attach the cart to the bracket at
3. Move the latch handle to the unlock position and
dump
cart’s box. The connecting tube will slide
off the elbow and the cart’s box will dump a 90
degree angle for quick unloading.
4. If bagging the grass clippings is desired, the grass can
be pulled from the cart at the curve side into a plastic
lawn bag. Also, the grass can be dumped onto a tarp
for throwing into a trailer.
Figure 26.
DUMPING GRASS AND LEAVES
1. Back the tractor to the desired place for unloading.
Shut the tractor’s engine off before getting off the
tractor’s seat.
2. Unhook the strap from the door lock and raise the
cover assembly to the open position. Lock the cover
in place by hooking the strap to the locking tab
(figure 27).
Figure 27.
A
WARNING
For
safety
and debris
to be
removed only after engine is shut off, key removed,
and
moving
stopped.
A
WARNING
Before
cover, shut off engine, remove key,
and set
brake.
A
CAUTION
Do not
haul sharp
that may
puncture the
cover.
5. The cover can be removed entirely from the cart.
Once the cover is removed, the
can be used for
hauling bulky loads.
A
CAUTION
Be sure to store the
in safe place where it
cannot he torn.
OPERATING WITHOUT COLLECTION SYSTEM
48” MOWERS
A
WARNING
When
blower assembly is removed from
deck, the deflector must be installed
described in
this section.
To operate without the grass collection system, remove
the blower assembly by removing the front wing nut (C,
figure 25) and slipping belt off of the pulley. Re-install the
mower deflector (figure 28) and the original hardware.
Install
carriage bolts from bottom and
washers and nuts (A). Install the front washers (B) and
nut (C). Be sure flat washers and
are used at
all three locations.
Pivot the
(A, figure 29)
the arbor pulley and
hook into position.
12