Adjusting the viewfinder, Adjusting the backlight, Adjusting the color, contrast, and brightness – Sony XDCAM EX PMW-EX1 User Manual
Page 25: Turning the evf on/off, Adjusting the focus in the viewfinder, Caution, Adjusting the lcd monitor and viewfinder, Prepa ra ti ons, Lcd b.light switch lcd b.light + and – buttons, Nd filter
Adjusting the LCD Monitor and Viewfinder
25
P
repa
ra
ti
ons
Adjusting the backlight
Turning the backlight on/off
The backlight may not be necessary for viewing
images on the LCD monitor under bright ambient
light, such as in an outdoor location. Set the LCD
B.LIGHT switch to OFF to turn off the backlight.
Adjusting the brightness of the backlight
When you set the LCD B.LIGHT switch to ON,
you can adjust the brightness of the backlight,
using the LCD B.LIGHT + and – buttons.
Press the – button to darken the backlight. Press
the + button to make it brighter.
During adjustment, the backlight level bar
appears to indicate the adjustment value.
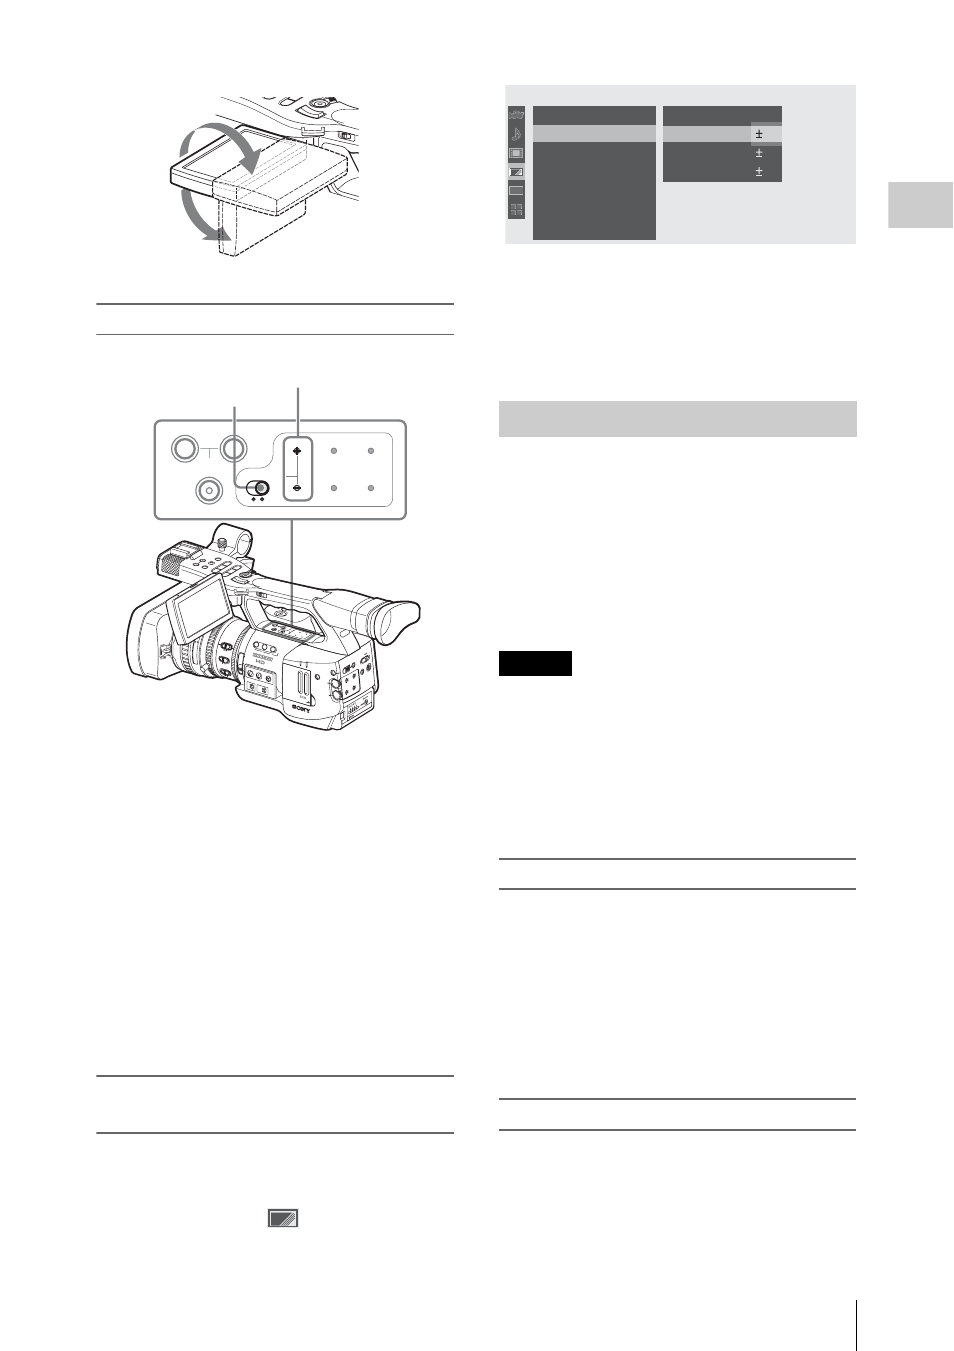
Adjusting the color, contrast, and
brightness
These adjustments can be made using the LCD/
VF SET menu.
Press the MENU button to set the camcorder to
Menu mode and select
(LCD/VF SET
menu) then “LCD” from the menu.
Set color, contrast and brightness of the LCD
monitor with the corresponding LCD menu
items: Color, Contrast, and Brightness
For details on menu operations, see “Basic Menu
Operations” on page 94.
If the picture on the LCD monitor is hard to view
under bright ambient light, you can use the
viewfinder to check the picture.
You can adjust the display conditions of the
viewfinder according to your current lighting
conditions.
These adjustments of the viewfinder have no
effect on pictures being recorded.
Do not leave the camcorder with the eyepiece of
the viewfinder facing the sun. Direct sunlight can
enter through the eyepiece, be focused in the
viewfinder, and cause fire.
Hereafter the viewfinder is referred to as “EVF”
(abbreviation of Electronic Viewfinder).
Turning the EVF on/off
With the factory setting, the EVF is turned on
when the LCD monitor is in its park position or is
rotated to face the subject.
You can change the setting so that the EVF is
always on regardless of the status of the LCD
monitor, using “EVF” (page 103) of the LCD/VF
SET menu. Change the “Power” setting from
“Auto” to “On.”
Adjusting the focus in the viewfinder
The eyepiece focusing (diopter compensation)
knob enables adjustment to match the eyesight of
operator so that the operator can view the image
clearly in the eyepiece.
PR
EV
RE
C
STA
RT
/ST
O
HO
LD
l
H L
OF
F
90°
180°
OFF
2
1
ND
FILTER
ZEBRA
PEAKIN
G
GAIN
B
A
PRST
L
M
H
WHITE
BAL
FULL A
UTO
SLOT SE
LECT
OPEN
ACCES
S
A
B
1
2
3
ASSIG
N
LENS IN
FO BR
T DISP
HISTO
GRAM
MENU
CH-1
AUDIO
LEVEL
CH-2
AUT
O
MA
NU
AL
INT
EXT
PIC
TUR
E
PR
OF
ILE
PM
W-E
X1
DC
IN
CH
-2
AUT
O
MA
NU
AL
INT
EXT
CH
-1
AUD
IO
SELE
CT
AUD
IO
IN
OFF
CA
ME
RA
CA
NC
EL
SEL
/SE
T
ME
DIA
15
2
5
40
81.2
10
3
1
0
5
1
0
3
0
1
5
5
.8
MANU
AUTO
MANU
AUTO
FOCUS
IRIS
MACRO
OFF
ON
TH
UM
BN
AIL
F R
EV
PR
EV
SE
L/S
ET
PLA
Y/P
AUS
E
STO
P
CA
NC
EL
F F
WD
NE
XT
RE
C
STA
RT
/ST
OP
HO
LD
RE
C
RE
VIE
W
l
s
L
j
G/S
J
MO
NIT
OR
VO
L
H L
OF
F
A
SHOT
TRAN
SITIO
N
B
LCD B
.LIGH
T
TC/U
-BIT/
DURA
TION
STATU
S
BARS
/CAM
DISP
LAY
BATT
INFO
ON
OFF
A
SHOT
TRANSITION
B
LCD B.LIGHT
TC/U-BIT/
DURATION
STATUS
BARS/CAM
DISPLAY
BATT INFO
ON
OFF
LCD B.LIGHT switch
LCD B.LIGHT + and – buttons
Adjusting the Viewfinder
Caution
00:00
Return
LCD
EVF
Peaking
Marker
Zebra
Display On/O f f
LCD/VF SET
Return
Color
Cont rast
Br i ght ness
: 0
:
0
:
0
: 0
B
B
B
B
B
B