Disc sanding – Woodstock W1828 User Manual
Page 22
Model W1828 (For Machines Mfg. Since 4/11)
-20-
O
PE
R
ATIO
NS
Disc Sanding
To use the sanding disc, do these steps:
1. DISCONNECT SANDER FROM POWER!
2. Set the angle of the table and miter gauge for your
operation. Make sure the table is about
1
⁄
16
" away
from the sanding disc.
3. Connect the sander to power, turn it ON, and allow
it to reach full speed.
4. Position the workpiece on the work table against the
miter gauge.
5. With light, but firm pressure, push the workpiece
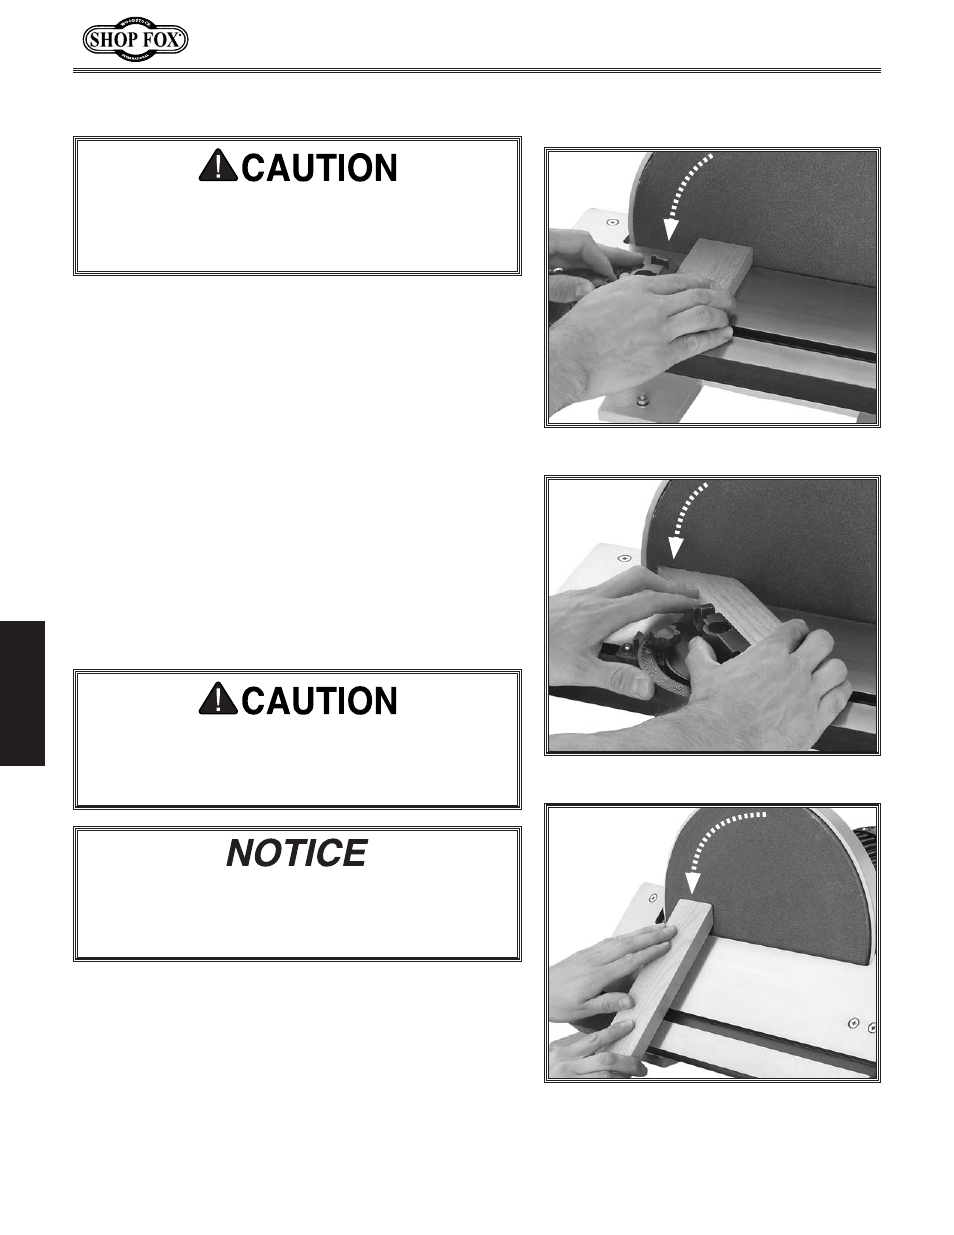
into the down-spin side of the rotating disc. See
Figures 16–18 for examples of disc sanding.
Figure 16. 90˚ disc sanding.
Figure 17. Miter sanding.
Figure 18. Sanding with table angled.
To prevent burning the workpiece and overloading
the sanding disc, move the workpiece slowly back
and forth from the left side of the sanding disc to the
center.
Always keep the workpiece on the side of the wheel
that is rotating down toward the table. This will keep
the workpiece from flying out of your hands from the
rotational forces.
Note: To perform sanding on compound-angle cuts, tilt
the table and rotate the miter gauge to the appropriate
angles.
To reduce the risk of your fingers getting trapped
between the work table and sanding disc, make sure
the table is approximately
1
⁄
16
" away from the sand-
ing disc.