Af`ek`e – Woodstock SHOP FOX W1829 User Manual
Page 25
-23-
Df[\cN(/)0D]^%J`eZ\0&((
FG
<
I
8
K@FEJ
<[^\Af`ek`e^
The purpose of edge jointing is to produce a finished,
flat-edged surface that is suitable for joinery or finishing
(see Figure
*)). It is also a necessary step when squaring
rough or warped stock.
Kf\[^\af`ekfek_\af`ek\i#[fk_\j\jk\gj1
(% Read
and
understand
J8=
)% Inspect your stock for dangerous conditions as
described in the
JkfZb@ejg\Zk`feI\hl`i\d\ekj
instructions, on
GX^\)'.
*% Set the cutting depth for your operation.
Efk\1 9\kn\\e
(
Ð
(-
Xe[
(
Ð
/
]fi\[^\af`ek`e^#lj`e^
Xdfi\j_Xccfn[\gk_]fiZ\ikX`ejg\Z`\jfi]fin`[\
jkfZb.
+% Make sure the fence is set to 90˚.
,% If your workpiece is bowed (warped), place it so
the concave side is face down on the surface of the
infeed table.
-% Start
the
jointer.
.% Press the workpiece against the table and fence with
firm pressure. Use your trailing hand to guide the
workpiece through the cut, and feed the workpiece
over the cutterhead (see
=`^li\**).
Efk\: @]pflic\X[`e^_Xe[^\kjn`k_`e+f]k_\
Zlkk\i_\X[#c`]k`klgXe[fm\ik_\Zlkk\i_\X[#Xe[
gcXZ\`kfek_\gfik`fef]k_\nfibg`\Z\k_Xk`j
fm\ik_\flk]\\[kXYc\%=fZljpfligi\jjli\fek_\
flk]\\[\e[f]k_\nfibg`\Z\n_`c\]\\[`e^#Xe[
i\g\Xkk_\jXd\XZk`fen`k_pflikiX`c`e^_Xe[`]`k
^\kjn`k_`e+f]k_\Zlkk\i_\X[%B\\gpfli_Xe[j
jX]\Ç;FEFKc\kk_\d^\kZcfj\ik_Xe+]ifdk_\
Zlkk\i_\X[
/% RepeatJk\g. until the entire edge is flat.
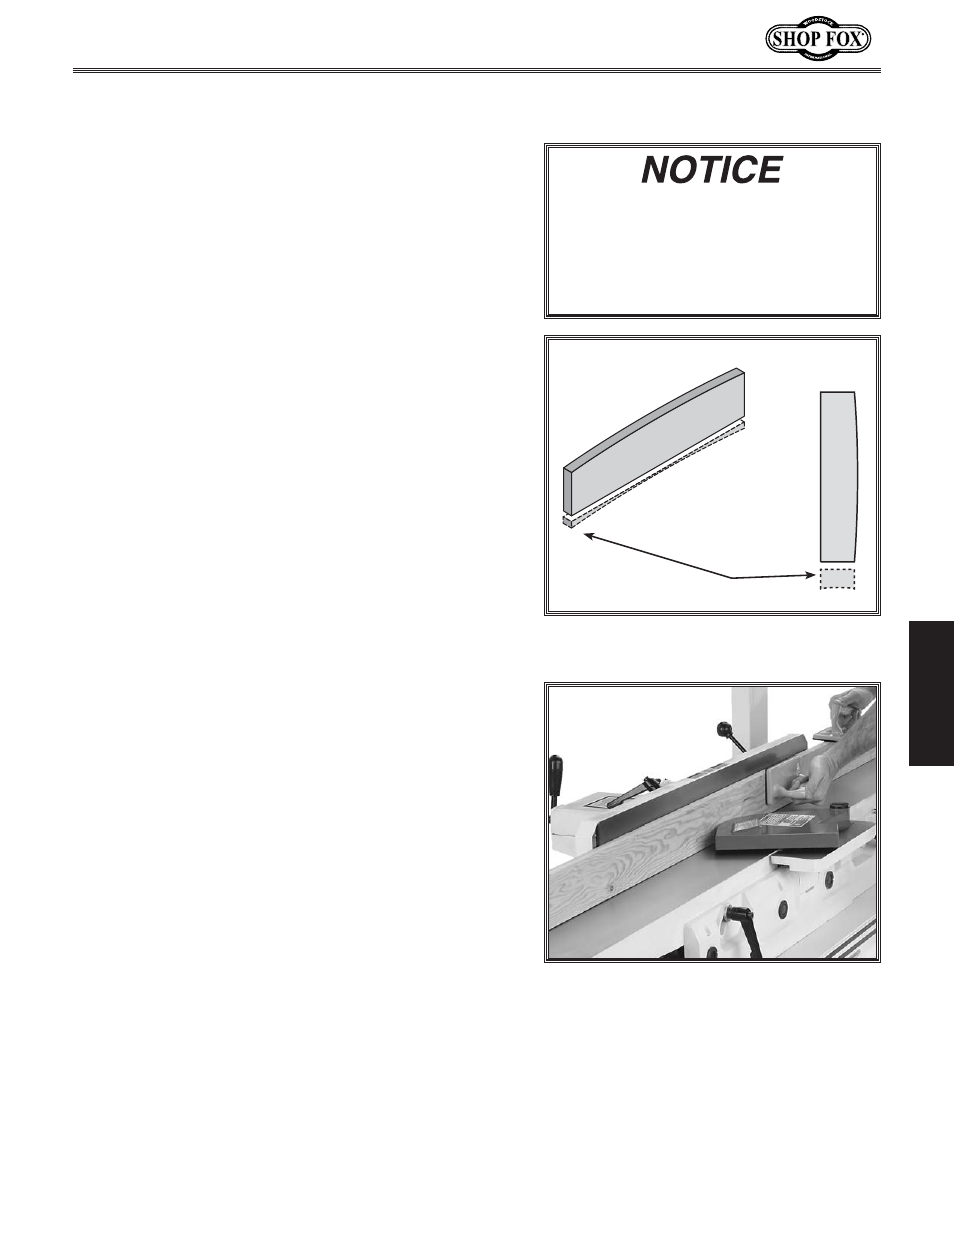
=`^li\**% Typical edge jointing operation.
=`^li\*)%Illustration of edge jointing
results.
Portion
Removed with
Jointer
@] pfl Xi\ efk \og\i`\eZ\[ n`k_ X
af`ek\i#j\kk_\[\gk_f]Zlkkf'#Xe[
giXZk`Z\]\\[`e^k_\nfibg`\Z\XZifjj
k_\ kXYc\j Xj [\jZi`Y\[ Y\cfn% K_`j
gifZ\[li\ n`cc Y\kk\i gi\gXi\ pfl ]fi
k_\XZklXcfg\iXk`fe%