Assembly, Se tu p – Woodstock W1815 User Manual
Page 16
-14-
Model W1815 (Mfg. Since 10/10)
SE
TU
P
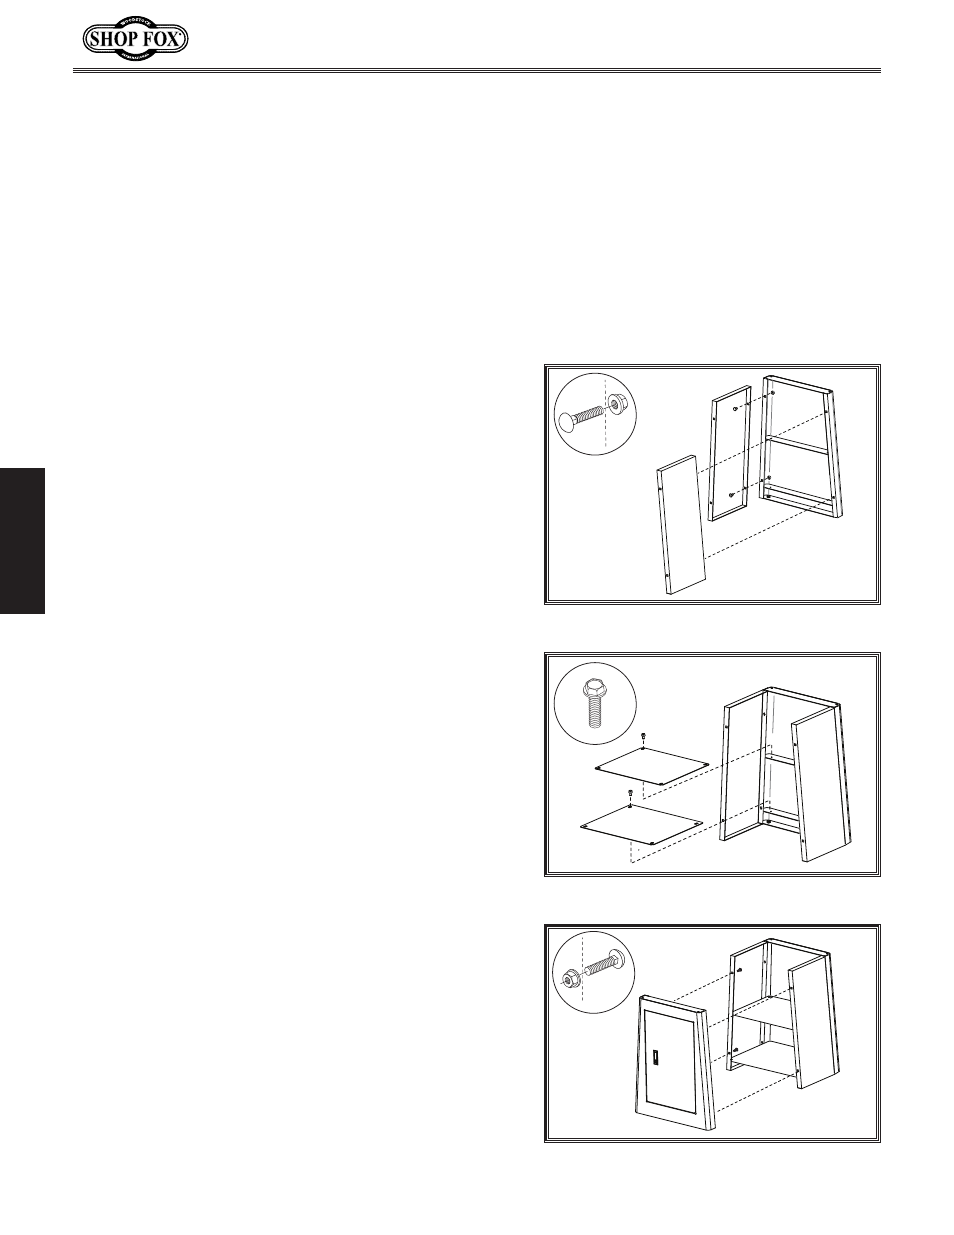
Figure 5. Side and rear panel installation.
Figure 7. Door w/panel installation.
Figure 6. Shelf installation.
Assembly
Before beginning assembly, refer to the inventory list
and group all fasteners with their intended components.
Doing this will make assembly easier. When assembling
this machine, tighten fasteners using hand tools only. Be
careful if using air or electric impact tools to assemble
this machine because fasteners can easily be over-
tightened, causing them to dig into the paint, and strip
threads
To assemble the cabinet and mount the sander, do
these steps:
1. Fasten the left and right panels to the rear panel, as
shown in
Figure 5, using (4)
5
⁄
16
"-18 x
3
⁄
4
" carriage
bolts and (4)
5
⁄
16
"-18 flange nuts.
3. Fasten the panel and door assembly to the left and
right panels, as shown in
Figure 7, using (4)
5
⁄
16
"-18
x
3
⁄
4
" carriage bolts and (4)
5
⁄
16
"-18 flange nuts.
2. Fasten the upper and lower shelves, as shown in
Figure 6, using (8) M6-1 x 12 flange bolts.