JVC VN-V25U User Manual
Page 27
27
6.
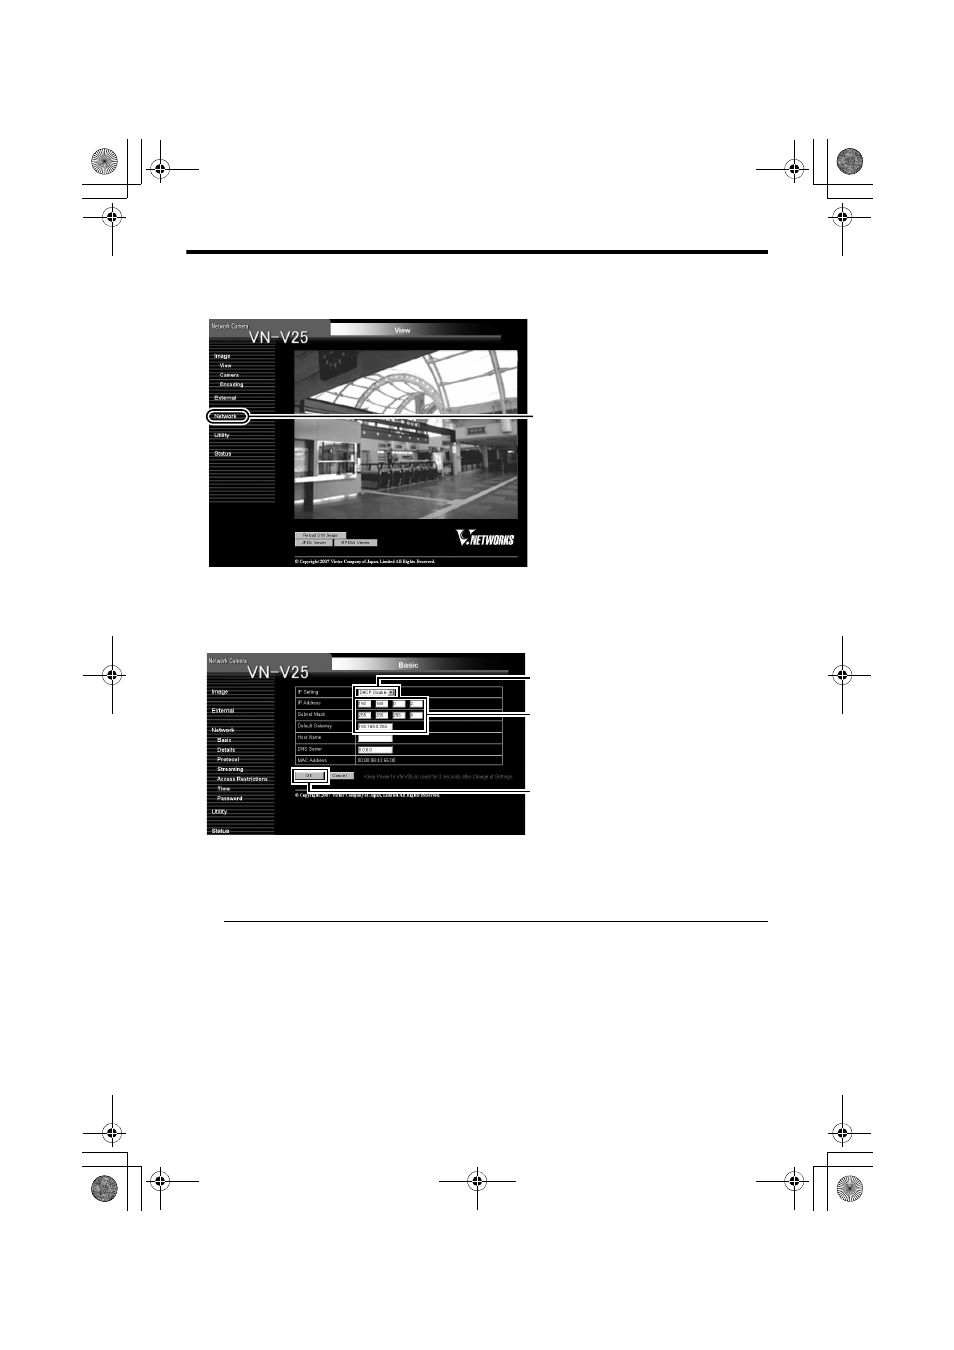
The top page of VN-V25U appears
7.
The [Basic] page with the IP address settings appears when DHCP is not in use
A confirmation screen appears. Press the [OK] button. VN-V25U restarts using the new IP address. It
takes about one minute for the camera to reboot.
Note:
● Access from this computer may fail when the IP address of VN-V25U is changed. To enable access
to VN-V25U from the same computer, alter the IP address at the computer accordingly.
Click on [Network], followed by [Basic]
on the next submenu.
A
B
C
Enter the values you wish to specify in
the [IP Address], [Subnet Mask] and
[Default Gateway] fields.
Click [OK].
Set the [IP Setting] item to [DHCP
Disable].
VN-V25U_EN.book Page 27 Friday, November 2, 2007 11:26 PM
See also other documents in the category JVC Car Video:
- KW-AVX716 (666 pages)
- KD-S777R (46 pages)
- KD-S777R (4 pages)
- KD-AVX44 (6 pages)
- KD-AVX44 (301 pages)
- EXAD KD-AVX33 (6 pages)
- LVT2086-001B (147 pages)
- KW-AVX720 (6 pages)
- KD-DV4202 (6 pages)
- 0110NYMMDWJEIN (4 pages)
- LVT2086-001A (147 pages)
- KW-AVX720 (6 pages)
- KW-AVX720 (257 pages)
- VN-V25U (48 pages)
- VN-V25U (40 pages)
- KD-R400 (4 pages)
- KD-DV7302 (6 pages)
- KD-ADV5490 (6 pages)
- KW-AVX830 (6 pages)
- KW-AVX830 (279 pages)
- KW-AVX730 (279 pages)
- KW-ADV790 (207 pages)
- KW-ADV790 (6 pages)
- KD-SX838 (4 pages)
- XL-MV35TN (28 pages)
- KD-NXD505J (357 pages)
- KD-AV7001 (6 pages)
- KD-AV7001 (363 pages)
- 0805MNMMDWJEIN (4 pages)
- KV-MR9010 (6 pages)
- KD-ADV49 (225 pages)
- KV-MH6510 (36 pages)
- LVT1627-001A (252 pages)
- KT-HD300 (4 pages)
- KD-AVX40 (6 pages)
- KD-AVX40 (6 pages)
- KD-AVX40 (292 pages)
- XL-MV558GD (27 pages)
- GET0602-001A (362 pages)
- KV-M706 (10 pages)
- 0509DTSMDTJEIN (6 pages)
- LVT1774-001A (126 pages)
- KV-M706 (4 pages)
- KD-AV7000 (352 pages)