Locate the end point, Prepare the source tape, Prepare the vhs deck for dubbing – JVC HR-DVS3U User Manual
Page 65: Start random assemble editing, End random assemble editing
Masterpage:Right-NoTitle0
EN
65
Filename [DVS3U_3-EN.fm]
Page 65
January 10, 2002 10:43 am
F
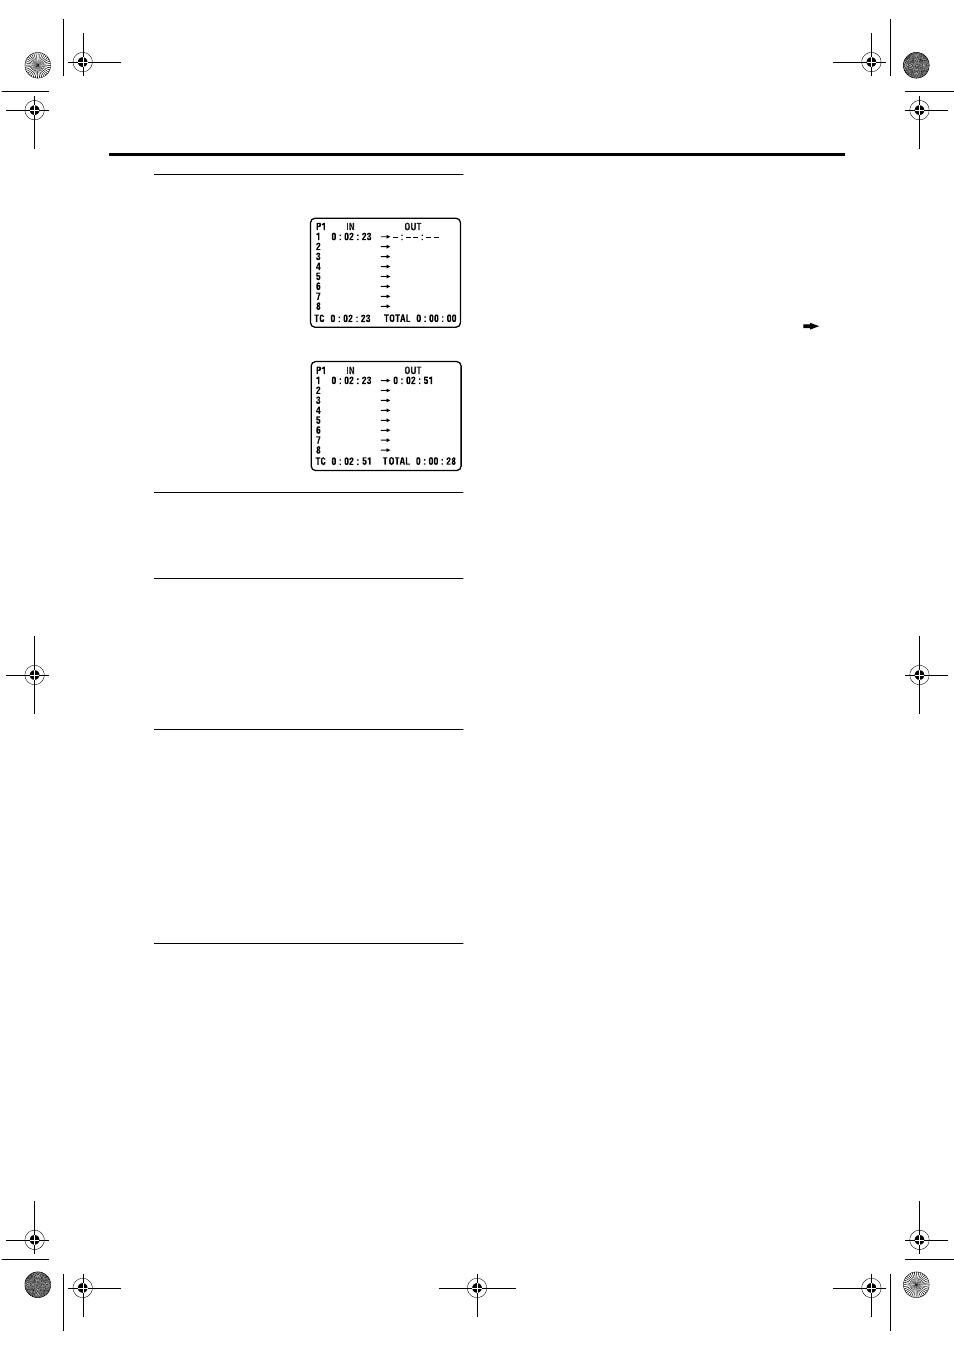
Locate the end point.
G
Prepare the source tape.
Rewind the tape in the DV deck to the beginning of the
scene you want to edit.
H
Prepare the VHS deck for dubbing.
A Press S-VHS.
B Search for the point where you want to start dubbing
by pressing PLAY (
4
), FF (
5
) or REW (
3
) then
press STOP (
8
).
C Press REC (
7
), then the VHS deck enters the Record
Pause mode.
I
Start Random Assemble Editing.
Press START (or OK).
● Automatic editing begins; all the specified scenes are copied
to the VHS deck in the order they were registered.
● The on-screen display remains while your VCR searches for
each scene (blinking cursor indicates scene currently being
searched for), but disappears during actual editing.
● During scene search, the VHS deck automatically enters its
Record-Standby mode.
● When all registered scenes have been edited, the DV deck
enters the Pause mode, the VHS deck enters its Record Pause
mode, and “– : – – : – –” blinks at the next available number.
J
End Random Assemble Editing.
Press R.A.EDIT twice to return to the normal screen.
Press STOP (
8
) to stop the VHS deck’s Record Pause
mode.
Press DV, then press STOP (
8
) to stop the DV deck’s Pause
mode.
To Make Corrections ...
... in step 5 or 6, you can cancel registered in and out points by
pressing
CANCEL
. Each time you press, the preceding point is
erased.
● If, for example, you have registered 5 sets of in and out points
and want to reset the first set, you have to press CANCEL until
all points after the first set have been erased. Reenter them
after you have repaired the first set of points.
NOTES:
● When Random Assemble Editing does not work, press
,
then perform Random Assemble Editing again.
● To cancel the registered scene, press CANCEL. Each time
CANCEL is pressed, the latest registered scene is erased.
● When the source tape has more than 2 identical time codes
(
੬
pg. 41), the VCR may not find the edit-in point you set
and a malfunction may occur.
● When choosing a scene, set edit-in and edit-out points so that
there's a relatively large difference between them.
● If the search time for an in-point exceeds 5 minutes, the VHS
deck's Record-Pause mode will be cancelled and editing will
not take place.
● If there are blank portions before or after the edit-in and edit-
out points, a blue-backed screen may be included in the
edited version.
● Since time codes register time only as accurately as seconds,
the time code total time may not match the total program time
exactly.
● To use Random Assemble Editing consecutively for two or
more programs, press START for each program.
When dubbing from another Mini DV cassette, change the
Mini DV cassette first, and then press START.
Press PLAY (
4
) to start
playback. Find the edit-out
point where you want the
edited scene to end by
pressing PAUSE (
9
), then
press IN/OUT.
● The edit-out point is registered
in memory and appears on the
screen.
● The total time of the edited
scenes is displayed to the right
of “TOTAL”.
● Repeat steps 5 and 6 for each
additional scene.
DVS3U_1-EN.book Page 65 Thursday, January 10, 2002 10:51 AM