Setting cable box's brand and channel – JVC HR-DVS3U User Manual
Page 21
Masterpage:Right-NoTitle0
EN
21
Filename [DVS3U_1a-EN.fm]
Page 21
January 10, 2002 10:49 am
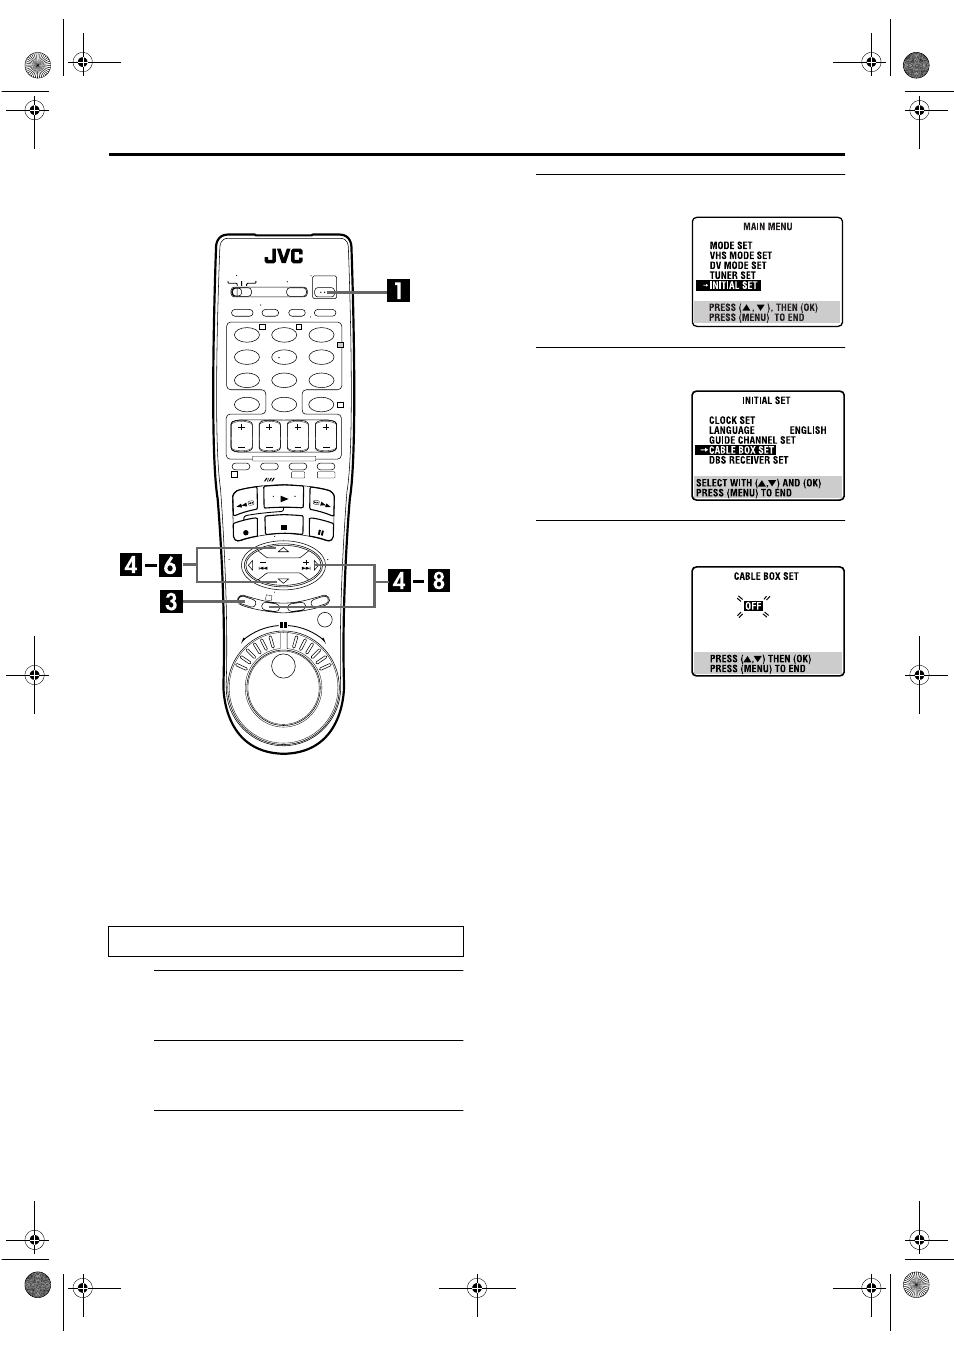
Setting cable box's brand and channel
After installation, set the cable box’s brand and channel
correctly; otherwise, the Controller cannot work
correctly.
A
Turn on the VCR.
Press POWER.
B
Turn on the cable box.
Turn on the cable box’s power.
C
Access the Main Menu screen on the VCR.
Press MENU.
D
Access the Initial Set screen.
E
Access the Cable Box Set screen.
F
Select the cable box’s channel.
Your selection depends on how
the cable box is connected to
your VCR.
If the cable box is connected
to your VCR’s ANTENNA IN
connector on the rear panel,
press
rt
until the channel
number representing the cable
box’s output (CH2 – CH9) appears on the screen.
If the cable box is connected to your VCR’s AUDIO/
VIDEO IN connectors on the rear panel, press
rt
until
“ON L-1 (REAR)” appears on the screen.
If you do not use a cable box, press
rt
until “OFF”
appears on the screen.
Turn on the TV and select the AV mode.
1
2
3
4
5
6
7
8
9
0
2
4
1
3
T
W
DV
S-VHS
Press
rt
to move the
highlight bar (arrow) to
“INITIAL SET”, then press OK
or
e
.
Press
rt
to move the
highlight bar (arrow) to
“CABLE BOX SET”, then
press OK or
e
.
DVS3U_1-EN.book Page 21 Thursday, January 10, 2002 10:51 AM