Normal dubbing – JVC HR-DVS3U User Manual
Page 55
Masterpage:Right-NoTitle0
EN
55
Filename [DVS3U_3-EN.fm]
Page 55
January 10, 2002 10:43 am
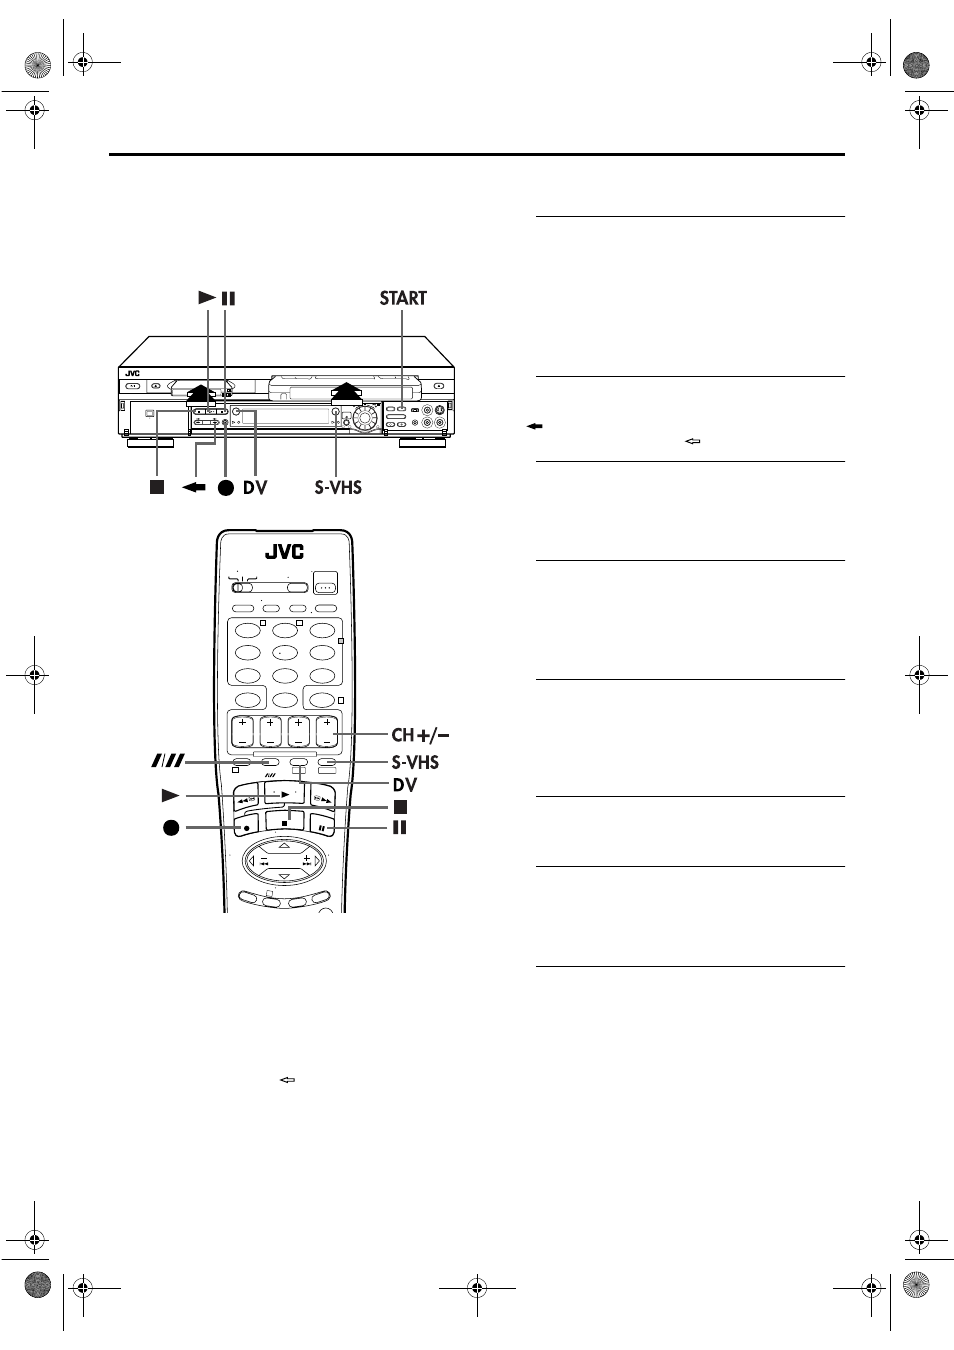
Normal Dubbing
(from VHS to DV)
NOTES:
● If you set the dubbing direction incorrectly, you could erase an
important recording that you wanted to copy. It is
recommended to conduct a test with unimportant cassettes
first.
● There may be a discrepancy of several seconds between where
you intend editing to start, and where it actually starts.
● The superimposed indication during the operation or dubbing
is not recorded.
● To cancel the dubbing mode, press CH +/– so that the
dubbing direction indicator (
S-VHS) goes off.
● Before you start dubbing, set “SOUND MODE” to the
appropriate mode. (
੬
pg. 76)
You can dub selected scenes on a tape, starting and
stopping wherever you wish.
A
Load cassettes.
For the VHS deck
Insert a VHS (or S-VHS) cassette with the record safety
tab removed.
For the DV deck
Insert a Mini DV cassette with the erase protection switch
set to “REC”.
B
Select the dubbing direction.
Press .
● The dubbing direction indicator (
S-VHS) lights.
C
Set the tape speed.
Press DV, then press SP/LP (
p
).
● “VHS
]
DV” appears on the TV screen if “SUPERIMPOSE” is
set to “ON”. (
੬
pg. 71)
D
Locate the start point on the VHS deck.
A Press S-VHS.
B Press PLAY (
4
) to start playback.
C Press PAUSE (
9
) to pause playback a little before the
start point.
E
Prepare the DV deck for dubbing.
A Press DV.
B Press and hold PAUSE (
9
) and press REC (
7
) so that
the DV deck enters the Record Pause mode.
● VHS playback indicator and DV recording indicator light.
F
Start dubbing.
Press START.
G
Pause dubbing.
Press START.
● The DV deck enters the Recording Pause mode, then the VHS
deck enters the Dubbing Pause mode.
H
End dubbing.
Press STOP (
8
) to stop recording on the DV deck. Then
press S-VHS and press STOP (
8
) to stop playback on the
VHS deck.
1
3
2
1
2
3
4
5
6
7
8
9
0
2
4
1
3
T
W
DV
S-VHS
DVS3U_1-EN.book Page 55 Thursday, January 10, 2002 10:51 AM