Installing the projector and screen (cont’d) – JVC DLA-SH4KNL User Manual
Page 62
14
Connection and Installation
Ⅵ When shift amount in the right direction is
+25 %
Install the projector such that the center of the lens is
aligned with the 1/4 position from the left edge of the
screen.
Ⅵ When shift amount in the left/right direction
is 0 %
Install the projector such that the center of the lens is
aligned with the center of the screen.
Ⅵ When shift amount in the left direction is –25 %
Install the projector such that the center of the lens is
aligned with the 1/4 position from the right edge of the
screen.
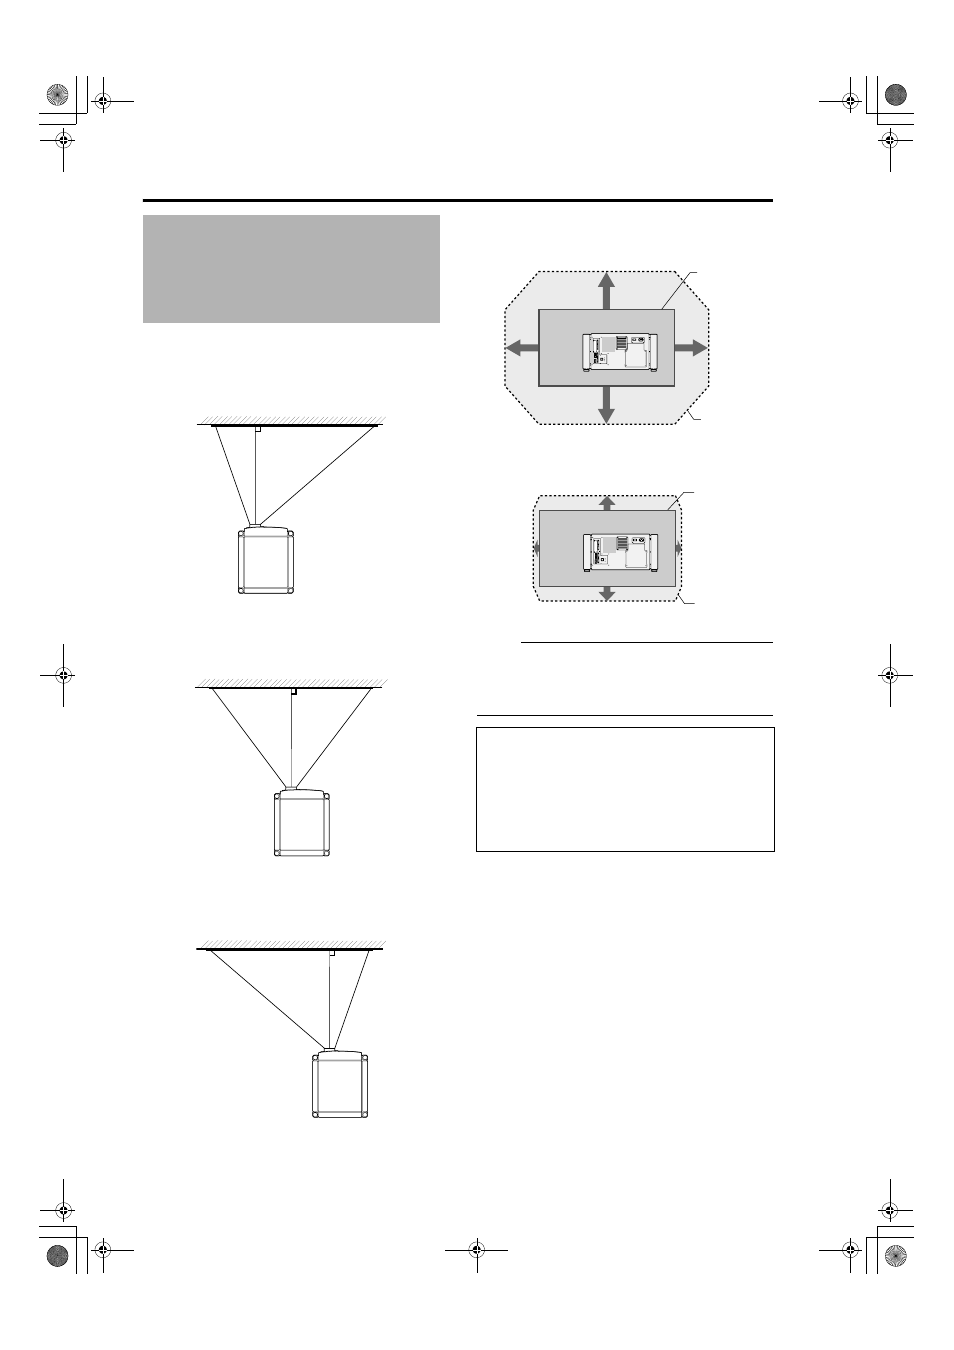
Ⅵ Movable Range of Projected Image
ⅷ GL-MS4015SZG Zoom lens
ⅷ GL-MS4011SG Short focal length lens
NOTE:
● When using the lens shift feature, do not exceed the
range (shift amount) as shown above. If the shift
amount exceeds the range as shown, shadows will
appear on the projected image.
Installing the Projector
and Screen (Cont’d)
Lens Fixation Mechanism
A screw for securing the lens mechanism is attached in
the factory shipment to prevent damage of the
equipment during transportation. If the lens does not
move horizontally or vertically when you operate
AShiftB
in the Lens menu, this could be because the screw has
not been removed. When this occurs, please consult
your authorized dealer.
25 %
50 %
50 %
25 %
Projected
Image
Movable
Range
5 %
15 %
15 %
5 %
Projected
Image
Movable
Range
DLA-SH4KNL_EN.book Page 14 Thursday, June 12, 2008 4:25 PM