JVC DLA-G150HTE User Manual
Page 17
DLA-G150HTE
1-17
No.51847
29
Connecting to Various Devices
ENGLISH
DEUTSH
FRAN
ÇAIS
ITALIANO
ESPAÑOL
Connecting to Computer Devices (Cont.)
Before connection, be sure to turn off both the projector and computer devices.
• Read thoroughly the manual that comes with each device.
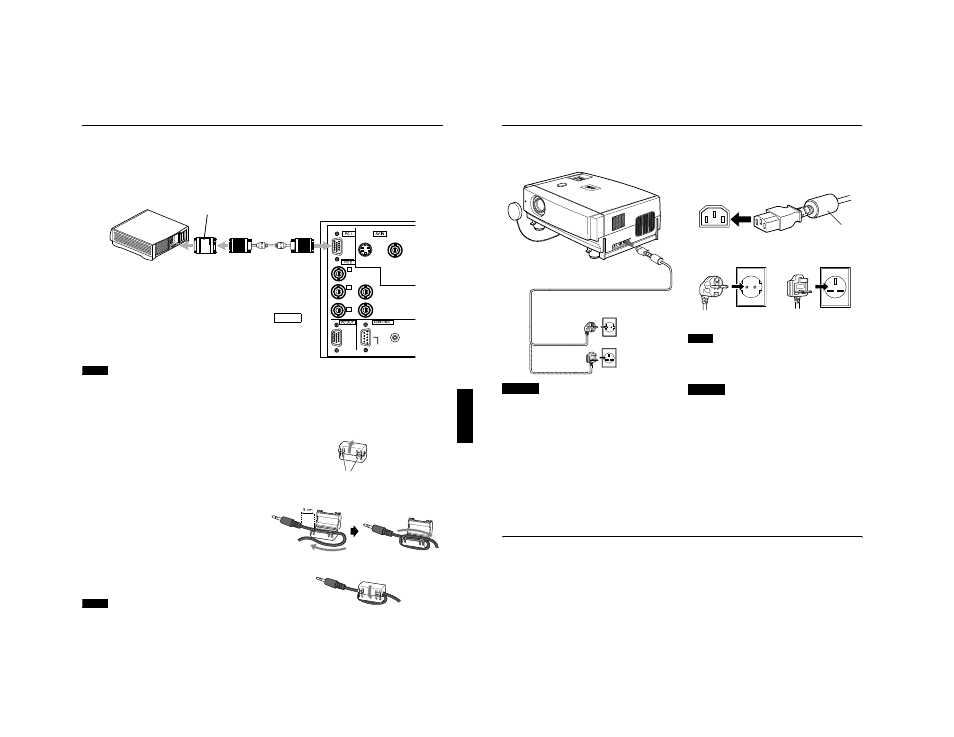
■ Connection to Macintosh
• Use the supplied Personal computer connection cable and the supplied conversion adapter for Mac.
Note
• Other connections are the same as in the connection example for IBM PC or IBM compatible PCs.
How to attach the ferrite core
Attach the ferrite core when using the S-video cable or infrared remote sensor extension unit which are sold separately.
However, use a cable that can be wound once.
1
Release the stopper at each end and
open the ferrite core.
2
Wind the cord around the ferrite core.
Attach the ferrite core about 3 cm from the end of the
cord.
3
Close the ferrite core with the cord
inside until you hear it click shut.
Note
• When connecting, connect the terminal which is at the
ferrite core end of the cord to the projector.
Y
P
B
/B-Y
P
R
/R-Y
H
V
G
B
R
REMOTE
RS-232C
Y/C
VIDEO
• Desktop type
Conversion adapter for Mac
(supplied)
To monitor connector
Personal computer connection cable
(supplied)
To PC 1
To PC 1
Click!
Stoppers
Wind the cable once.
30
Connecting to Various Devices
Connecting the Power Cord
After all devices have been finished being connected, connect the supplied power cord. At this time,
do not yet turn on the
MAIN POWER switch
.
CAUTIONS
To prevent fire and electric shock, observe the
following:
• When you do not use devices, pull out their power cords
from wall outlets.
• Do not connect the devices with power cords other than
those supplied.
• Do not use mains voltage other than the power voltage
indicated.
• Do not scar, damage, or work on the power cords. Also, do
not put a heavy object on, heat, or stretch the power cords,
otherwise they may be damaged.
• Do not insert or pull out the plugs with a wet hand.
1
Insert the supplied power cord into the
power input terminal of the projector.
2
Insert the main plug of the supplied
power cord into a suitable wall outlet.
Note
• The power cord for the United Kingdom is only included as
a special accessory when shipped to the United Kingdom. It
is not included when shipped to European continent
countries.
CAUTIONS
• Since the power requirement of the projector is high, insert
the power plug directly into a wall outlet.
• Use the supplied power cord with the ferrite core only.
• Do not remove the ferrite core from the supplied power
cord; Otherwise, there may be a possibility that a harmful
interference occurs.
Removing the Lens Cap
■ To use the projector
• Remove the lens cap.
*The lens cap has a string attached and it is fixed to the projector.
Be sure to fit lens cap when not in use.
LA
MP
TE
MP
HID
E
PC
VID
EO
ME
NU
KE
YS
TO
NE
PR
ES
ET
EX
IT
EN
TE
R
OP
ER
A T
E
Power cord (supplied)
for United Kingdom
for European continent countries
Ferrite core
for United Kingdom
for European
continent countries