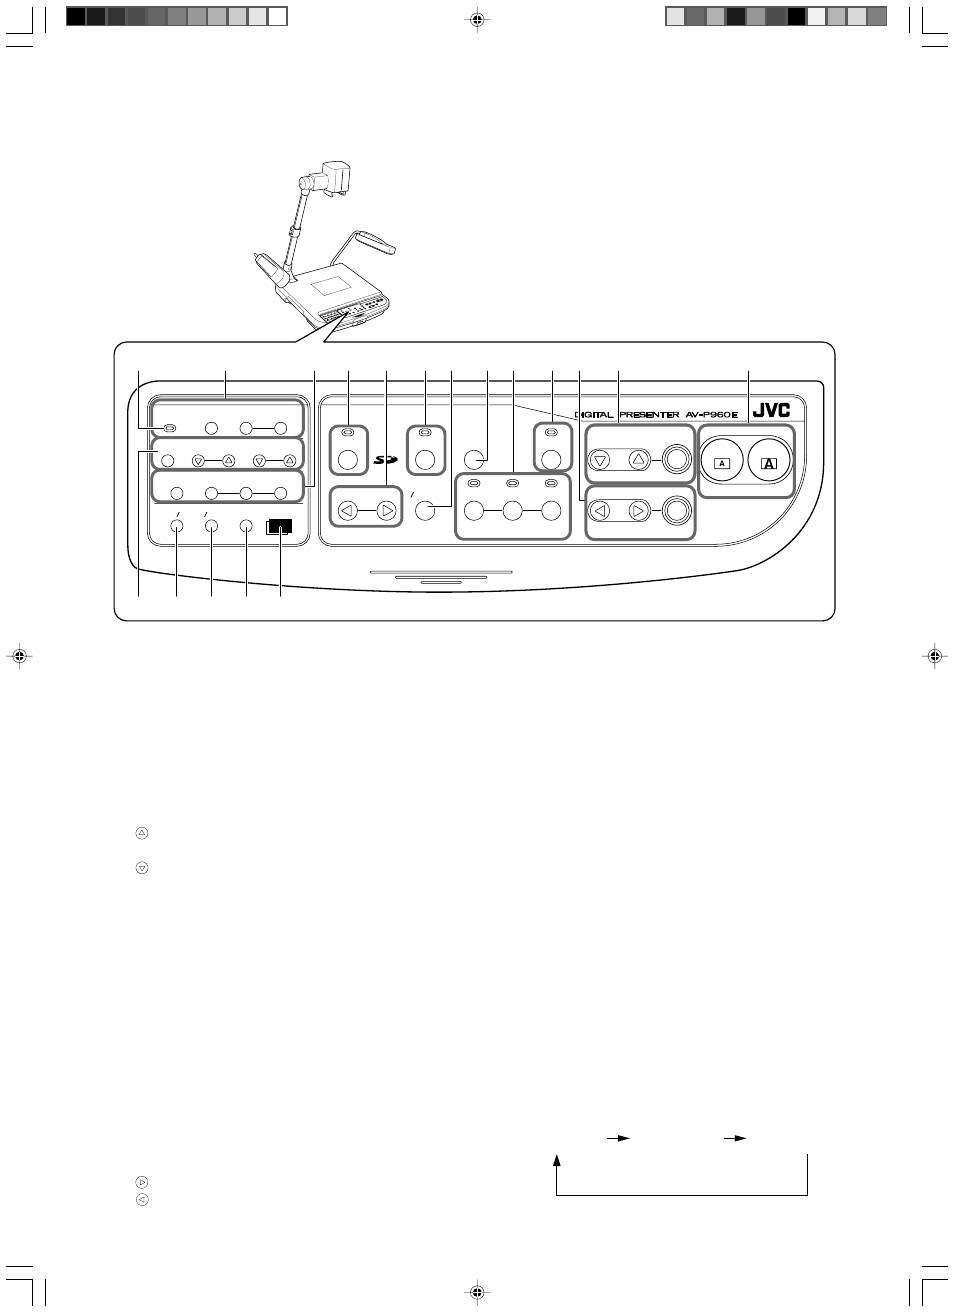
Control panel, Names and functions (continued), 2 [focus] adjustment buttons – JVC AV-P960E User Manual
Page 6: 3 [bright] adjustment buttons, 4 [freeze] button, 6 [light] button for switching lighting
E-6
USER SETUP
DEFAULT
SAVE
SAVE
WHITE BALANCE
RED
BLUE
AUTO
CAMERA
PICTURE MEMORY
1
2
3
NEGA POSI BW COLOUR
TEXT
IMAGE OFF
DELETE
PAGE
IMAGE SELECT
ENTER
SD CARD SYSTEM
LIGHT
SD CARD
EXT IN
CAMERA
FREEZE
AUTO
AUTO
BRIGHT
SELECT
SOURCE
FOCUS
OUT
IN
ZOOM
SD LEFT&RIGHT
SD UP&DOWN
SD DEFAULT
@
%
^
&
*
!
0
9
8
6
4
2
1
3
5
7
#
$
1 [ZOOM] Adjustment Buttons
Adjust in accordance with the object.
[IN]
: To shoot objects (materials) in an enlarged form.
If this button is pressed continuously, the image
will stop enlarging at the optical zoom tele end
and thereafter digital zoom will be activated.
(Optical zoom: 12x, Digital zoom: 6x)
[OUT] : To shoot objects (materials) in a reduced form.
2 [FOCUS] Adjustment Buttons
For adjusting the focus of the camera.
[
]
: To adjust the focus of the object (material) which
is far away from the camera.
[
]
: To adjust the focus of the object (material) which
is close to the camera.
[AUTO] : When this button is pressed, the CAMERA lamp
at the SOURCE SELECT section will blink and
the focus will be adjusted automatically.The indi-
cator lamp will go off once the adjustment is com-
pleted.
Depending on the object (material), it may be dif-
ficult to adjust the focus.
☞ Page 4 ‘Auto Focus’
3 [BRIGHT] Adjustment Buttons
For adjusting the brightness of the camera image.
[AUTO] : When this button is pressed, the CAMERA lamp
at the SOURCE SELECT section will blink and
the brightness will be adjusted automatically.The
indicator lamp will go off once the adjustment is
completed.
[
]
: To increase the brightness of the camera image.
[
]
: To reduce the brightness of the camera image.
4 [FREEZE] Button
When this button is pressed, the camera image freezes
and is displayed as a still image, and the indicator lamp
lights up. When the button is pressed again while the indi-
cator lamp is light up, the indicator lamp will go off, still
image will be released and the moving image will be re-
stored.
5 [SOURCE SELECT] Buttons for Select-
ing Output Image
To select the image to be outputted from the [RGB OUT-
PUT] terminal and the [MONITOR OUTPUT] terminal lo-
cated at the rear panel. The indicator lamp of the input
source selected for outputting will light up. Depending on
the types of monitor connected , it may take some times
for the images to be displayed.
[CAMERA] : To output the camera images.
[EXT IN]
: To output signals inputted to the [EXT INT]
terminal located at the rear panel. External
input signals will not be output through the
[MONITOR OUTPUT] terminal.
[SD CARD] : To output images from the SD card inserted
in the slot.
☞ Page 20 ‘Viewing Image Data Stored in SD Card’
6 [LIGHT] Button for Switching Lighting
To switch between different lighting sources.
The lighting source changes whenever the button is
pressed.
Names and Functions (continued)
Control Panel
Side
illuminations
Back
illumination
All
illuminations off