Viewing image data stored in sd card, Insert the sd card, Press the [sd card system] buttons – JVC AV-P960E User Manual
Page 20: Viewing images, Press the [camera] button, Removing the sd card
E-20
1.
Insert the SD card
2.
Press the [SD CARD SYSTEM] buttons
3.
Viewing images
Press the [PAGE] buttons
● The image switches whenever the button is pressed.
● The image will switch continuously if the button is pressed and
held. (at an interval of about 0.5 seconds)
Press the [IMAGE SELECT/ENTER] button
● 16 images are displayed in a view.
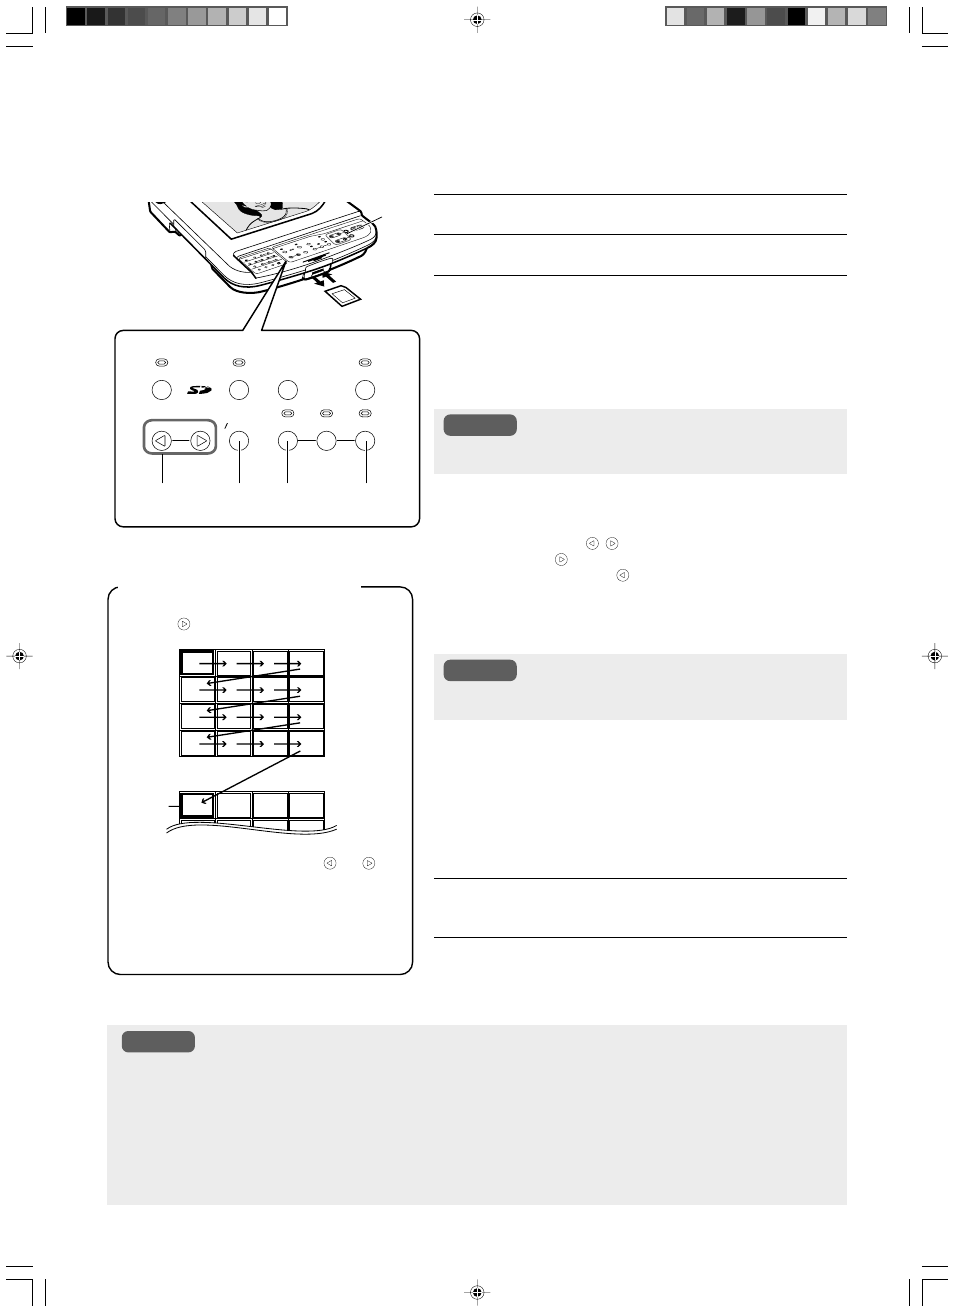
● Use the [PAGE , ] buttons to move the cursor.
● Pressing [ ] at the last image of the page displays the next
page while pressing [
] at the first image of the page displays
the previous page.
● If the [IMAGE SELECT/ENTER] button is pressed when the
image has been selected by the cursor, the selected image
will be displayed on the screen in full size.
Viewing Image Data Stored in SD Card
Images stored in the SD card can be viewed.
● This unit supports the output (Exif format) of the image taken by the digital still camera. (Not all types of Exif
formats are supported.)
● JPEG data taken with digital camera and JPEG data downloaded via Web may be converted to image data viewable
on this unit by using [JPEG conversion software (Exif Conv.exe)] in the CD-ROM provided with this unit. For details,
read JPEG conversion software’s Instruction [Exif Cnv.pdf] in the CD-ROM.
(The software [JPEG conversion software (Exif Conv.exe)] can also be downloaded from http://www.jvc-victor.co.jp/
english/pro/prodv/down-load/index.html.)
● If SD card image is selected without inserting the card, the output image will turn black.
● The brightness and focus operations are not applicable for images stored in the SD card.
● The first image of the SD card will be displayed if the [IMAGE SE-
LECT/ENTER] button is pressed for more than 2 seconds.
Notes
Note
● The cursor will move as shown below when the
[PAGE
] button is pressed.
● Pressing and holding either the [ ] or [ ] but-
ton moves the cursor continuously (at an inter-
val of 0.1 second). If the last image of the cur-
rent page is reached, the next page will be dis-
played.
● The image selected by the cursor can be de-
leted. (
☞ Page 19 ‘Deleting images’)
Next page
Cursor
1.
5.
SAVE
DELETE
PAGE
IMAGE SELECT
ENTER
SD CARD SYSTEM
LIGHT
SD CARD
EXT IN
CAMERA
FREEZE
SELECT
SOURCE
3.
3.
4.
2.,3.
3.
● The cursors can also be moved using SD UP&DOWN/SD LEFT&RIGHT
buttons.
Note
While holding down the [SD CARD SYSTEM] buttons, press
the [IMAGE SELECT/ENTER] buttons within 1 second.
● From the image currently displayed, the following images will
be displayed in sequence automatically. (at an interval of about
2 seconds)
● When the [IMAGE SELECT/ENTER] or [PAGE] buttons are
pressed once again, the image being played back will be se-
lected and the operation stops.
4.
Press the [CAMERA] button
●
Confirm that the output image is a camera image.
5.
Removing the SD card
●
To remove the SD card, push in the card before removing it from
the card slot.