Operation (application), Storing images in sd card, Press the [camera] button – JVC AV-P960E User Manual
Page 19: Insert the sd card, Press and hold the save button, Select the image to delete, Press the [delete] button for more than 2 seconds, Deleting images
E-19
English
Storing Images in SD Card
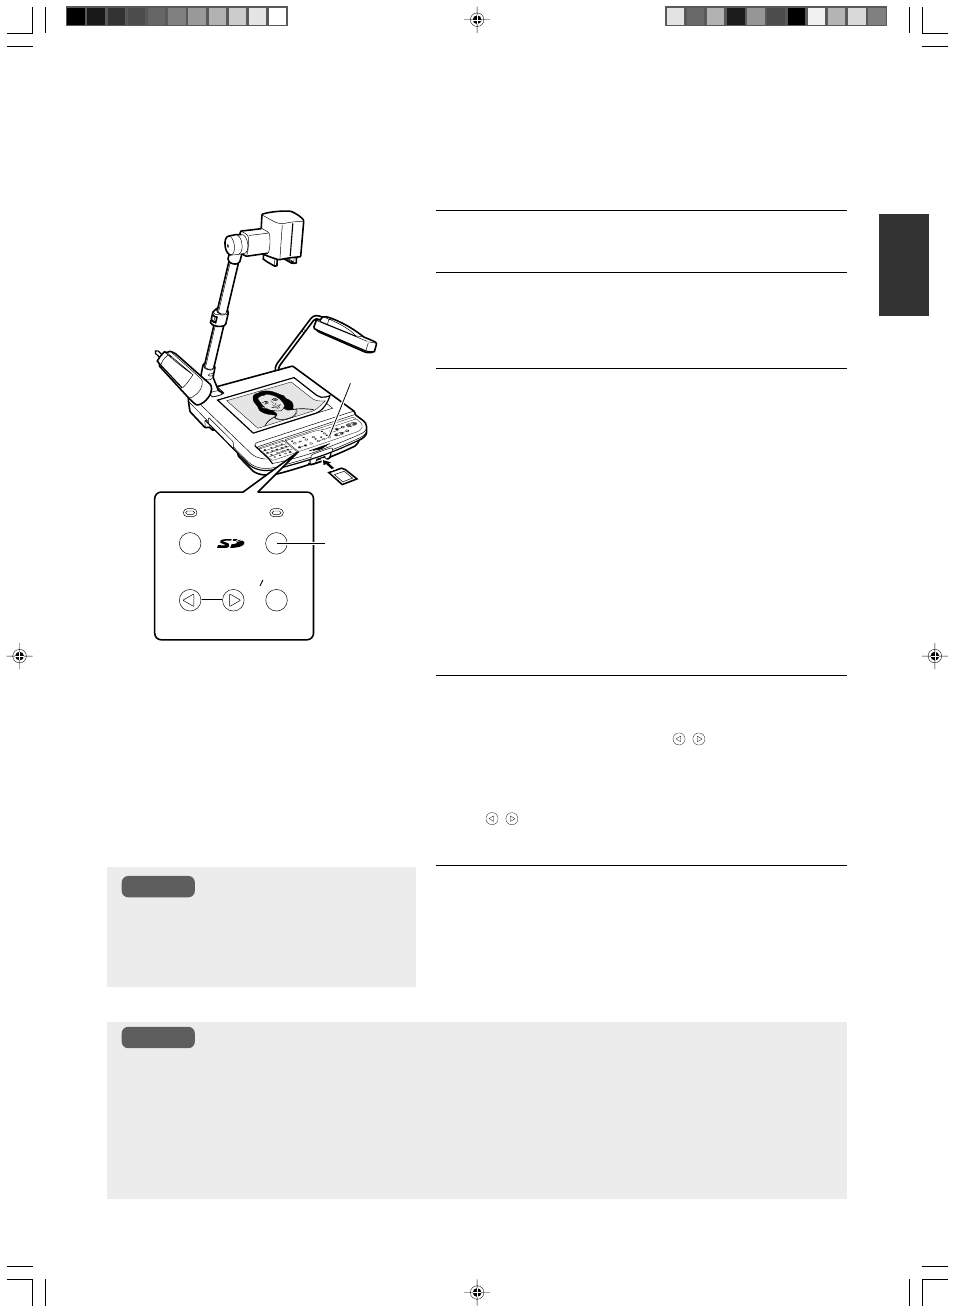
SAVE
DELETE
PAGE
IMAGE SELECT
ENTER
SD CARD SYSTEM
2.
3.
1.
1.
Press the [CAMERA] button
2.
Insert the SD card
● To remove the SD card, push in the card before removing it from
the card slot.
3.
Press and hold the SAVE button.
● The save indicator lamp lights up ➞ Blinks while saving is in
progress. Blinks
➞ Lights up ➞ Light goes off once saving is
completed.
● Saving is not possible if the SD card switch has been turned on
to write-protect. In this case, the save indicator lamp will not blink.
● If the SD card is full and additional images cannot be stored, the
save indicator lamp will not blink. In this case, delete unwanted
images or use a new card.
Images taken can be stored in the SD card (sold separately).
● When removing or inserting the SD card or when powering off, make sure to press the [CAMERA] button and
confirm that the output image is a camera image. Otherwise, the data in the card may be corrupted or this unit may
not function properly.
● The SD card is made from parts that are susceptible to static charges. Malfunction might occur and the contents of
the card might be damaged due to static charges. As such, make sure to handle with extra care.
● Do not leave the SD card in the card slot. Remove the SD card for safe keeping after use.
● Number of images that can be stored:
64 MB: about 120 images, 128 MB: about 240 images, 256 MB: about 480 images
● 64MB,128 MB or 256 MB SD card from Panasonic is recommended.
Notes
1.
Select the image to delete
●
To delete image, use the [PAGE
,
] buttons to select the
image to be deleted.
●
When the thumbnail screen is being displayed, use the [PAGE
,
] buttons to move the cursor to select the image to be
deleted.
2.
Press the [DELETE] button for more
than 2 seconds
● The delete indicator lamp lights up ➞ Blinks while deleting is in
progress. Blinks
➞ Lights up ➞ Light goes off once deleting pro-
cess is completed. (about 2 seconds)
● If an image is deleted in the thumbnail screen,
the next image will shift up and be displayed
in its position.
● The cursor will move to the next image fol-
lowing the deleted image.
Notes
Ⅵ Deleting images